Fig. 258: saving the node address assignment, Fig. 259: ok message box, Fig. 260: node ip address configured – Hardy HI 3010 Filler/Dispenser Controller User Manual
Page 92
HI-3000 Series
78
Operation and Installation
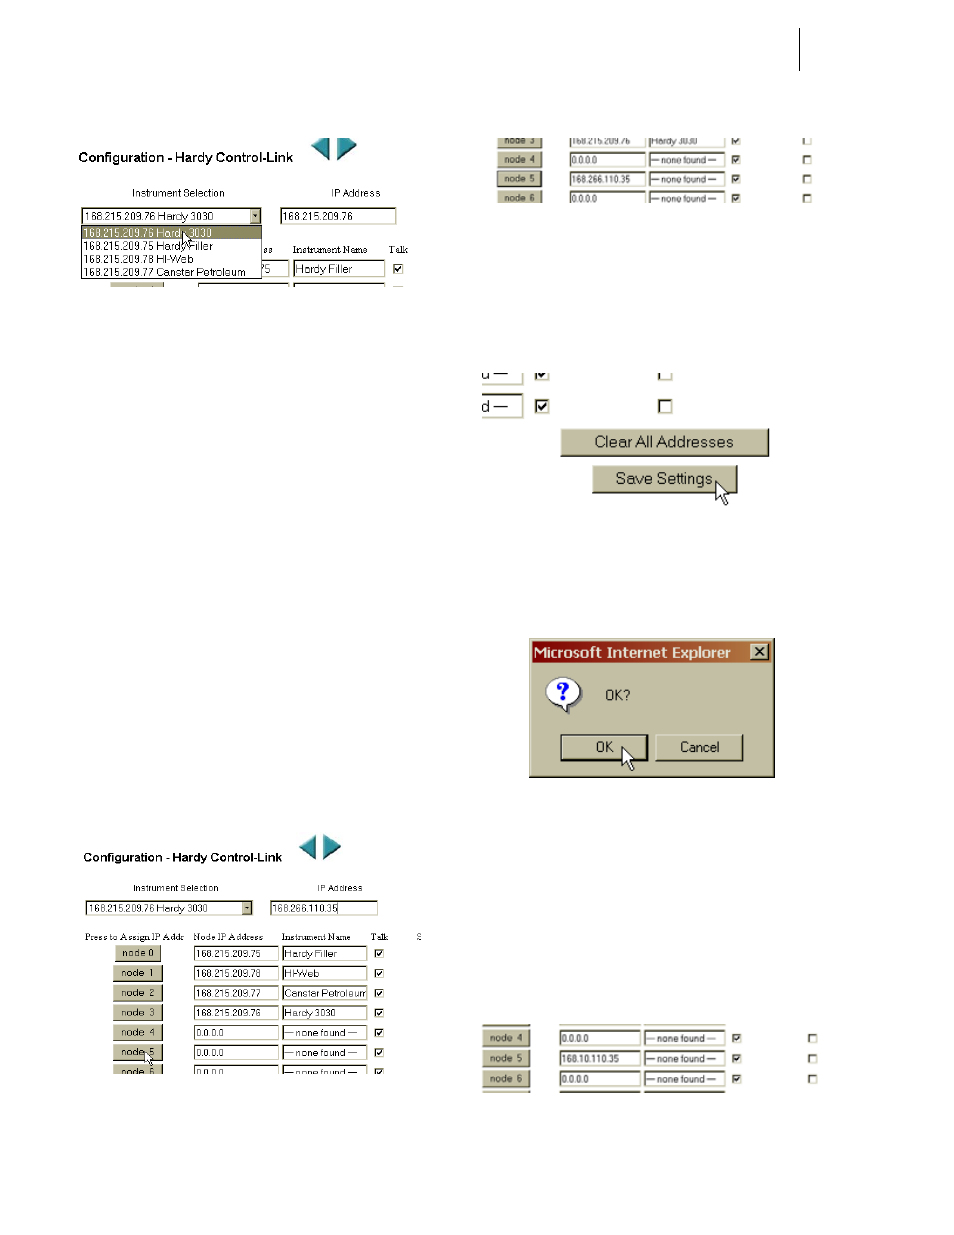
FIG. 255: HARDY CONTROL-LINK PAGE/
SELECTING LISTED HI 3000 MODULE IP ADDRESS
Step 3. Click on the pull down list below Instrument Selec-
tion.
Step 4. Click on the IP address of the instrument you are
mapping. The IP address appears in the IP Address
text field.
Step 5. If you do not find the IP address of the instrument
you going to configure, type the IP address of the
instrument in the IP Address text field. In our
example we typed “168.266.110.35”. (See Fig. 256)
Step 6. To assign the IP address to a Node you need to click
on the Node button you selected for this instrument.
In our example we selected Node 5. You can set up
to 16 Nodes on the Hardy Control-Link Network.
Step 7. Click on the Node 5 button. The IP address you
selected from the list or the IP address you typed in
the IP Address text field appears next to the Node 5
button. (See Fig. 257)
Step 8. Click in the Instrument Name text field next to the
Node 5 IP Address. Type in a descriptive name for
the Instrument you are configuring.
Step 9. If there is no check mark in the Talk Check Box to
the right of the Node Address, click in the Check
Box. A Check Mark appears. (See Fig. 257)
FIG. 256: HARDY CONTROL-LINK PAGE
SELECTING NODE 5
FIG. 257: SELECTED INSTRUMENT’S IP ADDRESS
APPEARS IN THE NODE 5 TEXT FIELD
Step 10. Click on the Save Settings button located at the bot-
tom of the node address list. (See Fig. 258) An OK?
message box appears. (See Fig. 259)
FIG. 258: SAVING THE NODE ADDRESS
ASSIGNMENT
FIG. 259: OK MESSAGE BOX
Step 11. Click on the OK button if you are satisfied with
your entry. The IP Address of the instrument you
want to configure permanently appears in the Node
IP Address field. (See Fig. 260) The instrument has
a Node 5 address in the network until you change it
to another node or delete the node address.
Step 12. If you are not satisfied or want to change something
in the configuration, click on Cancel.
FIG. 260: NODE IP ADDRESS CONFIGURED