Fig. 246: windowmaker/add access name dialog box, Fig. 247: windowmaker/selecting tagname dictionary, Fig. 248: windowmaker/creating a tag name – Hardy HI 3010 Filler/Dispenser Controller User Manual
Page 90
HI-3000 Series
76
Operation and Installation
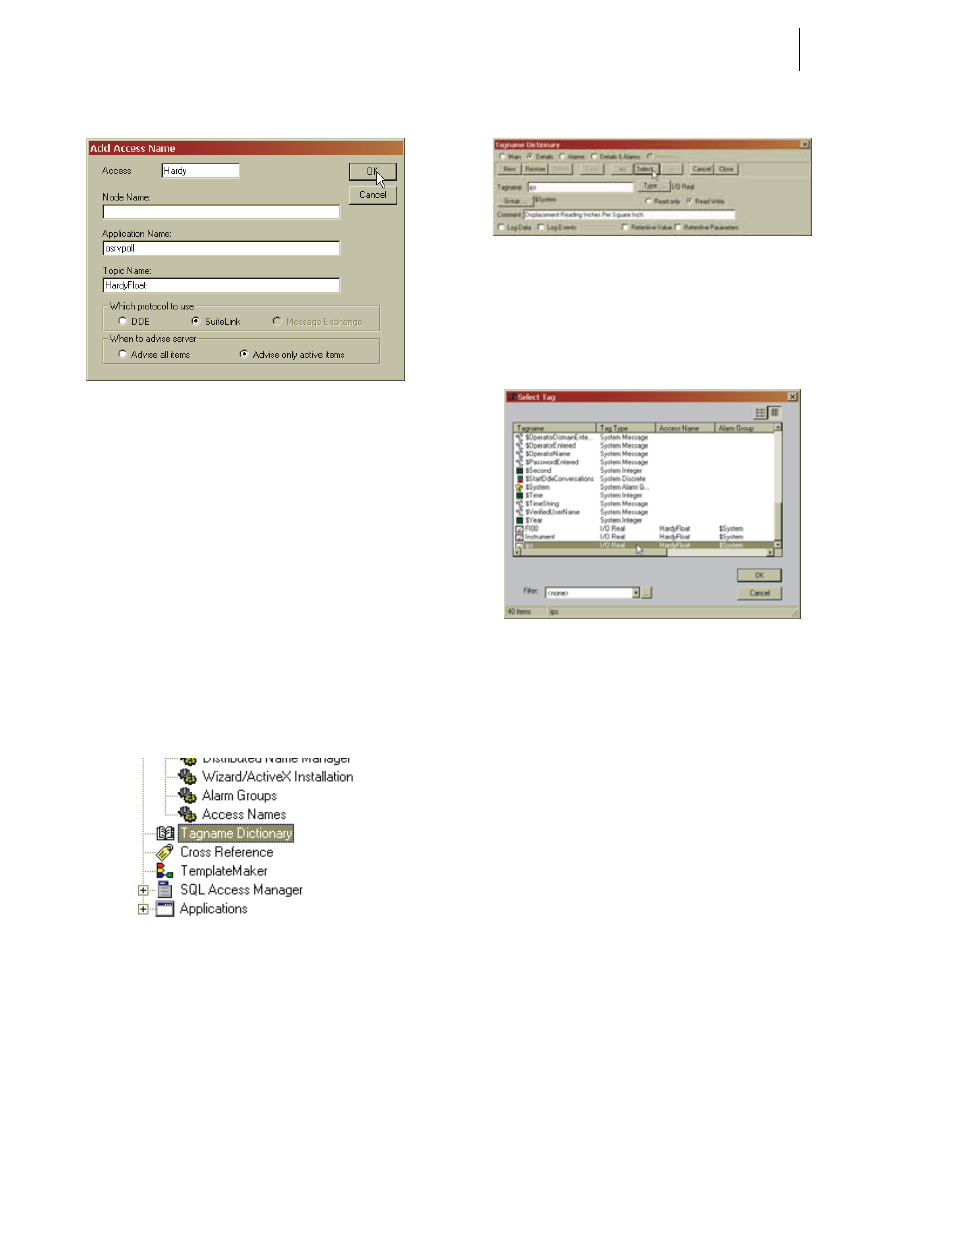
FIG. 246: WINDOWMAKER/ADD ACCESS NAME
DIALOG BOX
Step 33. Click in the Access text field. Type in an Access
name of your choosing. We selected Hardy.
Step 34. Click in the Application Name text field. Enter
“osrvpoll” without the quotation marks.
Step 35. Click in the Topic Name text field. Enter the Topic
Name you assigned in the Omniserver. We assigned
the name “HardyFloat”.
Step 36. Click in the radio button next to SuiteLink.
Step 37. Click in the radio button next to Advise only active
items.
Step 38. Click on the OK button.
Step 39. Click on Tagname Dictionary. (See Fig. 247) The
Tagname Dictionary dialog box appears. (See Fig.
248)
FIG. 247: WINDOWMAKER/SELECTING TAGNAME
DICTIONARY
FIG. 248: WINDOWMAKER/CREATING A TAG
NAME
Step 40. Click on Select. The Select Tag dialog box appears.
(See Fig. 249)
FIG. 249: WINDOWMAKER/SELECT TAG DIALOG
BOX/SELECTING IPS
Step 41. Click on the tag you want to use for this item. We
selected “ips”.
Step 42. Click on the OK button.
Step 43. Click on the Close button in the Creating a Name
dialog box.
Step 44. If you are creating a tag name for the first time do
the following:
•
Click in the Tagname text field.
•
Enter a Tag name.
•
Click in the Comments text field. Enter a
description of the Tag.
•
Make sure the Details radio button is
selected.
•
Click on the New button to add this tag
name to the Tagname list.
Step 45. You are now back to the newly created Window.
(See Fig. 250)