Fig. 318: selecting local inputs, Fig. 319: selecting local input #1, Fig. 320: equation entered (ho3.0=hi0.0) – Hardy HI 3010 Filler/Dispenser Controller User Manual
Page 108: Fig. 321: e-mail mapping complete, Testing e-mail, Fig. 322: testing e-mail
HI-3000 Series
94
Operation and Installation
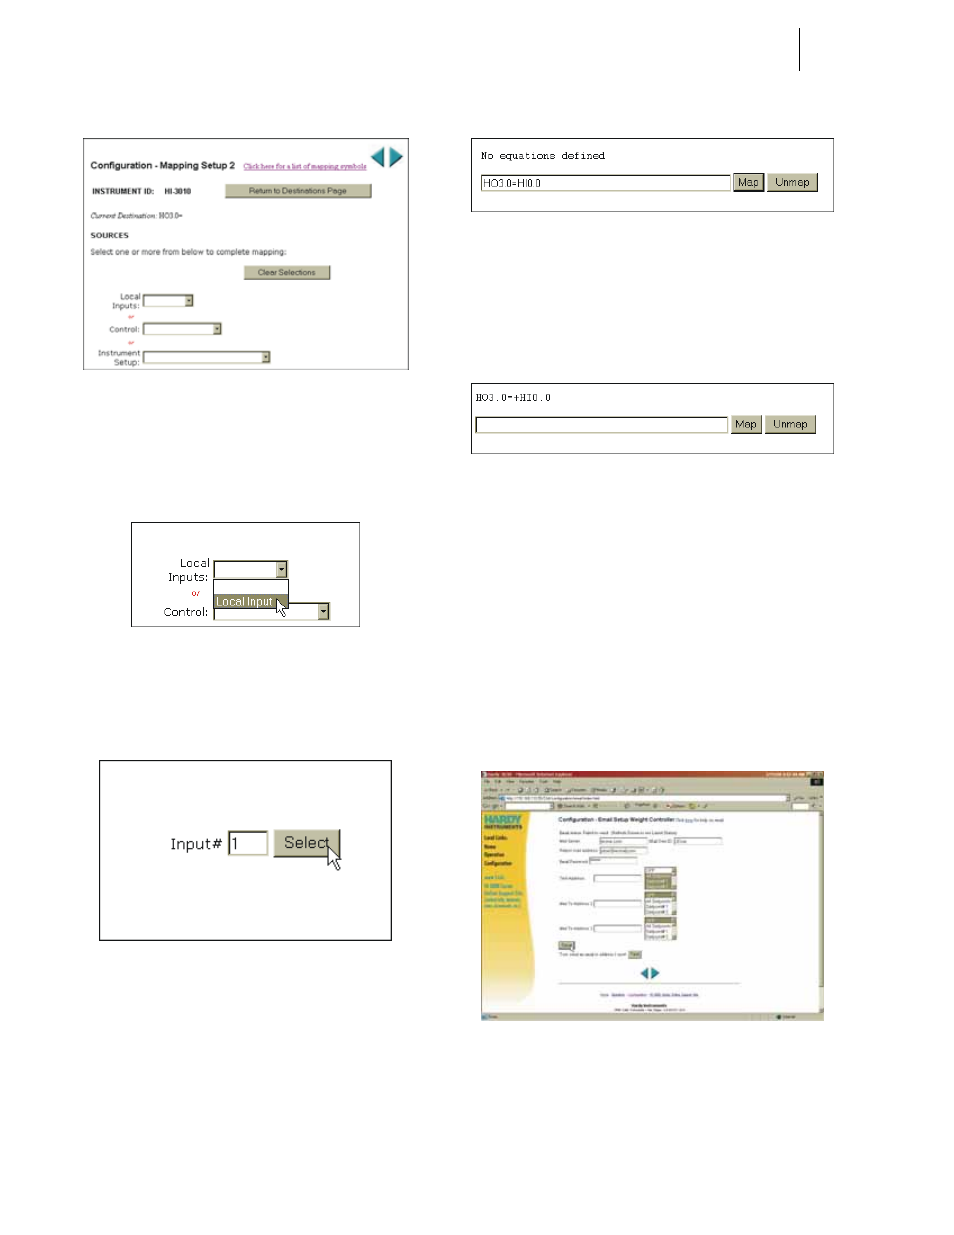
FIG. 317: MAPPING SETUP 2 PAGE
Step 19. Click on any of the pull down menu you want to
assign to the e-mail. In our example we selected
Local Input. (See Fig. 318)
FIG. 318: SELECTING LOCAL INPUTS
Step 20. When you select Local Input, to the right of the
Input# a select button appears. (See Fig. 319)
FIG. 319: SELECTING LOCAL INPUT #1
Step 21. Click on the Input# text field and type in the Local
number you want (1 - 5). Click on the Select but-
ton. The Source appears on the right side of the
equation. (See Fig. 320)
FIG. 320: EQUATION ENTERED (HO3.0=HI0.0)
Step 22. Click on the Map button. The equation appears
above the Map and Unmap text field. (See Fig.
321) This means that the mapping process is com-
plete.
FIG. 321: E-MAIL MAPPING COMPLETE
Step 23. Another mapping method, if you know the Destina-
tion and Source addresses, is to type them into the
Map text field. In our example simply type:
HO3.0=+HI0.0. Click on Map and your are done.
Testing E-Mail
To test the Standard or the Custom E-mail do the following:
Step 1. Click in the Test Address text field.
Step 2. Type in the e-mail address you want the test mes-
sage to go to. (See Fig. 322)
FIG. 322: TESTING E-MAIL
Step 3. Click on the Save Button to save the e-mail and set-
tings.
Step 4. Click on the Test button. The e-mail is sent to the
Test Address.