Fig. 229: wonderware/selecting wwclient, Fig. 230: wonderware/close the log viewer, Fig. 231: wwclient/selecting create connection – Hardy HI 3010 Filler/Dispenser Controller User Manual
Page 87: Fig. 232: create connection dialog box, Fig. 233: create connection dialog box, Fig. 234: iot connection
73
Network
Installation
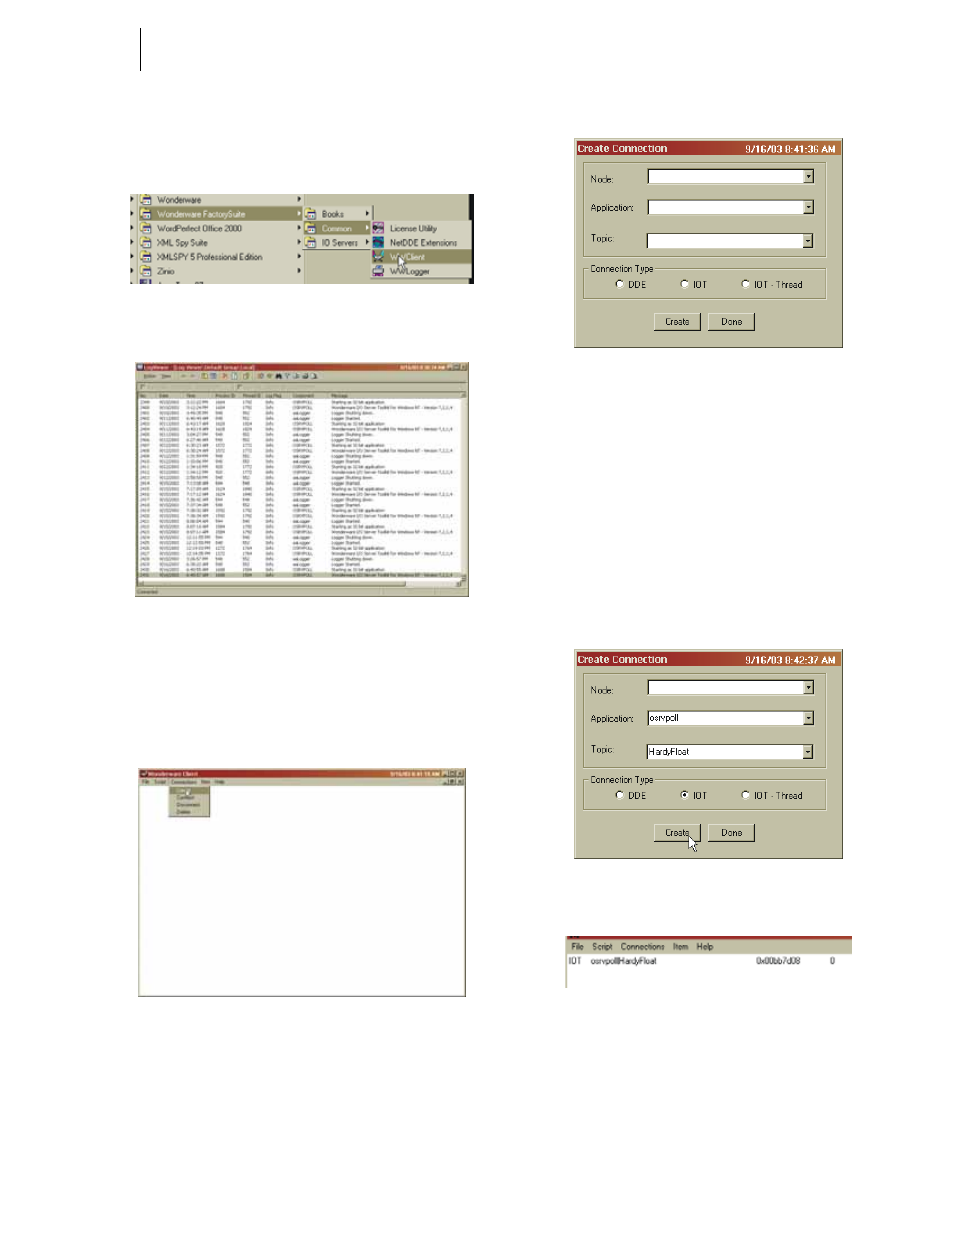
Step 3. Open Wonderware WWCLient. (See Fig. 229)
WWCLient dialog box appears with the logviewer
dialog box open. (See Fig. 230)
FIG. 229: WONDERWARE/SELECTING WWCLIENT
FIG. 230: WONDERWARE/CLOSE THE LOG
VIEWER
Step 4. Close the Logviewer Dialog box.
Step 5. Click on the Connections pull down menu. (See
Fig. 231)
FIG. 231: WWCLIENT/SELECTING CREATE
CONNECTION
Step 6. Click on Create. The Create Connection dialog box
appears. (See Fig. 232)
FIG. 232: CREATE CONNECTION DIALOG BOX
Step 7. Click in the Application text field.
Step 8. Enter the following: “osrvpoll” without the quota-
tion marks.
Step 9. Click in the Topic text field. Enter the Topic name
you assigned to the unit to which you are con-
nected. In our example we used “HardyFloat”.
Step 10. Click in the radio button next to IOT (this is the
Suitelink connection)
Step 11. Click on the Create button. (See Fig. 233) In the
WWCient page an IOT connection entry appears.
(See Fig. 234)
FIG. 233: CREATE CONNECTION DIALOG BOX
FIG. 234: IOT CONNECTION
Step 12. Click on the Item in the menu list. The Item dialog
box appears with the connection listed. (See Fig.
235)