Fig. 190: hi 3000 device icon with ip address, Fig. 191: protocols dialog box – Hardy HI 3010 Filler/Dispenser Controller User Manual
Page 77
63
Network
Installation
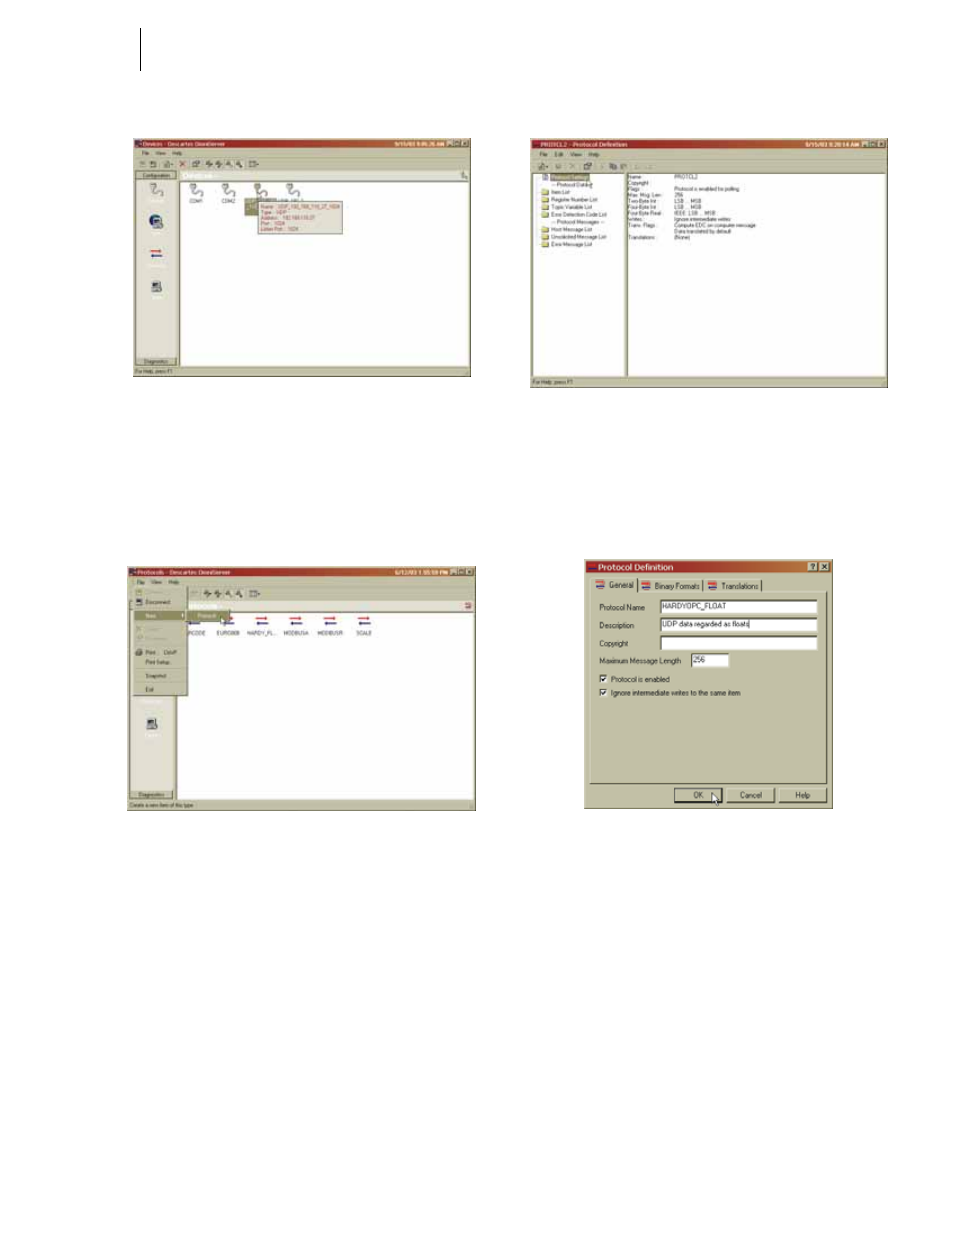
FIG. 190: HI 3000 DEVICE ICON WITH IP ADDRESS
Protocol Configuration
Step 1. Under Configuration, Click on the Protocols Icon.
(See Fig. 190) The Protocols dialog box appears.
(See Fig. 191)
FIG. 191: PROTOCOLS DIALOG BOX
Step 2. Click on the File pull down menu.
Step 3. Click on New.
Step 4. Slide the cursor to the right until the flyout menu
appears. (See Fig. 191) Click on Protocols.
Step 5. The Protocol Definition dialog box appears. (See
Fig. 192)
FIG. 192: PROTOCOL DEFINITION/DOUBLE OR
RIGHT CLICK ON PROTOCOL SETTINGS
Step 6. Double or Right Click on Protocol Settings. (See
Fig. 192) The Protocol Definition dialog box
appears. (See Fig. 193)
FIG. 193: PROTOCOLS DEFINITION DIALOG BOX/
CREATING PROTOCOL NAME AND DESCRIPTION
Step 7. In the Protocol Name text field, type in
“HARDYOPC_FLOAT” without the quotation
marks.
Step 8. Click in the Description text field. Type in whatever
you want to describe this protocol. We entered
“UDP data regarded as floats!”.
Step 9. If you want to change the Maximum Message
Length, click in the Maximum Message Length text
field. Type in the length of message you want. We
entered “256”.
Step 10. Click in the Protocol is enabled check box.
Step 11. Click in Ignore intermediate writes to the same item
check box.
Step 12. Click on the Binary Formats tab. The Binary For-
mat page appears. (See Fig. 194)