Fig. 84: cord grip installed, Fig. 86: cord grip installed, Ord grip installed – Hardy HI 3010 Filler/Dispenser Controller User Manual
Page 45: The hex nut onto the cord grip assembly - 31
31
Cabling
Installation
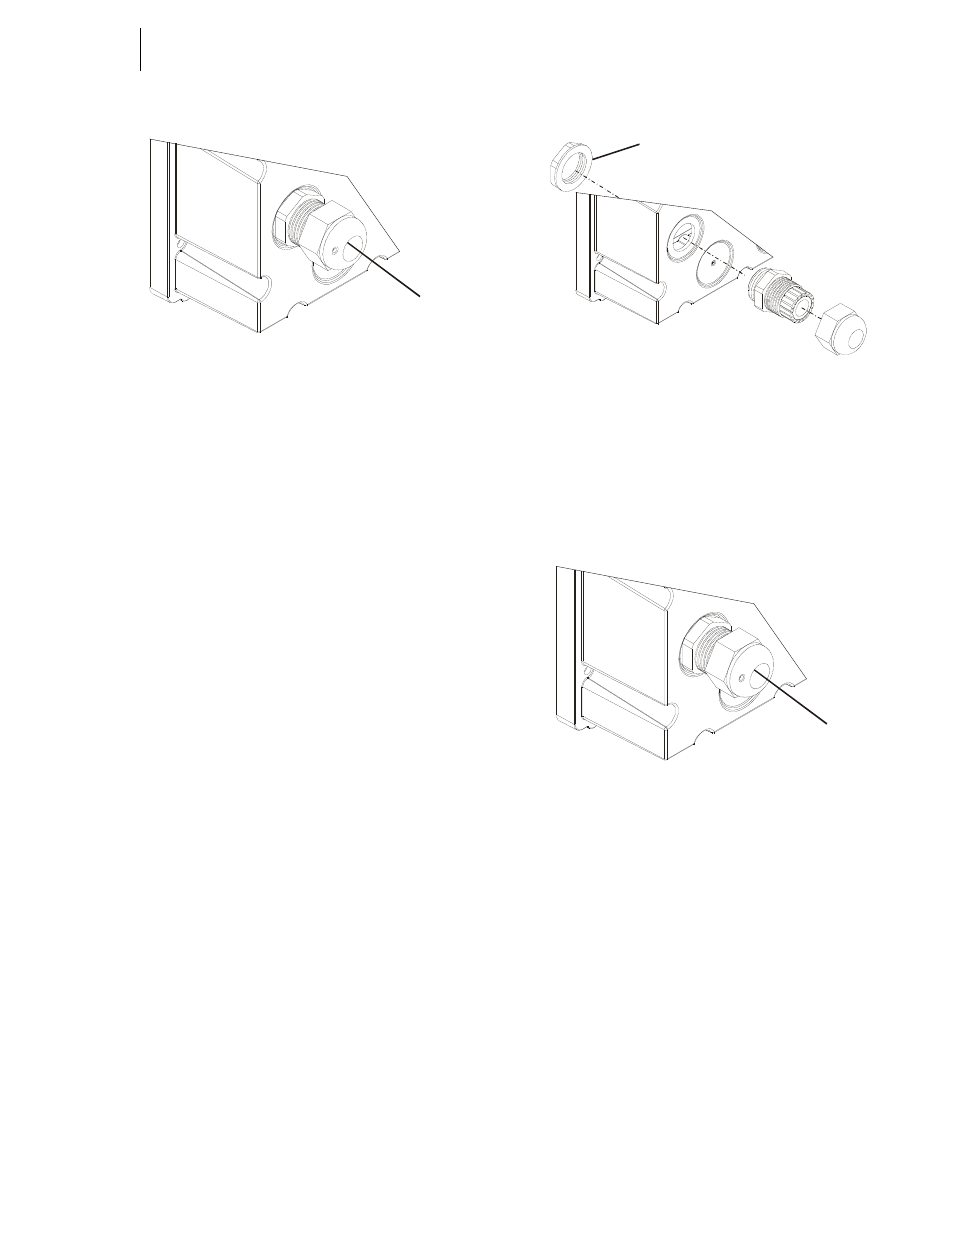
FIG. 84: CORD GRIP INSTALLED
•
Use a box end wrench to hold the cord grip
assembly nut so that it doesn’t move when
tightening the Hex Nut.
•
Use a box end wrench to tighten the Hex
Nut until the Cord Grip assembly is snug
against the rear cover. Do not over tighten.
Step 2. If you are installing a Cord Grip Assembly into a
location which requires drilling a hole into the rear
cover do the following:
•
Locate the indent that is closest to the con-
nector you want to connect to.
•
A 1” inch diameter hole is required when
using Hardy Cord Grip Assemblies.
•
Place the rear cover on a secure, flat sur-
face preferably a drill press table.
•
Place a wooden block under the location
of the hole you want to drill. This will pre-
vent ragged edges from forming when
drilling or using a hole saw.
NOTE:
When using a hole saw make sure you use a fine
tooth hole saw and not the coarse tooth hole saw.
CAUTION: D
O
NOT
USE
A
HOLE
PUNCH
. A
HOLE
PUNCH
MAY
CRACK
THE
REAR
COVER
AND
DESTROY
THE
NEMA
4X
SEAL
.
•
Center the drill bit in the preformed cen-
tering indent and drill or saw the hole
through the rear cover.
•
Use emery cloth and lightly touch up the
inside and outside surfaces of the hole to
remove any burrs.
•
Slide the Cord Grip Assembly into the
hole in the rear cover. (See Fig. 85)
FIG. 85: INSTALLING THE HEX NUT ONTO THE
CORD GRIP ASSEMBLY
•
Screw the Hex Nut onto the threaded end
of the Cord Grip Assembly until it is fin-
ger tight and the cord grip assembly is
flush against the outside surface of the rear
cover. (See Fig. 86)
FIG. 86: CORD GRIP INSTALLED
•
Use a box end wrench to hold the cord grip
assembly nut so that it doesn’t move when
tightening the Hex Nut.
•
Use a box end wrench to tighten the Hex
Nut until the Cord Grip assembly is snug
against the outside surface of the rear
cover.
CAUTION: D
O
NOT
OVER
TIGHTEN
. O
VERTIGHTENING
CAN
CRACK
OR
DAMAGE
THE
REAR
COVER
.
•
Slide the cable through the Cord Grip
Assembly. Make sure that you slide
enough of the cable so that you can create
a cable relief bend and connect to the con-
nectors in the rear panel of the instrument.
(See Fig. 87)
Cord Grip
Hex Nut
Cord Grip
Assembly
Cord Grip