Triton X-SCALE/X2 Configuration Manual User Manual
Page 91
8 1
S
YSTEM
P
ARAMETERS
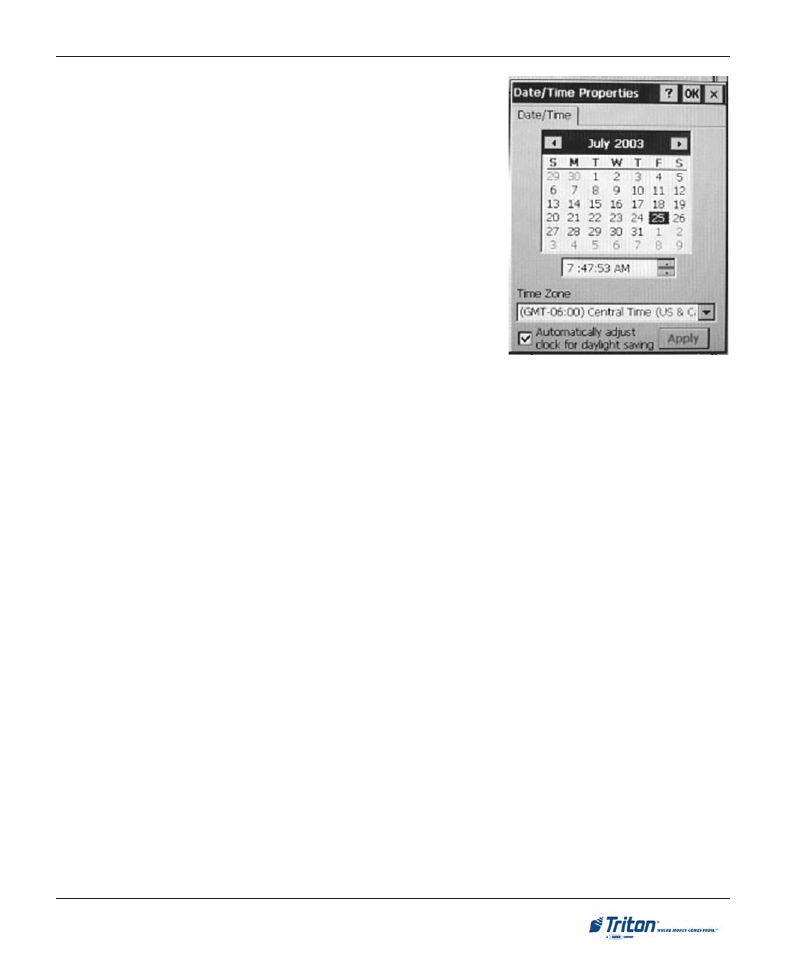
S
ET
THE
D
ATE
1.
S
ET
THE
M
ONTH
. When the date/time properties dialog is
displayed, the month is highlighted. If for some reason it is
not, press the
LEAR
> key as needed to highlight it.
Once it is highlighted, you can use the
RROW
> keys on the
keyboard to choose the month.
2.
S
ET
THE
Y
EAR
. Highlight the current year value.
3.
S
ET
THE
D
AY
. Move the highlight mark into the calendar area
(not the dotted border around the currently highlighted day)
and then use the arrow keys to select a day.
S
ET
THE
T
IME
1.
S
ET
THE
H
OUR
. Move the highlighted mark into the time-set
area. The hour is highlighted first. Enter the hour using the
numeric (0-9) keys on the keypad.
2.
S
ET
THE
M
INUTE
. Move the highlighted mark again to select the minute setting. Enter the minute
using the numeric (0-9) keys on the keypad.
3.
S
ET
THE
S
ECONDS
. Move the highlight mark again to select the seconds setting. Enter the seconds
using the numeric (0-9) keys on the keypad.
4.
S
ET
THE
AM/PM
INDICATOR
. Move the highlight mark again to select AM or PM. Press the arrow
keys to choose the appropriate setting.
S
ET
THE
T
IME
Z
ONE
AND
D
AYLIGHT
S
AVINGS
S
ETTING
To change the time zone setting, press the
LEAR
> key as needed to highlight the title of the date & time
dialog tab. Press the Right (>) arrow key to move the highlight to the title of the time zone tab.
Follow these steps to change the time zone and daylight savings settings:
1.
S
ET
THE
T
IME
Z
ONE
. Press the
LEAR
> key on the keypad to highlight the list of time zones. Use the
Move the highlight mark to the “D
AYLIGHT
S
AVINGS
” option. Press the
(checked) or disable (unchecked) the option. Note: This option unavailable for X2 equipped units.
A
CCEPTING
THE
D
ATE
/T
IME
S
ETTINGS
Once the date/time settings have been configured, move the highlight mark to the OK command button.
Press the
NTER
> key on the keypad to accept or
ANCEL
> to exit without making any changes.