Multichannel Systems MC_Rack Manual User Manual
Page 15
Step by Step Tutorial
9
In the Recorder settings, you select the data streams and channels that you want to save to the
hard disk. You define the path and the file in which the acquired data will be saved, and you
define other parameters like the recording mode (continuous or triggered), and the maximum
file size.
The Recorder shows you the currently available disk space on the target hard disk. Please check
the disk space and estimate how long you still can write data to the hard disk always before
starting an experiment. Otherwise, data loss will occur when the disk is full. For example, if you
record 60 electrode channels at a sampling frequency of 25 kHz, the data rate is 3 MB/s, that is
10.8 GB/h.
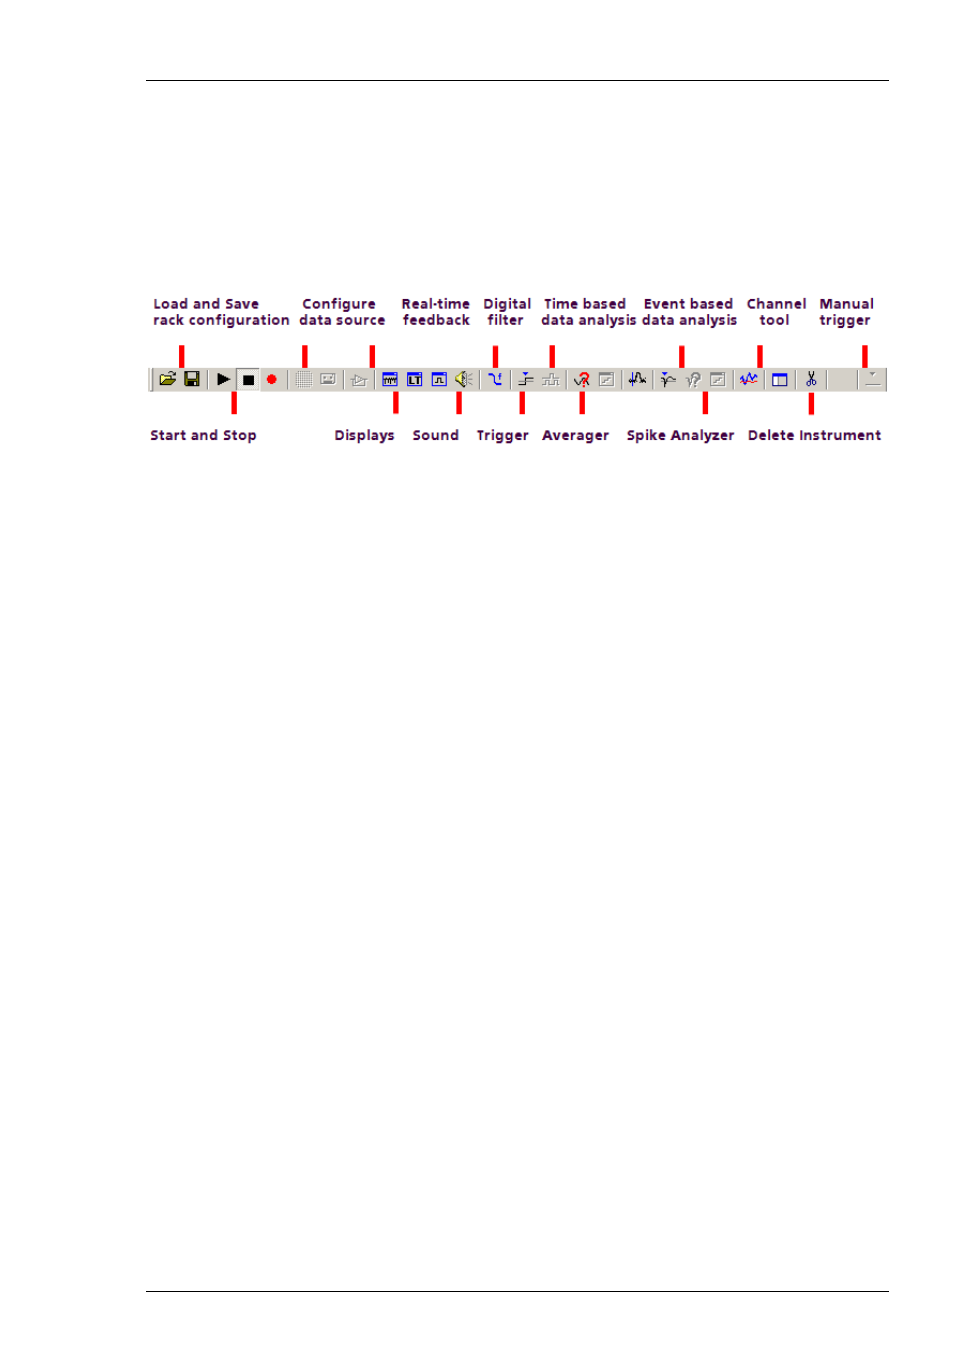
MC_Rack toolbar. For a more detailed information on the toolbar buttons, please see "Toolbar"
under General User Interface.
The MC_Rack toolbar shows all main functions available in MC_Rack. You can click on a virtual
instrument button to insert a virtual instrument into your rack configuration. Please note that
virtual instruments that need an input data stream that is generated by another virtual
instrument (for example, the Spike Analyzer, which needs a Spike data stream generated by
the Spike Sorter) can only be placed in series with the required virtual instrument and are
otherwise not available (indicated by a gray button color). In an empty rack, only the data source,
that is, the data acquisition or the replayer, are available to start with. After the data source
was inserted into the rack, other virtual instruments will be available.
3.2.2 Defining the Data Source
MC_Rack is the universal data analysis program for all ME- and MEA-Systems with PCI card as
well as with USB based data acquisition. To ensure correct display of the data of your system,
it is therefore necessary to configure the data source accordingly. This has to be done only once
for a given rack. See the MEA-System manual or the ME-System manual for the MC_Rack features
that are supported by your system.
On the Edit menu, click Data Source Setup to configure the software according to your data
acquisition and amplifier hardware. Data Source Setup is only available as long as no data
source is included in a new rack file. Configure the channel layout first and then set up the
rack for your experiment. The data source setup and channel layout information is saved
together with the rack.