Clamps section – HEIDENHAIN SW 54843x-03 DIN Programming User Manual
Page 49

HEIDENHAIN MANUALplus 620, CNC PILOT 640
49
1
.3 Pr
ogr
a
m section code
CLAMPS section
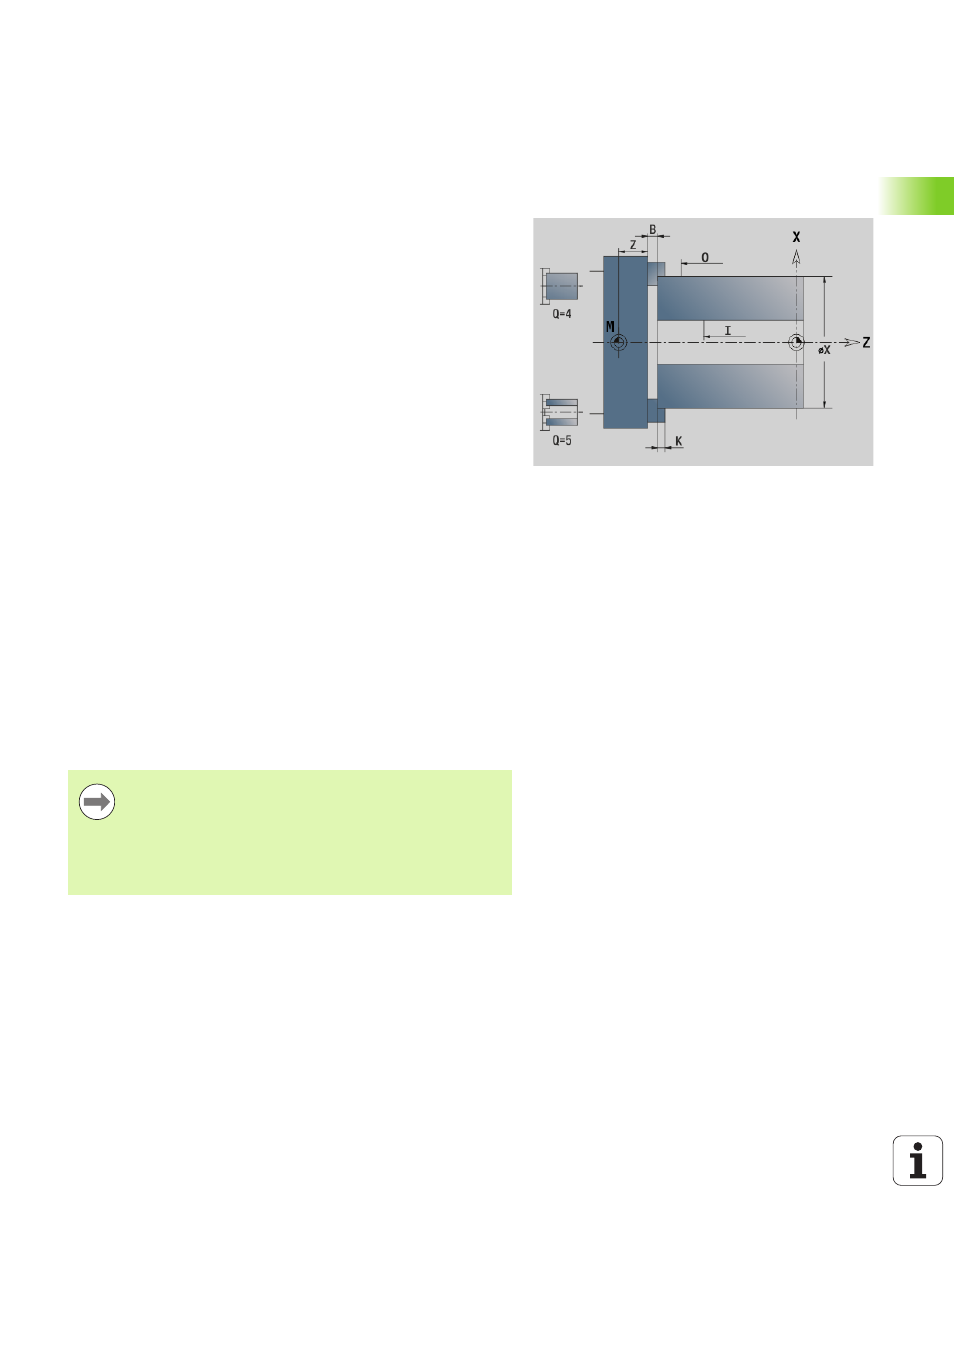
In the CLAMPS program section you describe how the workpiece is
clamped. This makes it possible to display the chucking equipment
during simulation. In TURN PLUS the chucking equipment information
is used to calculate the zero points and cutting limits during automatic
program generation.
Parameters
H
Chuck number
D
Spindle number for AWG
R
Clamp type
0: Parameter J defines the free length
1: Parameter J defines the clamping length
Z
Position of the chuck edge
B
Chuck jaw reference
J
Clamping length or free length of the workpiece (depending
on the clamp type R)
O
Cutting limit for outside machining
I
Cutting limit for inside machining
K
Overlap jaw/workpiece (pay attention to sign)
X
Clamping diameter of workpiece blank
Q
Chuck form
4: Outside chucking
5: Inside chucking
V
Shaft machining AWG
0: Chuck: Automatic separation points at largest and
smallest diameter
1: Shaft/chuck: Machining also starting from the chuck
2: Shaft/face driver: Outside contour can be machined
completely
If you do not define the parameters Z and B, TURN PLUS
will use the following machine parameters (see "List of
user parameters" in the User's Manual) during AWG
(automatic working plan generation):
Front chuck edge on spindle / counterspindle
Jaw width on spindle / counterspindle
