Grass Valley EDIUS Neo 2 User Manual
Page 357
EDIUS Neo — User Reference Guide
357
Rendering Operations
Note
Click the Abort button in the Rendering dialog to stop rendering in progress.
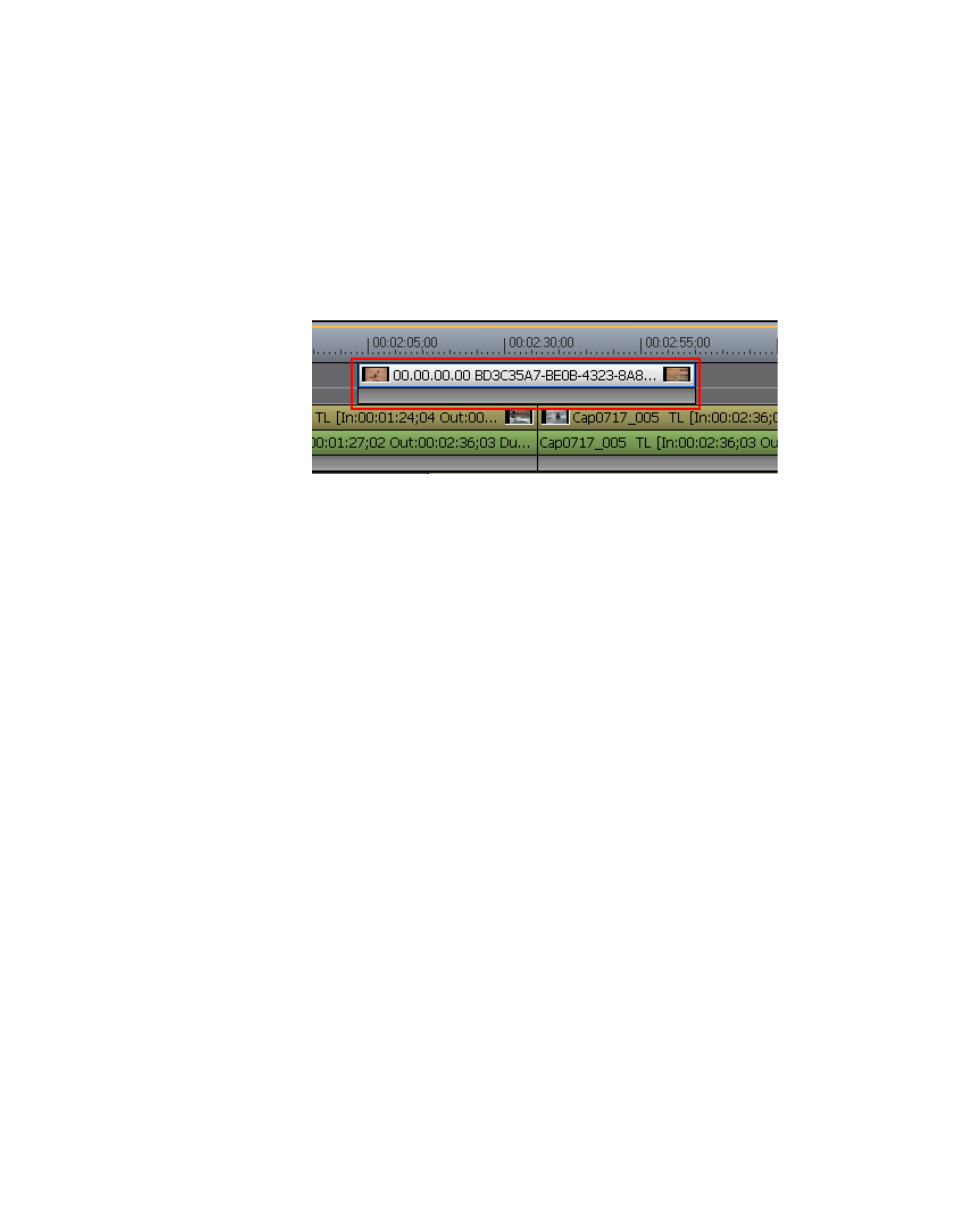
When rendering is complete, the video clip is placed on a V or VA track on
the Timeline.
If there is no space in the current track on the Timeline to add the clip, a new
V tracks is added and the rendered clip is placed there as shown in
.
Figure 425. New V Track with Rendered Clip
The clip color is and name denote this clip as a clip “rendered and added to
the Timeline.”
Note
Rendered/exported clips are saved in the “rendered” sub-folder in the project
folder.
Alternative Methods:
•
Select Render>Render and Add to Timeline from the Preview window
menu bar.
•
Right-click the time scale and select “Render and Add to Timeline”
from the menu.
•
Press the [
SHIFT
]+[
Q
] keys on the keyboard.
Important Notes Regarding Exported Clips
•
Clips on the title track and the muted part of a video clip are exported
as black clips.
•
The exported clip is automatically deleted when the project is closed. If
you need to save the clip for future use, save the project with the clip
placed on the Timeline or stored in the Asset Bin.
•
Copy the clip to a different folder to be able to use it in other projects.