Dividing clips at in/out points – Grass Valley EDIUS Neo 2 User Manual
Page 269
EDIUS Neo — User Reference Guide
269
Timeline Clip Operations
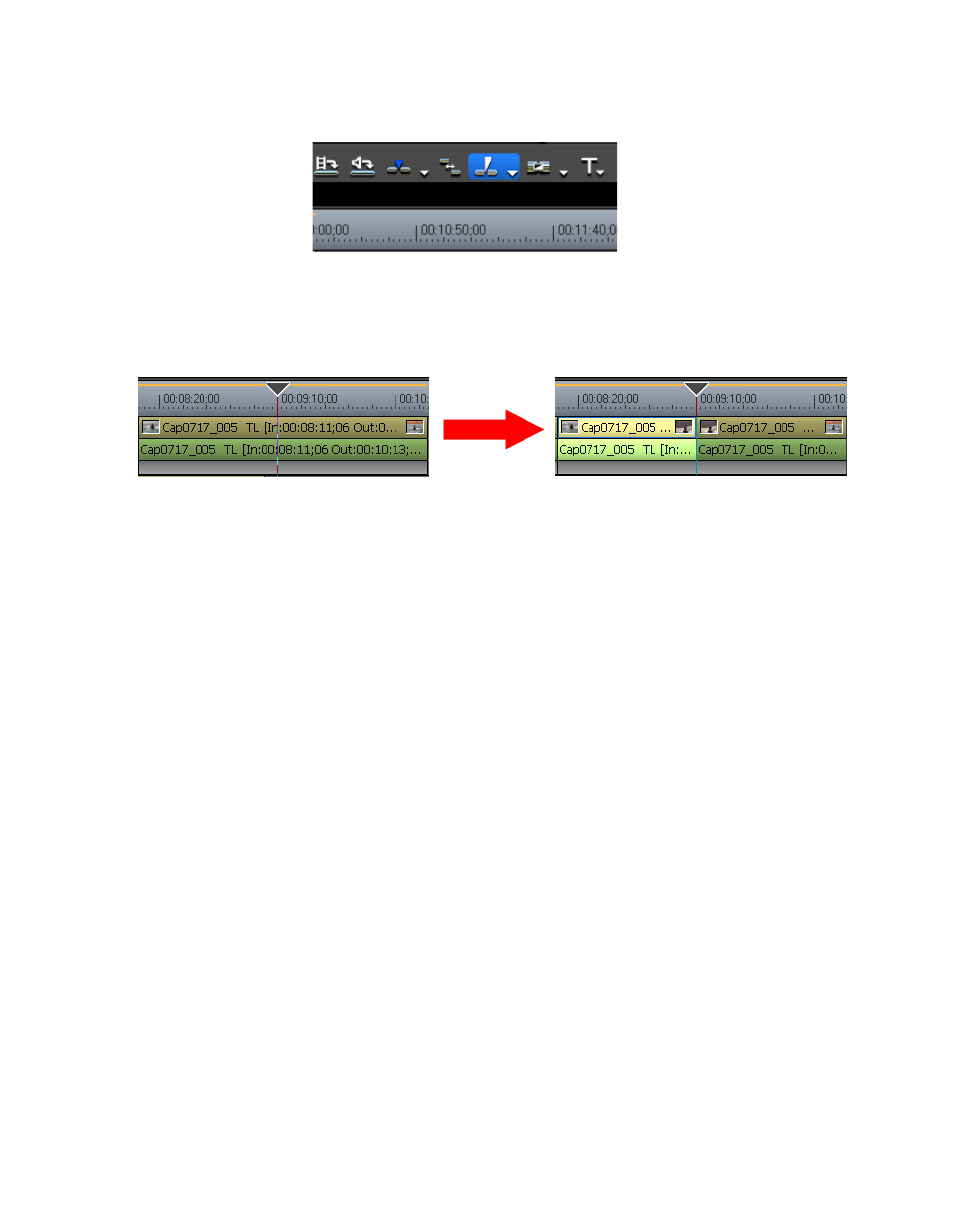
Figure 313. Timeline Add Cut Point Button
The clip is divided at the Timeline cursor position as illustrated in
.
Figure 314. Clip Divided at Cursor Position
Alternative Methods:
•
Click the list button [V] on the
Add Cut Point
button and select “Selected
Track” from the menu.
•
Right-click on the clip to be divided and select Add Cut Point>Selected
Track from the menu.
•
Select Edit>Add Cut Point>Selected Track from the Preview window
menu bar.
•
Press the [
C
] key on the keyboard.
To divide all clips on all tracks at the Timeline cursor position, do any of the
following:
•
Click the list button [V] on the
Add Cut Point
button and select “All
Tracks” from the menu.
•
Right-click on any clip and select Add Cut Point>All Tracks from the
menu.
•
Select Edit>Add Cut Point>All Tracks from the Preview window menu
bar.
•
Press the [
SHIFT
]+ [
C
] key on the keyboard.
Dividing Clips at In/Out Points
To divide a clip at the In/Out points on the Timeline, do the following:
1.
Select the track where the clip to be divided is placed.