Extend mode, See extend mode, Figure 241 – Grass Valley EDIUS Neo 2 User Manual
Page 221
EDIUS Neo — User Reference Guide
221
Timeline Settings
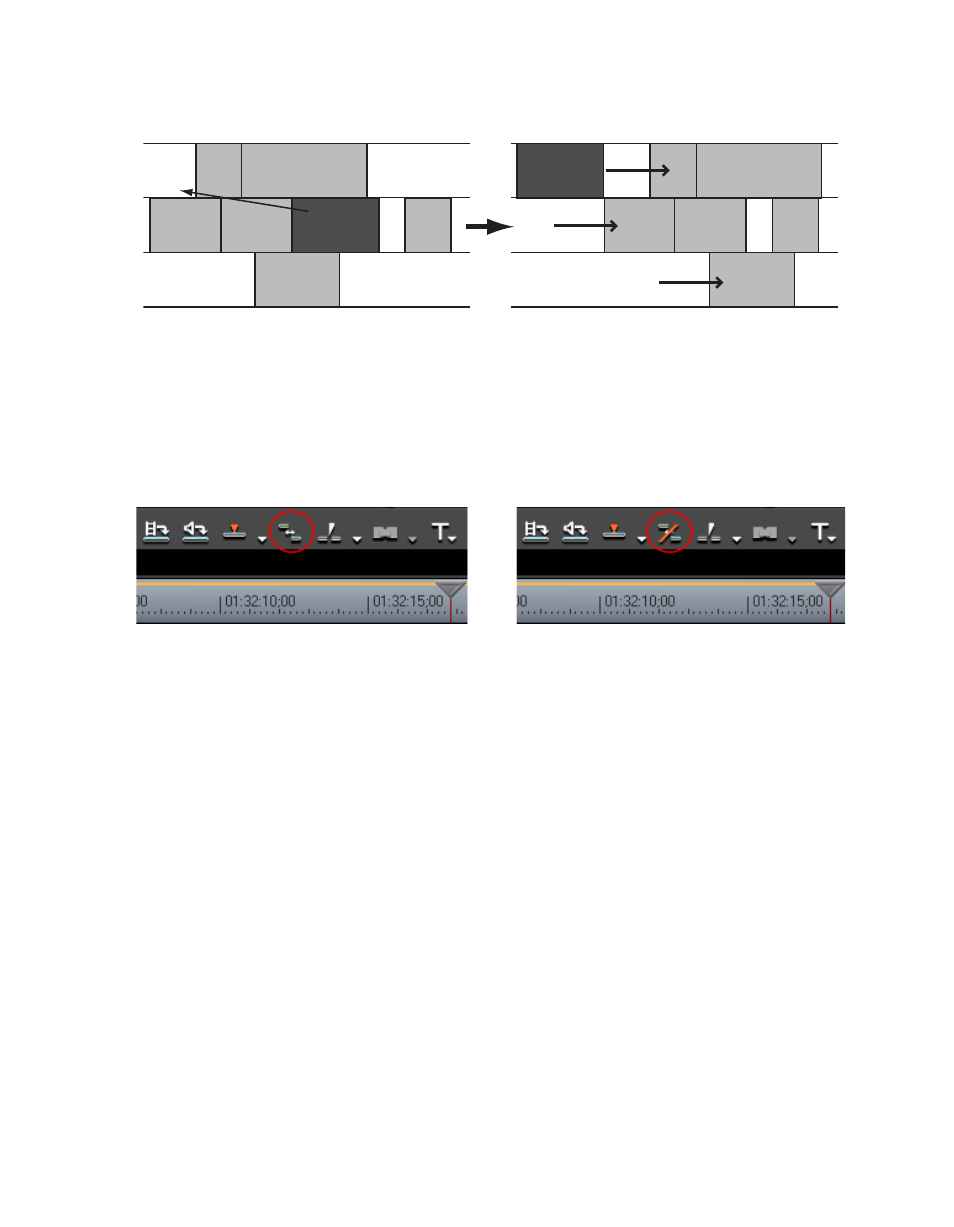
Figure 241. Ripple Mode On/Sync Mode On/Insert Mode Enabled
Ripple Mode is toggled on and off by one of the following procedures:
•
Click the
Ripple Mode
button on the Timeline window tool bar. Each click
toggles ripple mode on or off. When ripple mode is off there is a slash
through the ripple mode icon. When ripple mode is on, the slash is
removed. See
for details.
Figure 242. Ripple Mode Toggle Button
•
Select Mode>Ripple Mode in the Preview window. As in the example
above, the icon next to the Ripple Mode menu selection has a slash
through it when ripple mode is disabled. The slash is not present when
ripple mode is enabled.
•
Press the [
R
] key on the keyboard to toggle Ripple mode on and off.
Extend Mode
Extend mode and fix mode are controlled by the “Extend clips when
applying transition/cross fade” setting in the Timeline Settings dialog.
When this setting is enabled (checked), extend mode is enabled. When the
setting is disabled (not checked), fix mode is enabled.
To change the setting, select Settings>Application Settings>Timeline from
the Preview window menu bar. Enable or disable the “Extend clips when
applying transition/cross fade” setting depending upon the mode you
desire.
•
In Extend Mode, adding or deleting a transition or audio cross fade
between clips will not change the overall sequence length on the Time-
line as illustrated in