Ivoclar Vivadent IPS Empress CAD Chairside - de-en-es-it-ru User Manual
Page 73
25
Place the objects on the honey-comb firing tray and start
the firing program
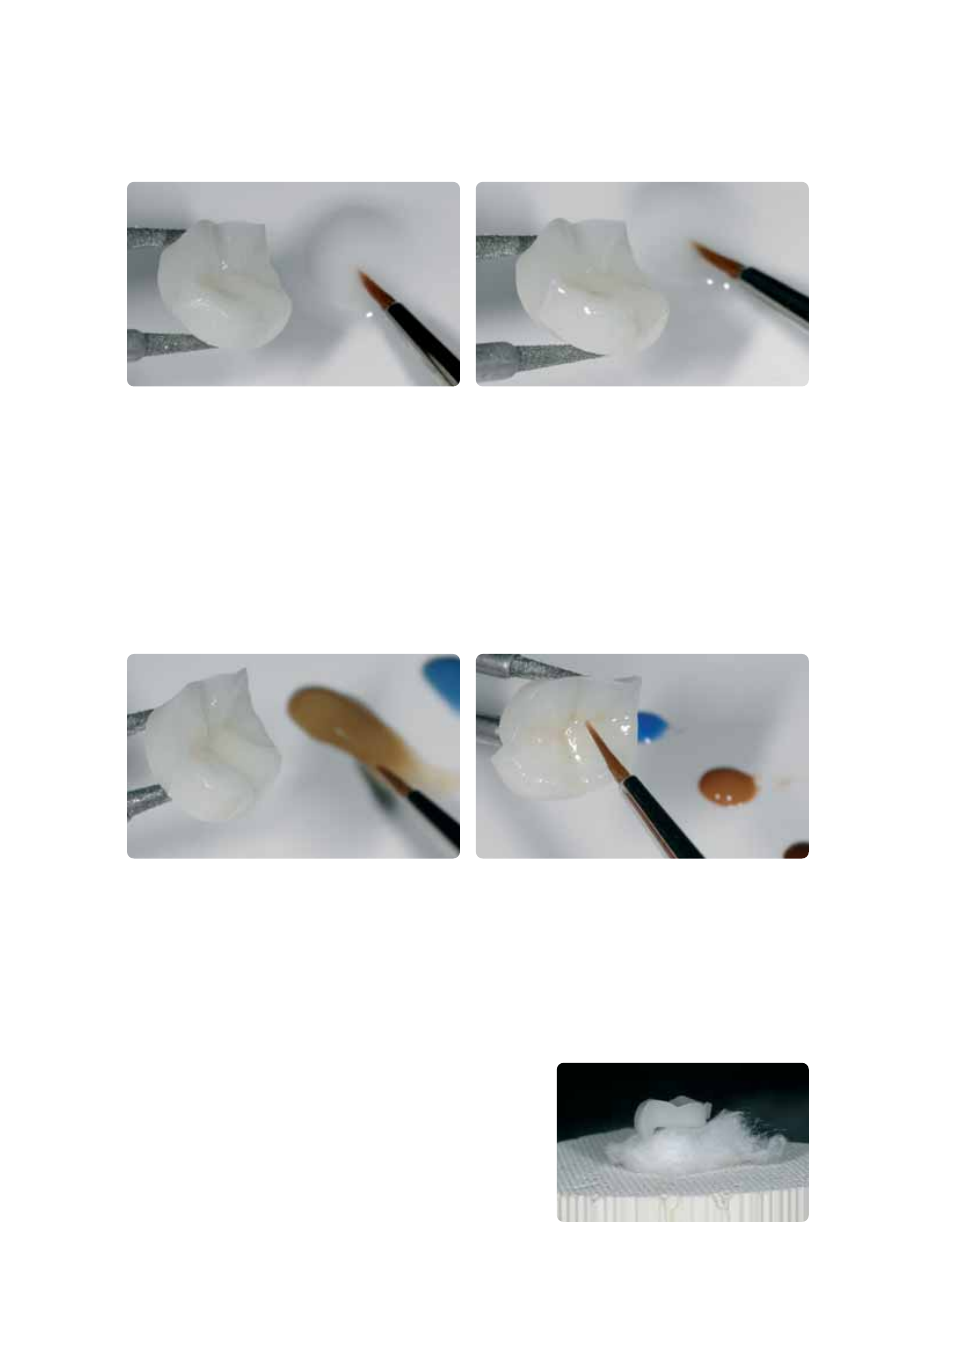
Evenly apply the glazing material on the entire outer surfaces of the restoration.
Step 2 – Application of Shades / Stains
– Extrude IPS Empress Universal Shade or Stains from the syringe and mix thoroughly.
– Thin the material to the desired consistency using IPS Empress Universal Glaze and Stain Liquid.
– Apply the mixed Shade material directly into the unfired glazing material layer.
– Intensify the corresponding dentin shade in the cervical and occlusal areas using IPS Empress Universal Shades.
– To imitate the incisal area and translucency in the incisal third, use IPS Empress Universal Shade Incisal.
– Apply individualized effects and characterizations on cusps and in fissures using the Stains materials. Only apply the
Stains once staining with the Shade materials has been completed.
– Apply the Stains thinly and in a controlled manner on the unfired glazing material layer using a brush.
Apply the mixed Shade material directly into the unfired glazing material layer. Intensify the
corresponding dentin shade in the cervical and occlusal areas and use IPS Empress Universal
Shade Incisal to imitate the incisal areas.
Apply individualized effects and characterizations on cusps and in fissures using
the Stains materials.
After glazing and staining, the glaze and stain firing is conducted in a compatible ceramic furnace (e.g. P300).
The following points should be observed when placing the restoration in the furnace and setting the firing parameters:
– Support inlays, onlays, and partial crowns with a firing pillow and place them on a honey-comb firing tray.
– Place veneers as well as anterior and posterior crowns on metal pins and position them on the honey-comb firing tray.
– As an alternative to the firing pillow and to better secure the restoration
on the metal pins (particularly with veneers), a small amount of
IPS Object Fix may also be used.
– Restorations supported with a firing pillow on the honey-comb tray are
exposed to less heat due to their lower position in the firing chamber.
Therefore, in order to achieve a true-to-nature gloss, it is recommended
to extend the holding time from 1 minute to 2 minutes.
– Make sure that the firing pillow is regularly replaced in order to prevent
contamination. Keep firing pillows used for all-ceramic materials
separated from those used for metal-ceramics to avoid cross-contamination.