Setting up a control surface, Using onscreen controls, 78 chapter 3 using the color interface – Apple Color 1.5 User Manual
Page 78
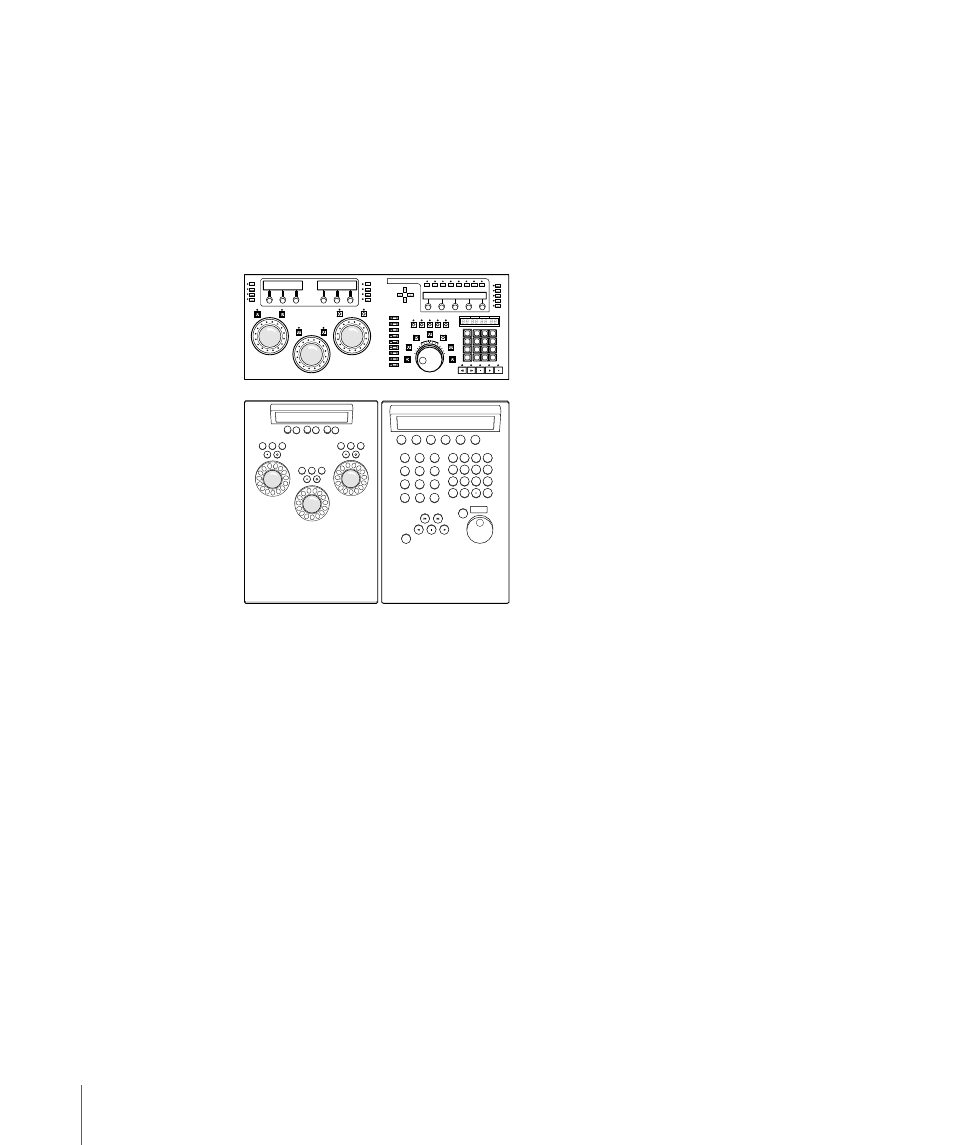
Setting Up a Control Surface
Color was designed from the ground up to support control surfaces specifically designed
for color correction from manufacturers such as Tangent and JL Cooper Designs. These
control surfaces typically include three trackballs that correspond to the three overlapping
tonal zones of the Primary and Secondary color balance controls (shadows, midtones,
and highlights), three rotary controls for the three contrast controls (black level, gamma,
and white point), and a number of other rotary controls and buttons that support different
functions depending on which room you’ve selected.
B3
R3
B2
B1
R1
R2
F1
M1
W1
W2
W3
W4
W5
W6
W7
JOG
SHUTTLE
M2
M3
1
2
3
4
5
6
7
8
PAGE
M4
M5
F2
F3
F4
F5
F6
F7
F8
F1
MEM
ALT
GRACE
DELETE
OUT
IN
MARK
CUE
DO
UNDO
MORE
REDO
7
4
1
00
0
2
3
-
5
6
+
8
9
PREV
NEXT
MODE
CLEAR
F2
F3
F7
F8
F9
F4
F5
F6
You can either choose a control surface to use when Color starts up, or click Show Control
Surface Dialog in the User Prefs tab of the Setup room to choose an available control
surface at any time. For more information on setting up a control surface, see
. For more information on configuring a control surface from within
Color, see
Using Onscreen Controls
If you don’t have a control surface, you can still operate every feature in Color using the
onscreen controls. In addition to the standard buttons, checkboxes, and pop-up menus
common to most applications, Color uses some custom controls that are described in
this section. See the referenced sections for more information on:
•
•
•
Using Text Fields and Virtual Sliders
•
•
78
Chapter 3
Using the Color Interface