Split tool – Apple Color 1.5 User Manual
Page 179
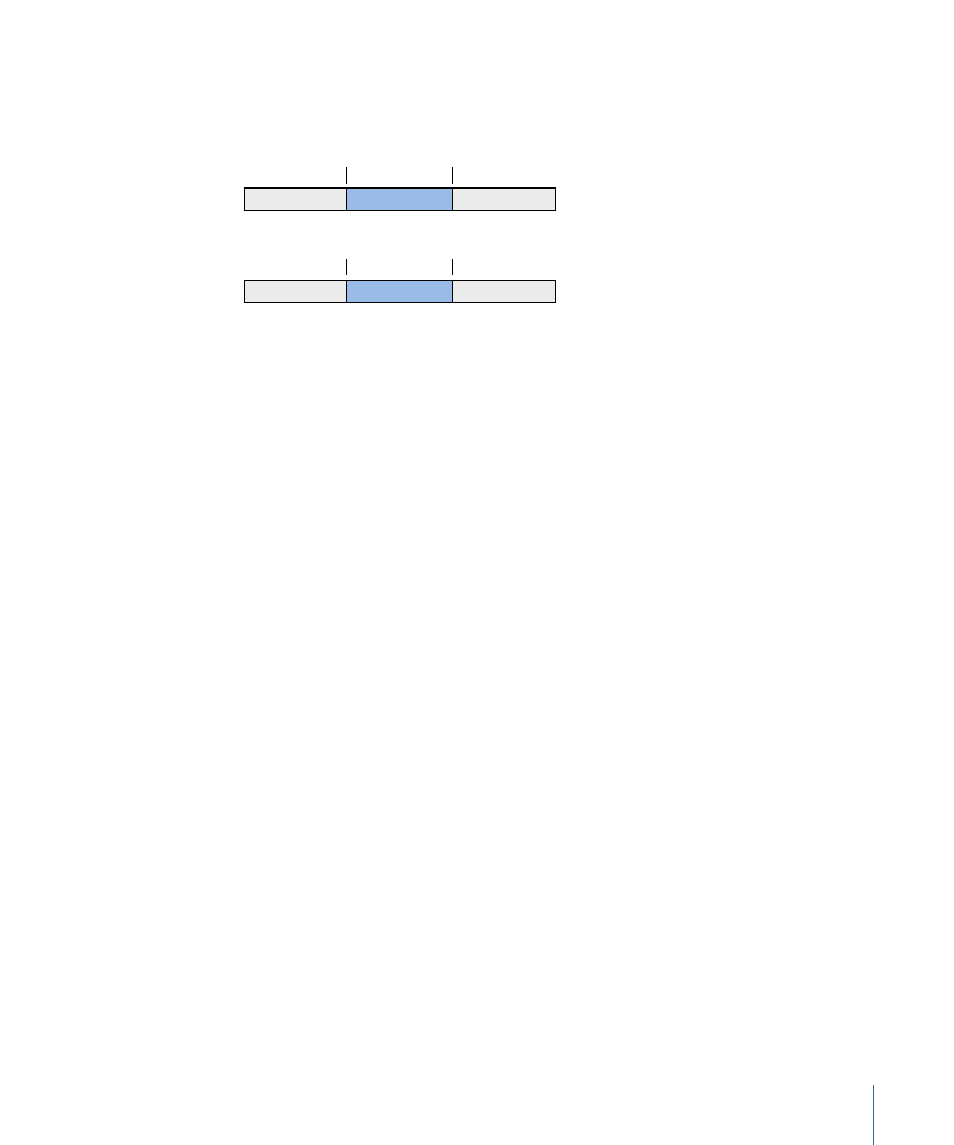
This means that the portion of the shot that plays in the Timeline changes, while its
position in the Timeline stays the same. No other shots in the Timeline are affected by a
slip edit, and the overall duration of the project remains unaffected.
A
B
C
A
B
C
Before edit
00:00:10:00
00:00:30:00
00:00:17:00
00:00:37:00
After edit
In the example above, the slip edit changes the In and Out points of shot B, but not its
duration or position in the sequence. When the sequence plays back, a different portion
of shot B’s media will be shown.
To perform a slip edit
1
Move the playhead to the shot you want to adjust, in order to be able to view the change
you’re making as you work.
2
Do one of the following to choose the Slip edit tool:
• Choose Timeline > Slip Tool.
• Press Control-Y.
3
Move the pointer to the shot you want to slip, then drag it either left or right to make
the edit.
Unlike Final Cut Pro, Color provides no visual feedback showing the frames of the new
In and Out points you’re choosing with this tool. The only image that’s displayed is the
frame at the current position of the playhead being updated as you drag the shot back
and forth. This is why it’s a good idea to move the playhead to the shot you’re adjusting
before you start making a slip edit.
Split Tool
The Split tool lets you add an edit point to a shot by cutting it into two pieces. This edit
point is added at the frame you click in the Timeline. This can be useful for deleting a
section of a shot or for applying an effect to a specific part of a shot.
To split one shot into two
1
Do one of the following to choose the Split tool:
• Choose Timeline > Split Tool.
• Press Control-X.
179
Chapter 7
Timeline Playback, Navigation, and Editing