The settings 2 tab – Apple Color 1.5 User Manual
Page 175
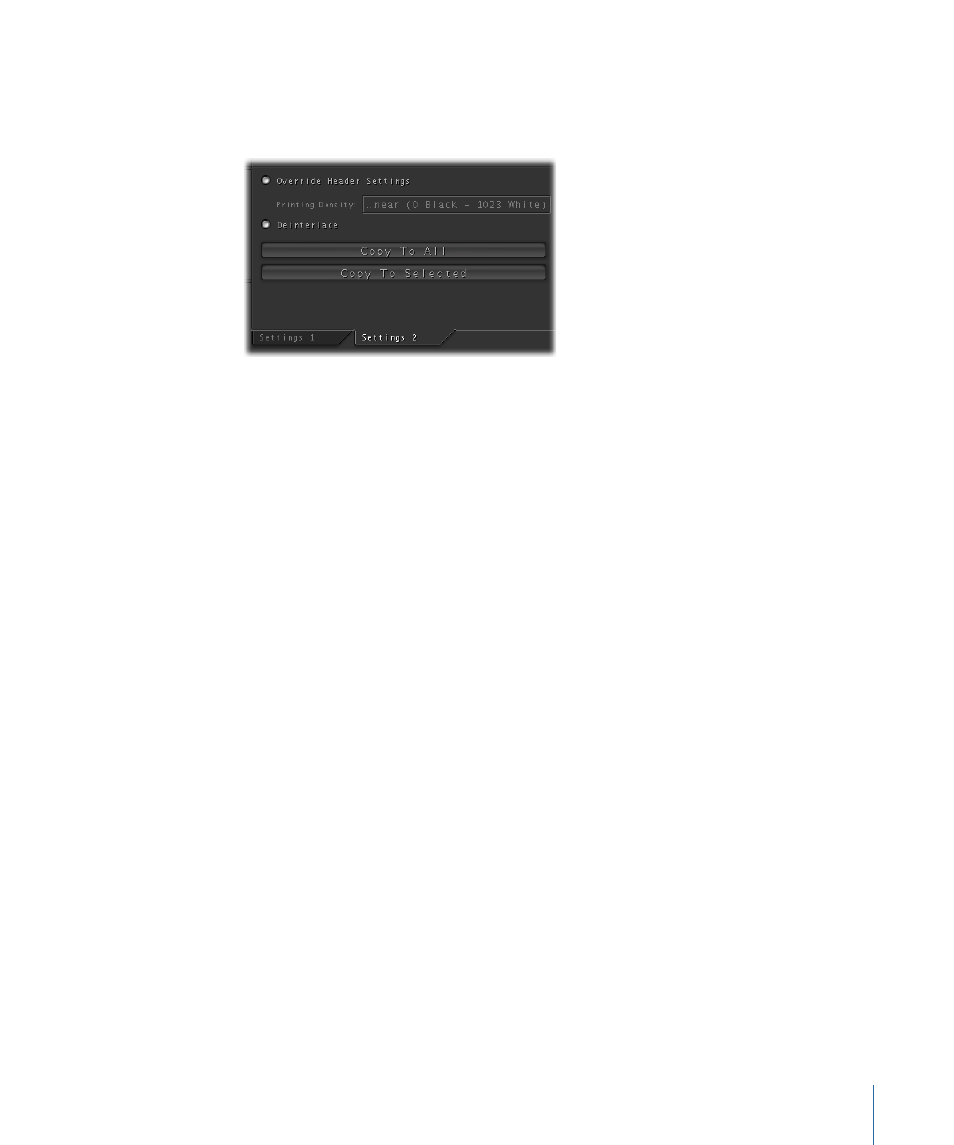
The Settings 2 Tab
The Settings 2 tab contains additional settings that let you modify the header data of
DPX and Cineon image files.
• Override Header Settings: Selecting this button enables the Printing Density pop-up
menu to be manually changed, so that you can override the printing density settings
in the DPX header for the current shot.
• Printing Density pop-up menu: This pop-up menu is initially disabled, displaying the
numeric range of values that 0 percent black and 100 percent white are mapped to in
the source media. There are three options:
• Film (95 Black - 685 White : Logarithmic)
• Video (65 Black - 940 White : Linear)
• Linear (0 Black - 1023 White)
If you’re working with logarithmic DPX and Cineon film scans, the default black point
is typically 95, and the default white point is typically 685. When you first load a project
that uses scanned film media, it’s important to make sure that the Black Point and
White Point settings aren’t filled with spurious data. Check with your lab to verify the
appropriate settings, and if the settings in your source media don’t match, turn on
Override Header Settings, and then choose a new printing density from this pop-up
menu. For more information, see
Choosing Printing Density When Rendering DPX
.
• DeInterlace: Selecting this button lets you individually deinterlace clips. This setting
overrides the Deinterlace Renders and Deinterlace Previews settings in the Project
Settings tab. When DeInterlace is turned on, both video fields are averaged together
to create a single frame.
• Copy To All: Copies the current header settings to every single shot in the Timeline.
This is useful if you find that the header data for all of the film scan media your program
uses is incorrect. Use this with extreme caution.
• Copy To Selected: Copies the current header settings to all currently selected shots in
the Timeline. Useful if your project consists of a variety of scanned media from different
sources with different header values.
175
Chapter 7
Timeline Playback, Navigation, and Editing