Apple Color 1.5 User Manual
Page 66
Deriving the offline media from the original digital media keeps your workflow simple
and eliminates the need to retransfer the source film later. The only disadvantage to this
method is that it can require an enormous amount of storage space, depending on the
length and shooting ratio of the project.
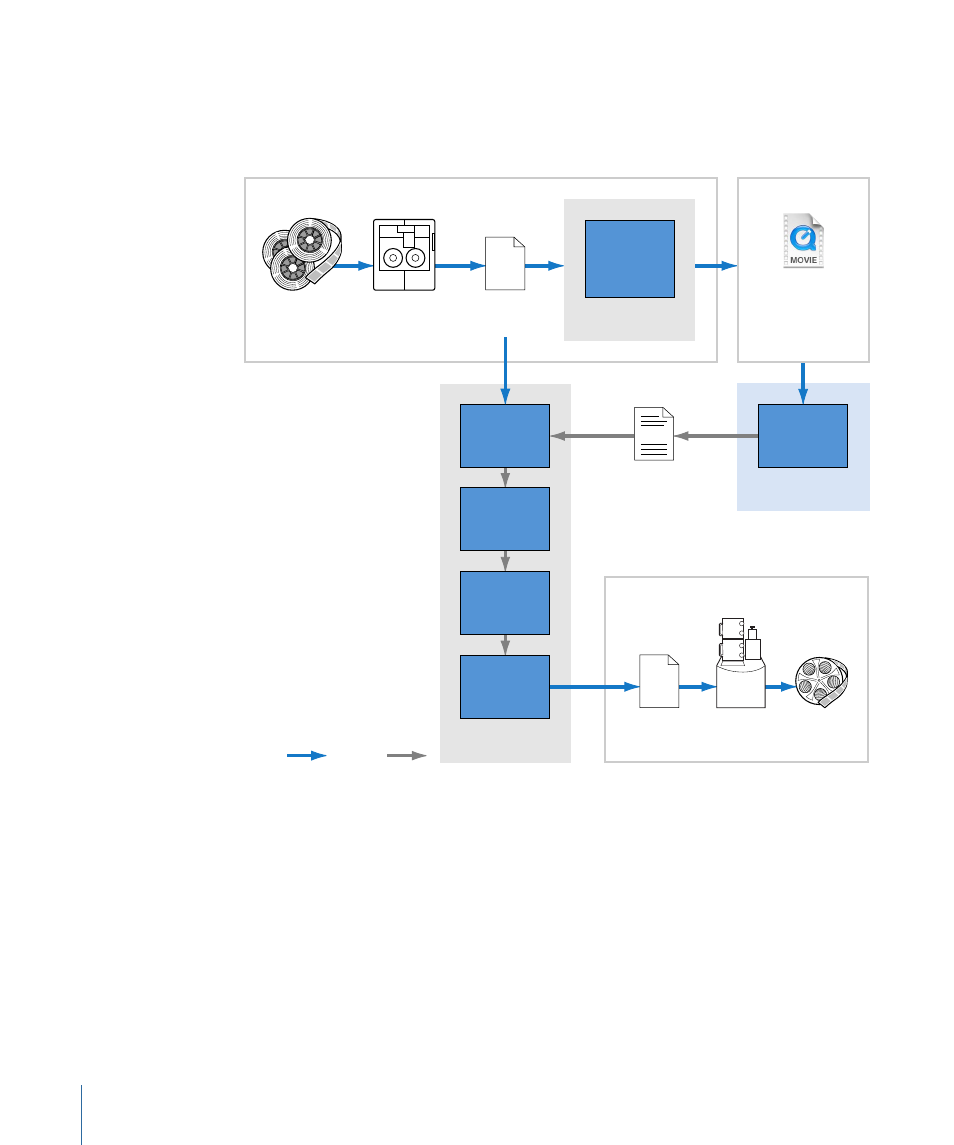
Color
Conform
Gather
Rendered
Media
Render
Color
Correction
Final Cut Pro
Offline
Edit
Film Output
Offline Media
(With Cloned
Timecode)
Datacine
Transfers
EDL
Film
Recorder
Film
Final Output
Sequence
DPX
2K/4K DPX
Image Sequence
DPX
Offline
Quicktime
Conversion
Color
Media
Data
Camera
Negative
The following steps break this process down more explicitly.
Stage 1:
Running Tests Before Shooting
Ideally, you should do some tests before principal photography to see how the film
scanner–to–Color–to–film recorder pipeline works with your choice of film formats and
stocks. It's always best to consult with the film lab you'll be working with in advance to
get as much information as possible.
Stage 2:
Scanning All Film as 2K or 4K DPX Image Sequences
Depending on how the shoot was conducted, you could opt to do a best-light datacine
of just the selects or of all the camera negative, if you can afford it. The scanned 2K digital
source media should be saved as DPX or Cineon image sequences.
66
Chapter 2
Color Correction Workflows