Apple Color 1.5 User Manual
Page 49
Important:
The EDL import capabilities of Color are not as thorough as those in
Final Cut Pro, and are limited only to shots on track V1. All transitions in EDLs are imported
as dissolves. Superimpositions and audio are not supported, and will be ignored.
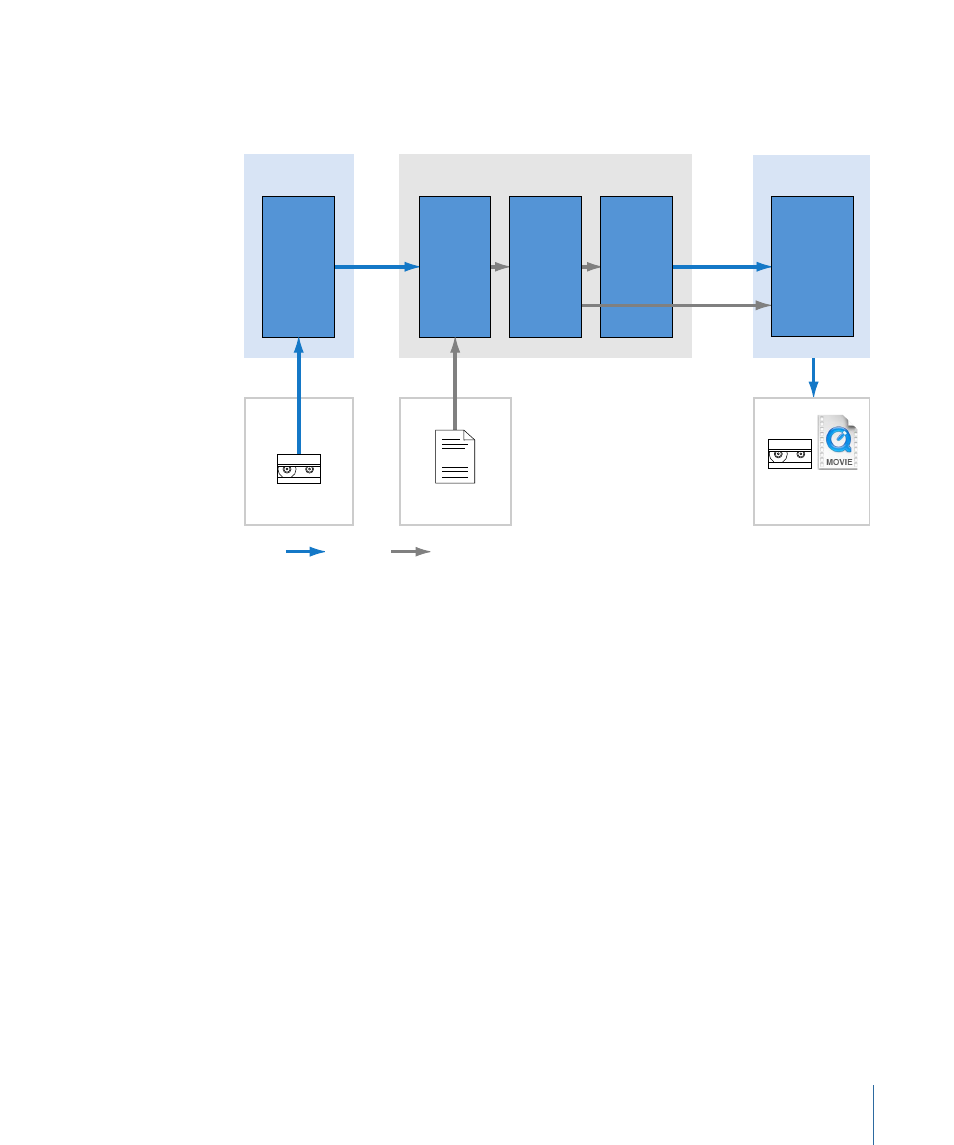
Final Cut Pro
Online
Media
XML
Final
Effects and
Output
Final Cut Pro
Color
Capture
Entire
Program
Create
Color
Project
from EDL
to “Notch”
Online
Media
Output
Final Master
Tape Master
EDL file
EDL
Media
Data
Color
Correction
Render
New Color
Corrected
Media
Send to
Final Cut Pro
Here's a more detailed explanation of this workflow.
Stage 1:
Capturing the Program Master
If you were given the program master on tape, you need to capture the entire program
using the highest-quality QuickTime format that you can accommodate on your computer
(such as Apple ProRes 4444, Apple ProRes 422 (HQ), or Apple Uncompressed). If you're
being given the program master as a QuickTime file, you should request the same from
whoever is providing you with the media.
For this process to work correctly, it's ideal if the timecode of the first frame of media
matches the first frame of timecode in the EDL.
Stage 2:
Importing the EDL into Color and Relinking to the Master Media File
Either select the EDL from the Projects dialog that appears when you first open Color, or
use the File > Import > EDL command. When the EDL Import Settings dialog appears,
choose the EDL format, project, EDL, and source media frame rates.
To properly "notch" the master media file, you need to turn on "Use as Cut List," and then
choose the master media file that you captured or were given. For more information, see
.
49
Chapter 2
Color Correction Workflows