5 calibration function, Calibration function -52, Calibration function – KEYENCE IG Series User Manual
Page 110

4-52
IG-E
4
Setting V
a
ri
o
us
F
u
nct
ion
s
4-5
Calibration Function
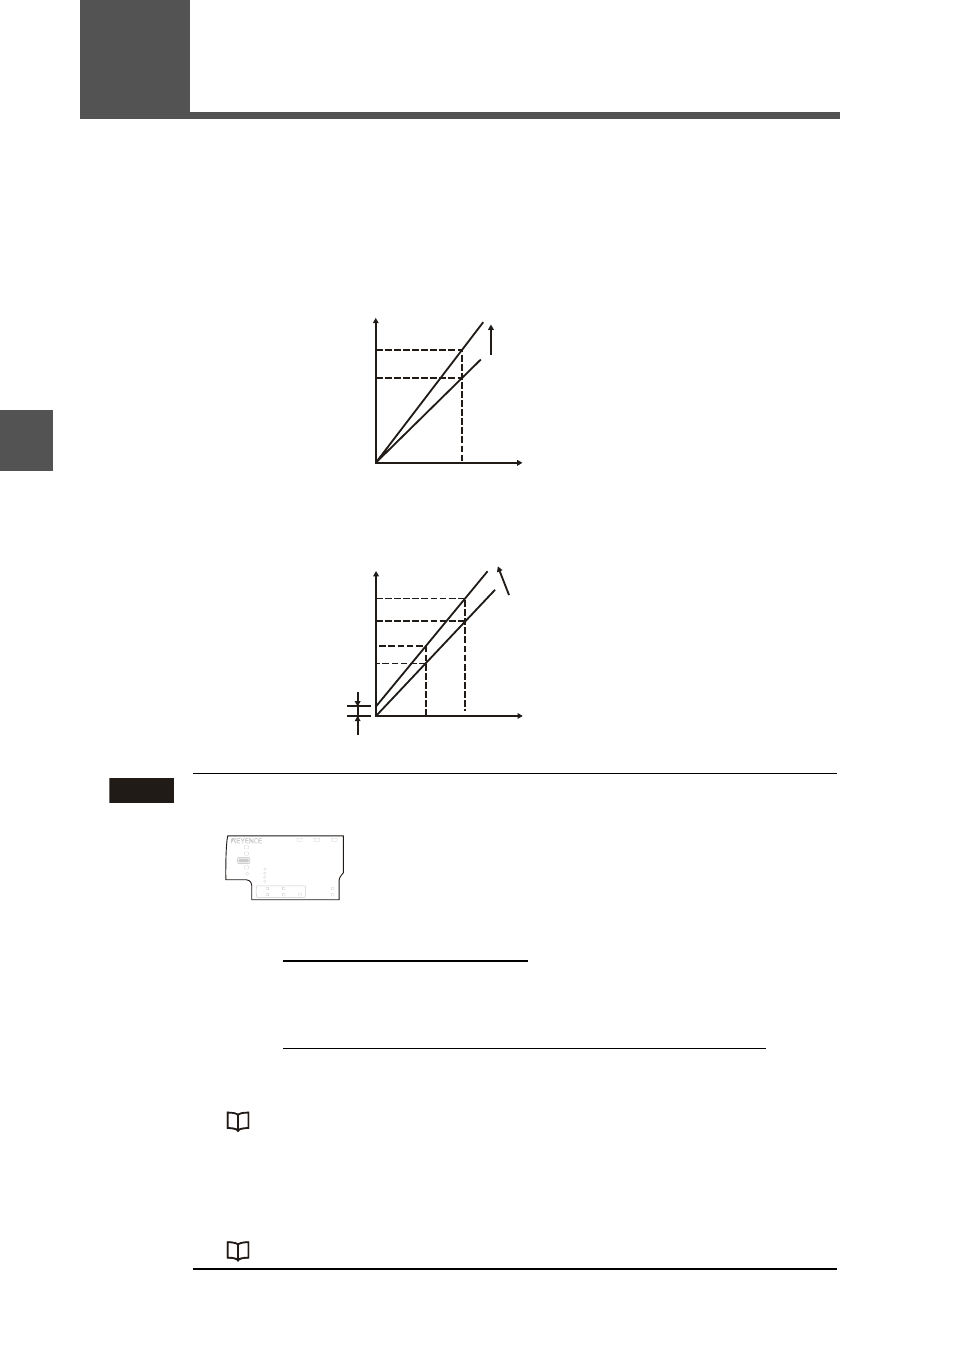
When there is difference between the internal measurement value (R.V.) and the actual
dimension of the object, the value can be corrected. There are two correction methods as
below: One-point calibration and Two-point calibration
One-point calibration
Only tilt (span) is corrected while the zero point (offset) is not corrected.
Two-point calibration
Both the zero point (offset) and the tilt (span) are corrected.
Note
• If the following conditions are not satisfied, the screen below is
displayed when the setting is complete. Make the setting again.
For one-point calibration
For two-point calibration
-99.999
d (offset value A) d99.999
"3-7 Zero Shift Function (Shifting the Internal Measurement Value (R.V.))"
(page 3-16)
• If the measurement mode is set to the "Pin interval judgment mode"
or "Pin diameter judgment mode", the calibration function cannot be
used. Only "Standard" and "User setting" can be switched on the
setting screen.
"1. Measurement mode" (page 4-8)
Correction
R.V. before correction
R.V. [
5'V] you wish to display
Correction
R.V. (2) before correction
R.V. (1) before correction
Offset value A
R.V. (2) [
5'V] after correction
R.V. (1) [
5'V] after correction
'TT
LASER
BANK
0
1
2
3
HI
GO
LO
R.V.
ANALOG
HI
SHIFT
ZERO SHIFT
TIMING
LO
ALIGNMENT
5'6
HOLD
CALC
CHECK
0.5
d (R.V. you wish to display)
(R.V. before correction)
d2
0.5
d (R.V. (2) you wish to display) - (R.V. (1) you wish to display)
(R.V. (2) before correction) - (R.V. (1) before correction)
d2
