18 setting the writing operation (dc100 only), 18 setting the writing operation (dc100 only) -38 – Yokogawa DAQWORX User Manual
Page 85
4-38
IM WX102-01E
4.18 Setting the Writing Operation (DC100 Only)
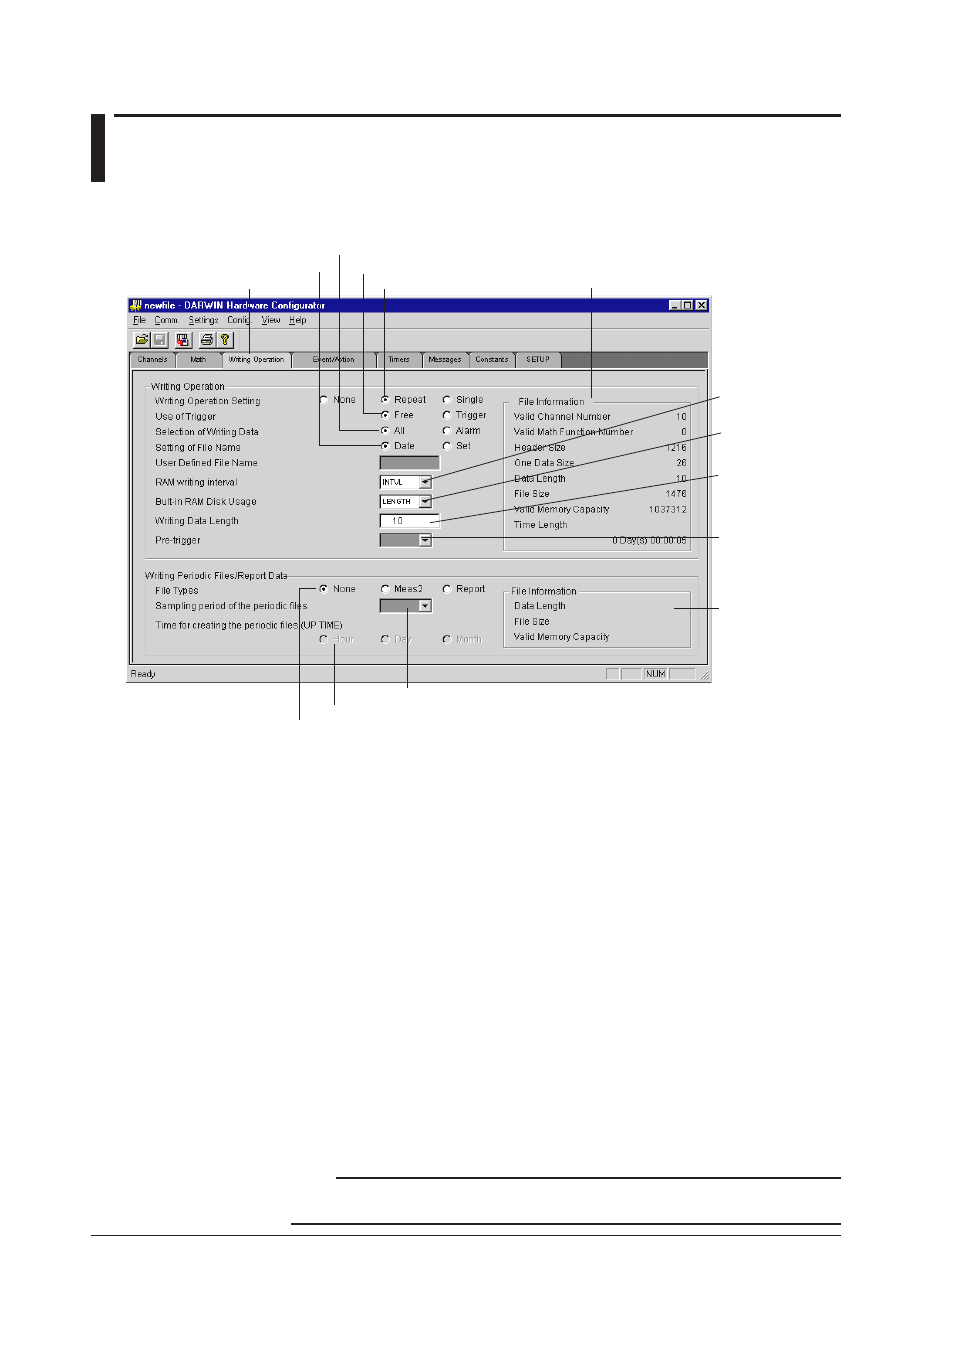
To open the Writing Operation setting screen (see below), click the Writing Operation tab,
or select Settings > SET (Regular) Settings > Writing Operation from the menubar. :
Writing operation tab
Trigger ON/OFF
RAM overwriting
interval
Way to use the
built-in RAM disk
Writing data length
Writing operation setting
Trigger generated writing
File name setting
File information
Pretrigger setting
Sampling period
Report data file info
Periodic file creation interval
Select the file type
Writing Operation Setting (WRITE MODE)
Select the writing operation of the measured/computed data from the following:
• None: Displayed only when the /M3 option is installed. Use this mode when saving
only report data or periodic files. The entire built-in RAM disk is used for
saving these files. If there are files saved on the built-in RAM disk, you cannot
change the operation from None to Single or Repeat or visa versa.
• Single: Data for only one file are written and then the writing operation is terminated.
• Repeat: After writing data for one file is completed, the next file is created and writing
starts. When the built-in RAM disk becomes full, the writing operation is
terminated. However, if the WRITE MEMORY setting is DIV, when the built-
in RAM disk becomes full, the file with the oldest date and time is deleted and
new data items can also be continued to be written by setting FILE ROTATE
to ON in the SETUP (Basic) mode.
Use of Trigger (WRITE TRIG)
Writing can be set to be started when an event (trigger) is generated.
• Trigger: Writing starts at the generation of an event (trigger) using the event/action
function (trigger mode).
• Free:
Writing starts when the Start key is pressed.
Note
If data are written using TRIG, the saving operation is also required to start using the START
key or through the event/action function.