4 selecting a directory to save data, 4 selecting a directory to save data -5 – Yokogawa DAQWORX User Manual
Page 43
3-5
IM WX102-01E
1
2
3
4
5
6
7
8
9
10
11
Index
Software Configurator
3.4
Selecting a Directory to Save Data
Use Software Configurator to select the directory you want to save Logger collected
measurement data to. The default directory is the directory to which you saved DAQ 32
Plus software /DAQ32 Plus/User/data
1
Startup DAQ 32 Plus and select Software Configurator from the Launcher toolbar.
2
Click the Communications tab to display the Communications setting screen.
3
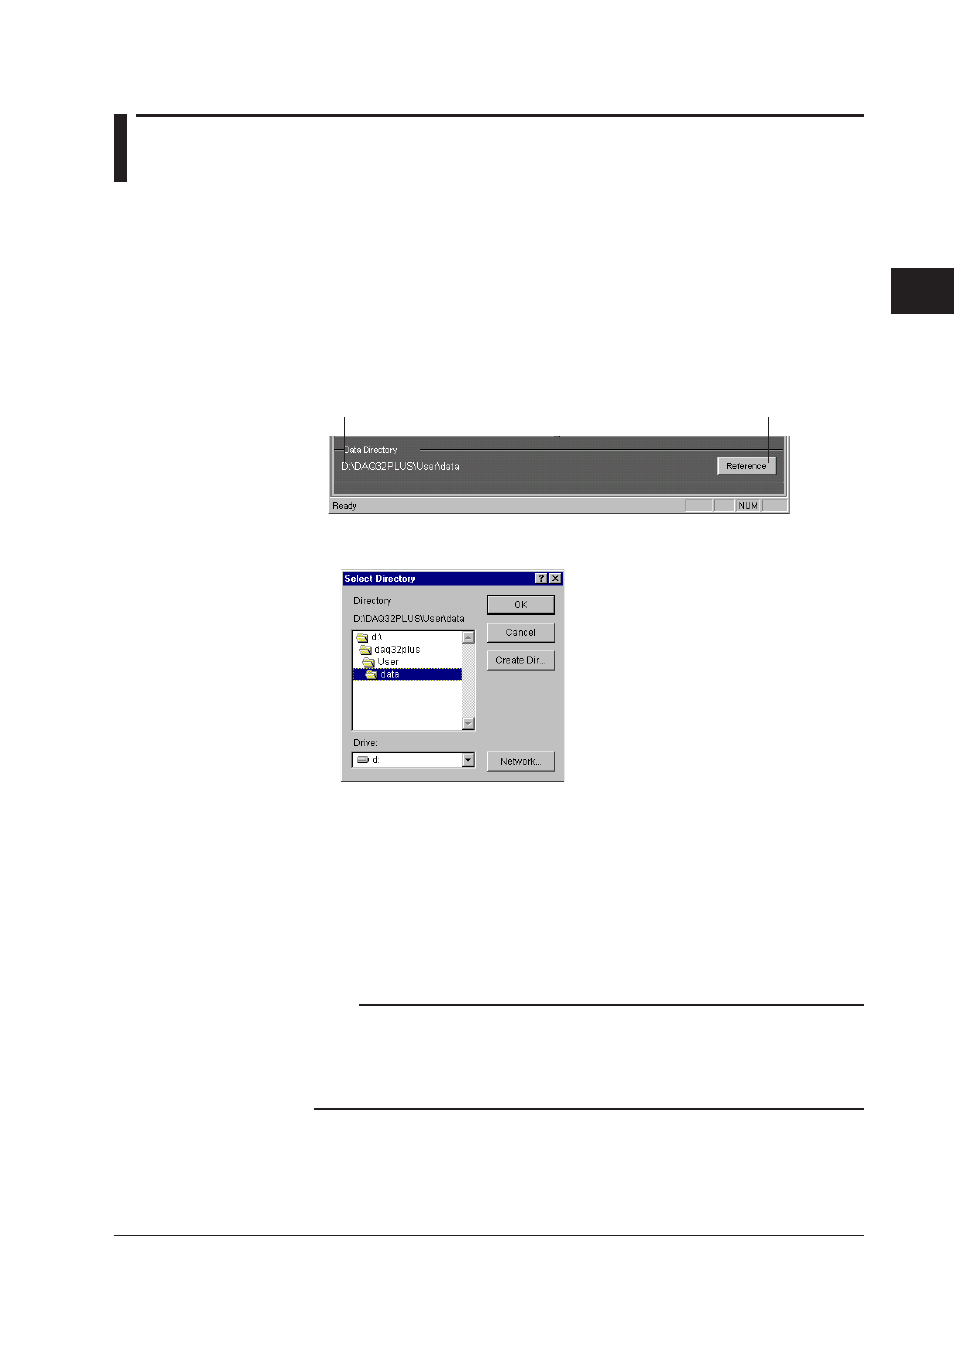
To open the Select Directory screen (below) click the Reference button in the
Data Directory setting window (below), or click Communications > Data Directory
from the menubar.
Currently used directory
Reference button
Select Directory screen
4
Choose a (earlier created) directory to save the collected measurement data to.
Creating a directory to save data to
4
Select a folder to store the directory you want to create.
5
Click Create directory… to open the Create directory dialogbox.
6
Enter the directory name in the text box and click OK. The created directory will
appear.
Note
• When opening Launcher software, a User/data folder will automatically be created in the
directory where you installed this software.
• Don’t appoint a root-directory as the to save measurement data.
• Don’t select a media like a floppy-disk drive as directory to save measurement data. Access
time will increase, and it may not be possible to normally save data.