2 making project settings, 2 making project settings -2, Saving a new project – Yokogawa DAQWORX User Manual
Page 35
2-2
IM WX102-01E
2.2
Making Project Settings
Saving a new Project
1
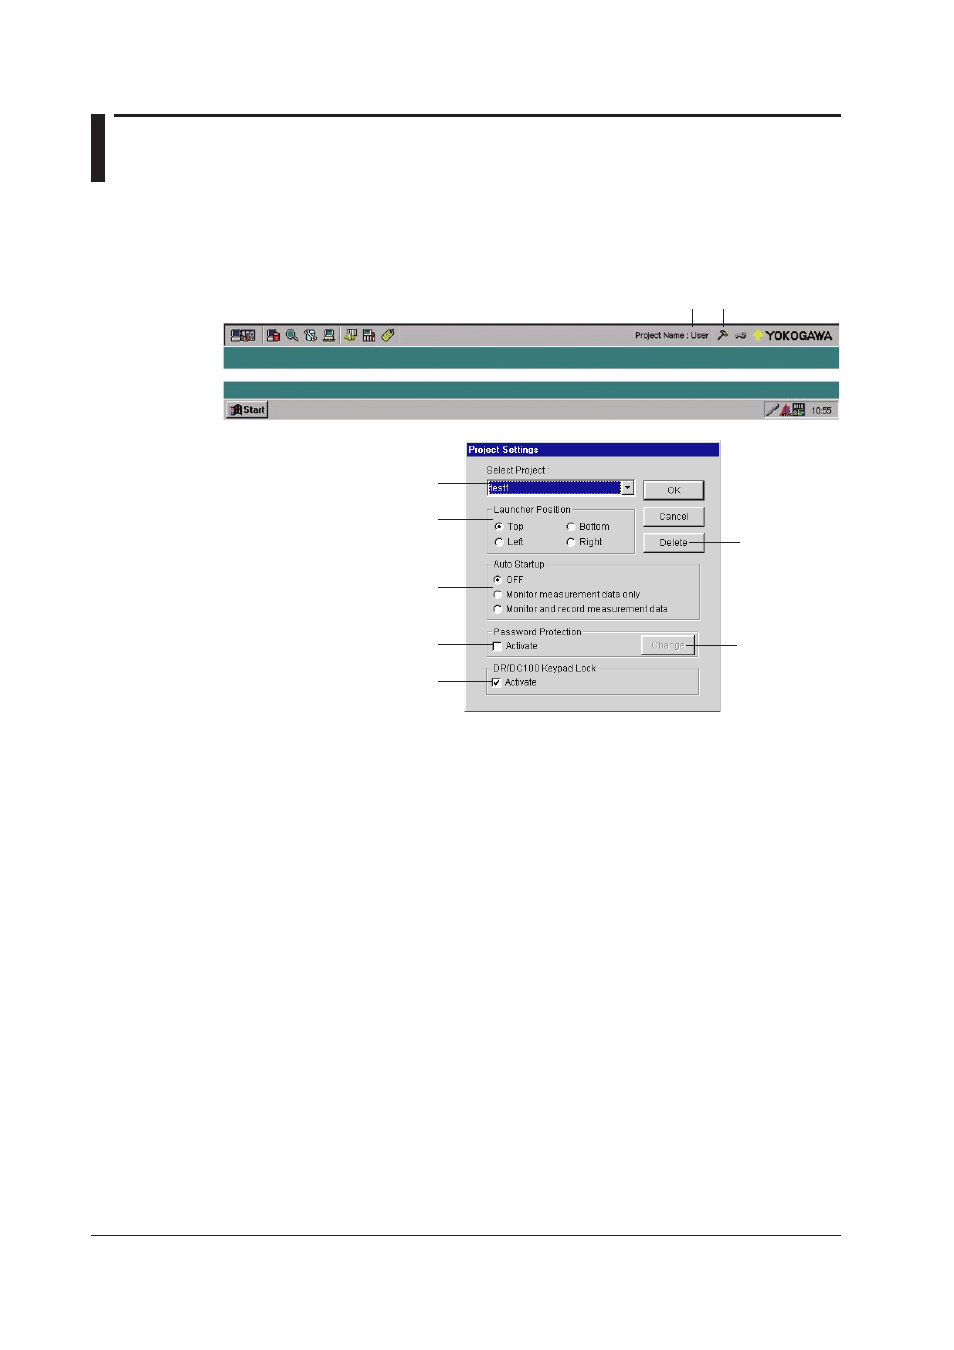
To open the Project Settings dialog box (see below) you should first close all DAQ
32 Plus software. Open the Project Settings dialogbox by clicking the Project
Settings button (see below), or click the Menu button and select Project settings....
Project name Project Setting button
Project name, and
overview of saved
projects
Launcher position
on PC screen
Select for auto-start
monitoring and
recording
Check to protect
settings with a
password
Check to use the
keypad lock for
DR and DC 100
Delete
projects
Password
setting
2
Select New project from the Select Project pull-down menu. The New Project
dialog box opens.
3
Enter a name in the New Project dialog box, and click OK.
4
Select a place to position the Launcher menu on the screen: Top, bottom, left, or
right.
5
Select Logger software to monitor measurement data only, to both monitor and
record measurement data, or to display nothing.
6
Select whether you want to use the Password Protection function or not. If you
check Activate, Project changes without first entering a password will become
impossible.
7
Click the Change button to open the Password Setting dialog box. After you
enter a password click OK. Click Cancel to invalidate the setting. Use the entered
password to release the Project lock.
8
Check Activate if you want the Keypad of the DC100 / DR connected to your PC
to be locked while Logger is operating (monitoring/recording).
9
After you have finished all settings, save them by clicking OK, or erase them by
clicking delete. The Project Settings dialog box closes.