Final assembly – Elecraft K2 Owner's Manual User Manual
Page 82
E
LECRAFT
®
81
7. Final Assembly
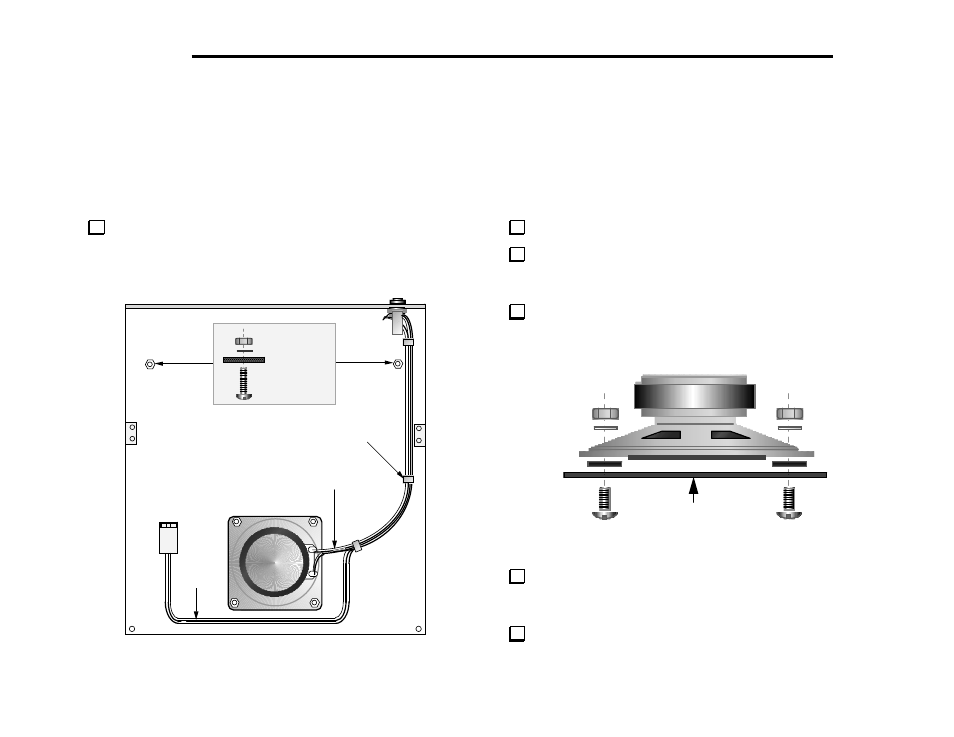
Place the top cover upside down as shown in Figure 7-1, with its
rear panel facing away from you. The illustration shows how the
speaker, 2-conductor cable, external speaker jack and other hardware
will be attached to the top cover.
3/8" (9.5 mm)
9"
(23 cm)
15"
(38 cm)
Cable Ties (3)
A
A
B
B
C
C
D
D
Figure 7-1
Trim the supplied grille cloth to the size of the speaker frame.
Place #4 fibre washers (black) at each of the top cover's four
speaker mounting holes (Figure 7-1). Trim the corners of the grille
cloth so it just fits between the fibre washers, not touching them.
Place the speaker on top of the fibre washers and grille cloth.
Secure it with four 3/8" (9.5 mm) screws, #4 lock washers, and 4-40
nuts (Figure 7-2). Do not over-tighten the nuts.
Top Cover
Figure 7-2
Locate the two holes marked A in Figure 7-1. Use two 4-40 x
3/8" (9.5 mm) screws to fill these holes, securing them with #4 lock
washers and 4-40 nuts. (The holes are for the battery option.)
Install 2-D fasteners at the two locations marked B in Figure 7-1.
The 2-D fasteners should line up exactly with the edges. Use two
chassis screws per 2-D fastener.