Figure 23 port binding dialog box, 23 port binding dialog box – HP StorageWorks 2.140 Director Switch User Manual
Page 68
Monitoring and managing the director
68
• Speed—Either 1 Gb/s or 2 Gb/s.
•
Block Port—Click this option to display a check mark and block port transmission. If blocked, a
node attached to the port is prevented from logging into the director or communicating with
other devices attached to director ports. A blocked port continuously transmits off line signals
(OLS). Click to remove the check mark and unblock the port. If unblocked, a node attached to
the port can communicate with the director and communicate with other nodes attached to the
director.
•
Enable Beaconing—Click this option to make the amber LED by the port blink on the actual
director and the amber indicator blink for the port in the Hardware view. This enables users to
locate the unit where the port is located. When a blinking amber LED indicator is displayed by
a port, an attention indicator ( ) is displayed below the port's connector in the Port Card view,
Port List view, and on the Port card in the Hardware view. Note that beaconing cannot be
enabled for a failed port.
•
Port(s) Diagnostics—Click this option to display the Port Diagnostics dialog box. Use this dialog
box to run an internal loopback and external loopback test on the port. The Port(s) Diagnostics
option enables you to run internal and external loopback tests on any port or all ports on a port
card. To use this option, follow the detailed steps in the HP StorageWorks Director 2/64 service
guide for the Director 2/64 and the HP StorageWorks Director 2/140 service guide for the
Director 2/140.
•
Swap Ports—Click this option to display the Swap Ports dialog box. Use this dialog box to swap
addresses between ports. For details, see ”
•
Clear Link Incident Alert(s)—Click this option on the port’s right-click menu on the Port Card view
and the Port List view to display the Clear Link Incident Alert(s) dialog box. Click This port only to
clear the attention indicator for the selected port on the Hardware view, the Port List view, and
the Performance view. Click All ports on director to clear all ports. In addition, the procedure
clears the alert description in port Properties dialog boxes. If there are no link incident alerts set
for a port, no actions occur. Although you can manually clear link incidents, they may also be
cleared by actions outside of the user interface, such as when rebooting the HAFM appliance.
•
Reset Port—Click this option to display a confirmation dialog box. Click Yes to reset the port. If a
switch is attached to the port and on line, this operation sends a link reset to the attached switch;
otherwise, this action disables port beaconing for the port. If the port is in a failed state, such as
after failing a loopback test, the reset restores the port to an operational state, clearing the
service required (amber) LED. The reset does not affect other ports in the director.
•
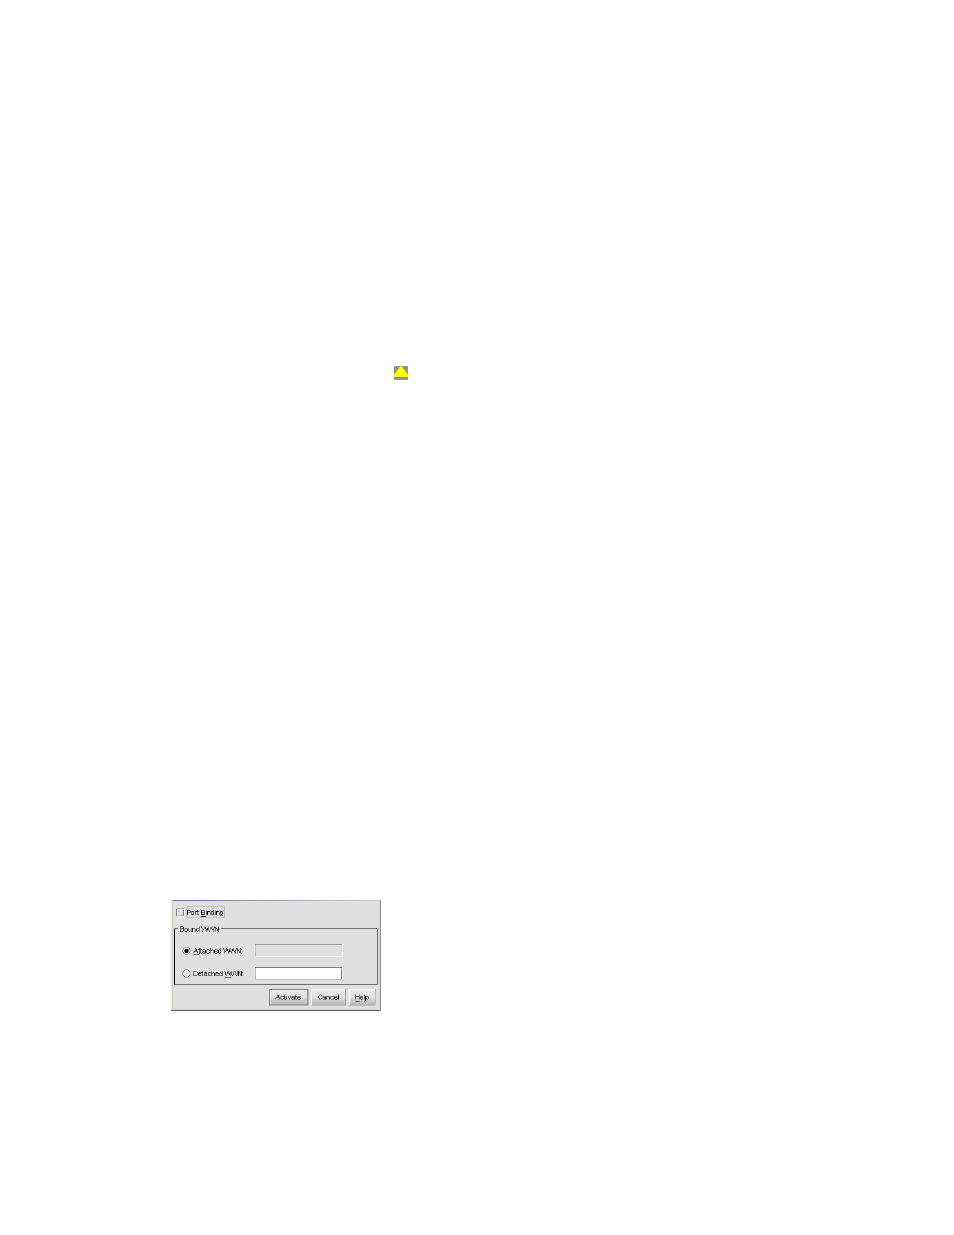
Port Binding—Right-click any port in the Port Card view right-click menu and select Port Binding
to display the Port Binding dialog box, as shown in
on page 68. Use this dialog box
to allow a device with a specific WWN or nickname to have exclusive communication privileges
over a port. To use this dialog box, see the following paragraphs.
Figure 23
Port Binding dialog box