Bulletin f-70 – Dwyer UXF2 User Manual
Page 34

- 24 -
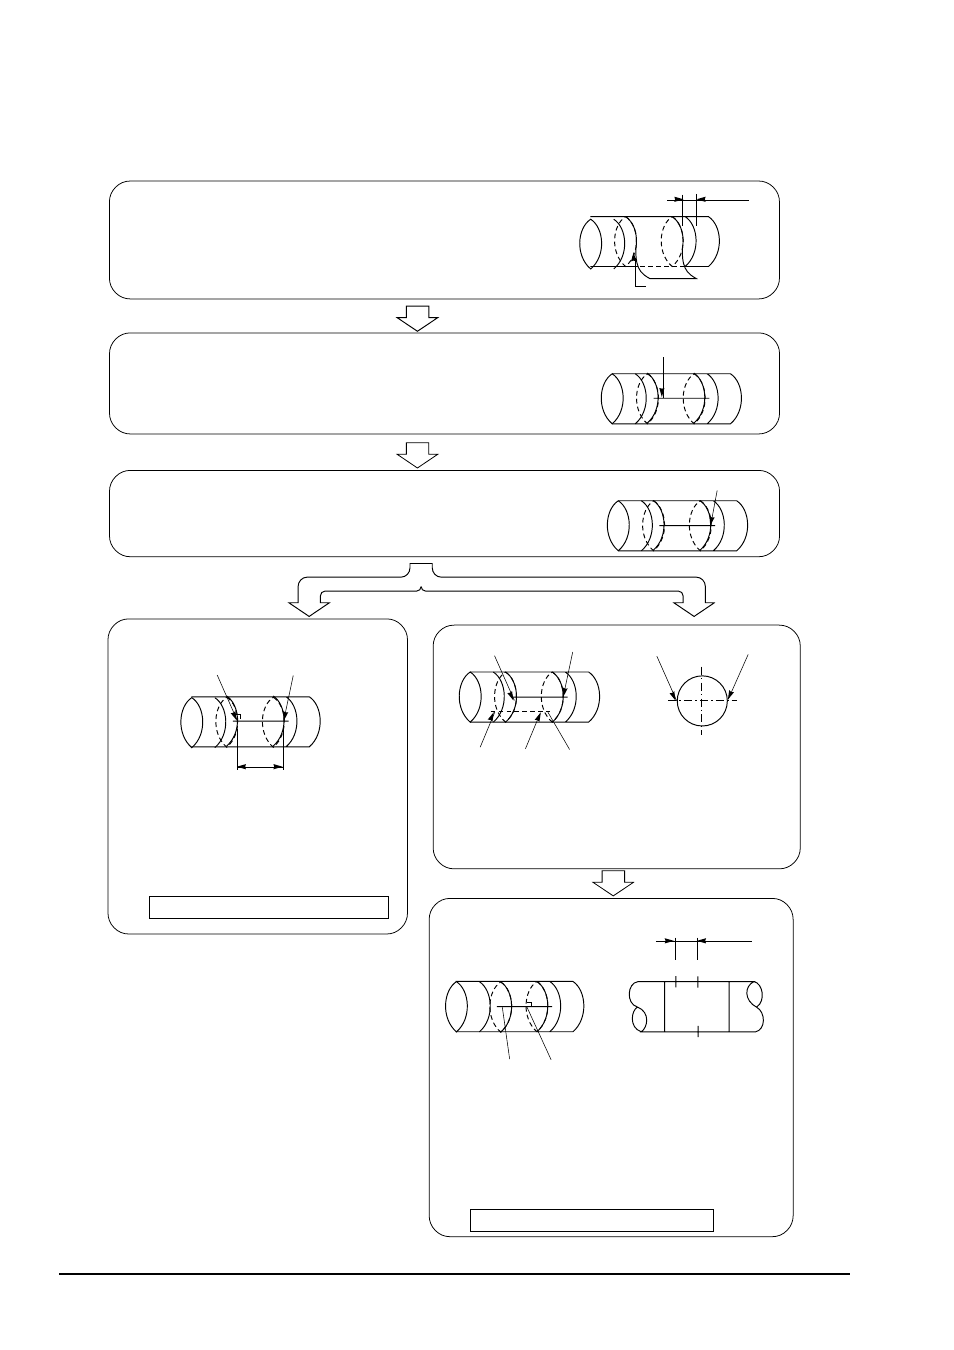
3.6.4. Determination of mounting position (with Z method for small type)
Carry out the following to determine the mounting position.
Gauge paper is necessary for this work. (Refer to 6.5. “How to make gauge paper”.)
(4)
Measure the circumference of the pipe from the
point A
0
, and mark a line (straight line B)
between the point B
0
and B
1
obtained at 1/2 of
the circumference.
A
0
A
1
B
1
B
0
Straight line B
A
0
, A
1
B
0
, B
1
(1)
Align the edge of gauge paper with a point about 100mm from
one end of the processed section, and wrap the paper around
the pipe so that the line drawn on the paper is parallel with the
pipe shaft. (The paper should be taped to prevent slipping.)
At this time, make sure that the paper edge is even.
Edge should be even.
100mm
Straight line A
A
0
Example) L = 200mm
(4)
Remove the gauge paper and measure
the mounting dimension from A
0
.
Then , draw a line which crosses the
straight line A (determine the position
A
2
).
A
0
and A
2
are the mounting position.
A
0
A
2
200mm
Example) L = 100mm
(5)
Put a mark at point B
0
and remove the gauge
paper.
Measure the mounting dimension from B
0
and
mark a line crossing the straight line B (determine
the position B
2
).
In this way, the mounting position is determined.
A
0
and B
2
are the mounting position.
B
0
B
2
B
2
B
0
A
0
100mm
V method
Z method
(2)
Extended the line drawn on the paper and mark a straight line A
on the pipe.
(3)
Mark a line along on edge of the paper. Assume the intersection of
the line and the straight line A is A
0
.
BULLETIN F-70
