5 config: misc ( warm-up (cdm-600 only), 10 config: remote (remote control), 5 config: misc æ warm-up (cdm-600 only) – Comtech EF Data CDM-600/600L User Manual
Page 102
CDM-600/600L Open Network Satellite Modem
Revision 3
Front Panel Operation
MN/CDM600L.IOM
5–26
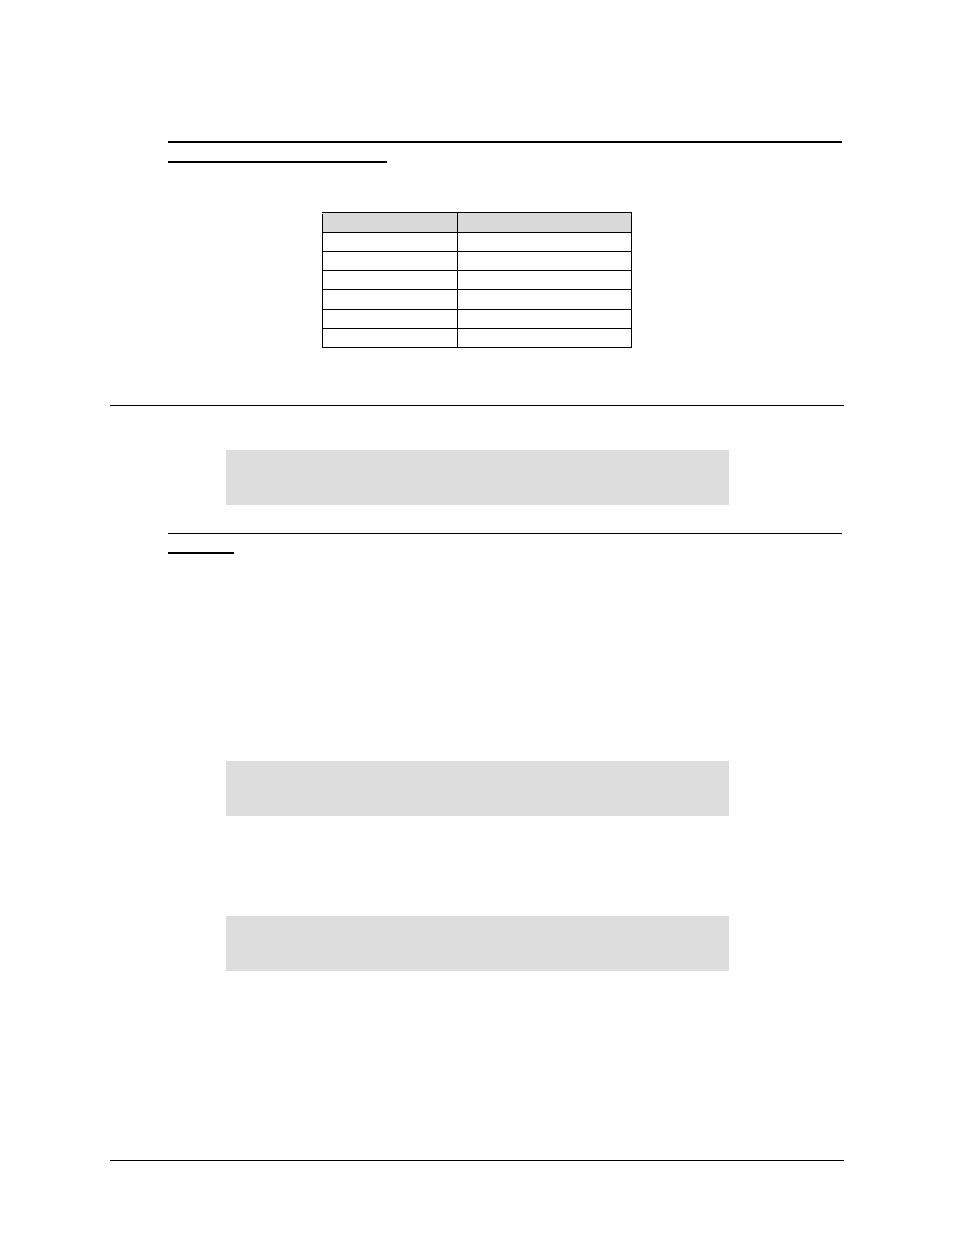
For CDM-600L units with Firmware Ver. 1.3.0 or higher, or for CDM-600 units with
Firmware Ver. 2.0.1 or higher: ESC++ is available as standard. Both Tx and Rx framing must
be set to ESC++. When enabled, the lower of the Tx or Rx primary data rate limits the maximum
baud rate, in accordance with the following table:
Data Rate (kbps)
Max ESC++ Baud Rate
≥ 64
4800
≥ 128
9600
≥ 192
14400
≥ 256
19200
≥ 384
28800
≥ 512
38400
See Chapter 10. ESC++ for more information on ESC++ framing.
5.4.9.5
CONFIG: Misc
Æ WARM-UP (CDM-600 ONLY)
HIGH-STAB REFERENCE POWER-UP WARM-UP:
NO DELAY(INSTANT-ON) (INSTANT-ON,DELAY)
For CDM-600 units with Firmware Ver. 1.4.0 or higher, and with a High-Stability module
installed: The High-Stability Reference Module contains an oven for the crystal. It can take a
little time for the oven & crystal to come up to temperature; during this time, the frequency
accuracy is not guaranteed.
This menu permits the user to select a Warm-up Delay, which will be implemented on power-up.
The delay is calculated by the modem, based on temperature and the amount of time the unit was
turned off. This is much more important at L-Band (950-195 MHz) than at 50-180 MHz, where
the 10 MHz reference may also be used for RF conversion equipment.
If the Warm-up Delay is enabled, when the modem is powered up, a Warm-Up Delay Countdown
will be activated, during which the Tx is suppressed. A countdown of the remaining Warm-up
Delay is displayed on the front panel, for example:
COMTECH CDM-600 OPEN NETWORK MODEM
HIGH-STABILITY REF WARMING UP: 045 SEC
If necessary, this warm-up period can be bypassed by pressing the [CLR] key.
5.4.10 CONFIG: REMOTE (Remote Control)
REMOTE CONTROL = LOCAL (LOCAL,REMOTE)
Select Local or Remote using the [
↑][↓] arrow keys, then press [ENT].
If Local is selected, then reconfiguration via Remote is not permitted. Remote monitoring is still
possible.
Selecting Local or Serial Remote displays the submenu that follows.