Splitting shape pattern, Creating a floral pattern, 42 editing embroidery designs – Baby Lock Palette 10 (ECS10) Instruction Manual User Manual
Page 43
42
Editing Embroidery Designs
B
asic
L
ayo
u
t & E
d
it
in
g
Op
e
rat
io
n
s
1
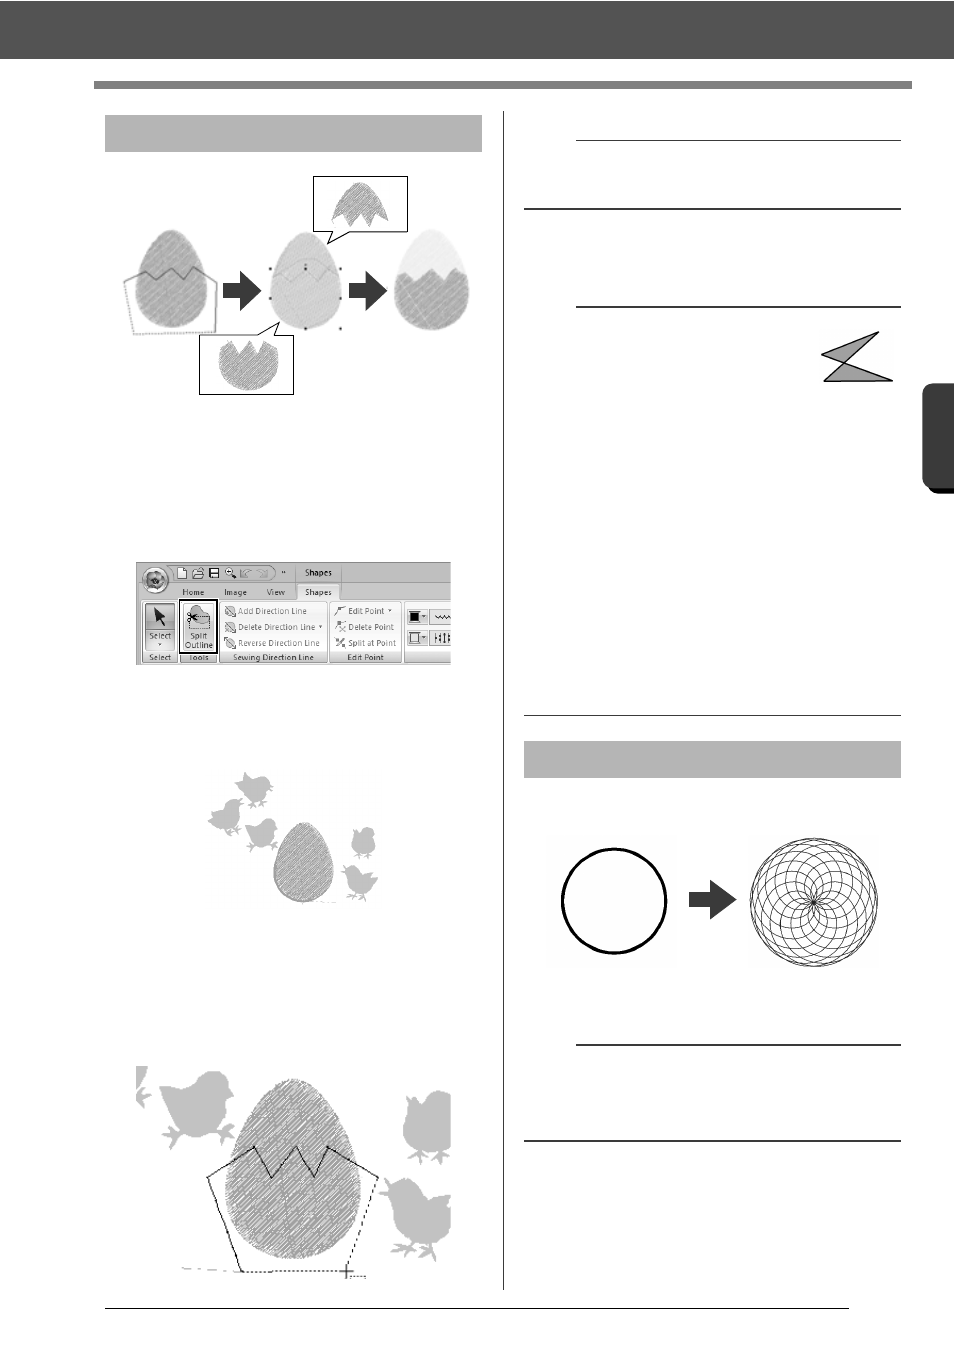
Select a shape pattern, and then click the
[Shapes] tab.
cc
For detail on the shape pattern, refer to
page 8
2
Click [Split Outline] in the [Tools] group to
select the [Split Outline] tool.
If the design contains overlapping patterns,
the selected pattern will appear in front of
the others. All patterns other than the
selected pattern will appear in gray.
3
Click in the Design Page at the point where
you want to start drawing the enclosing lines.
4
Continue clicking in the Design Page to
specify each corner of the enclosure around
the area to be cut off.
5
Double-click in the Design Page to specify the
section to be split off.
Line stitching in a floral pattern can be created
based on the selected shape.
1
Draw a shape, and then select it.
2
Click the [Shapes] tab.
Splitting Shape pattern
b
To remove the last point that was entered, right-
click the mouse button.
a
• Only closed patterns with no
intersecting lines can be split. The
pattern shown at the right cannot be
split.
• The inside pattern with hole sewing applied
cannot be split.
• If the enclosing line that was drawn intersects
itself, the section cannot be split off, and a
message appears.
• After splitting a pattern with fit text to outline
applied, fit text to outline will be canceled.
• If the entered patterns are not in the desired
sewing order, change it in the [Sewing Order]
pane.
cc
"Sewing order optimization" on page 83, and
"Changing colors" on page 85
cc
"Checking and Editing the Sewing Order" on
page 82
Creating a floral pattern
a
Be sure to select a closed line.
cc
"Changing the attributes of line ends" on
page 64