Tutorial 6-4: photo stitch 2 – Baby Lock Palette 10 (ECS10) Instruction Manual User Manual
Page 145
144
C
re
a
ting Embr
oide
ry
Pa
tte
rns
Us
ing Ima
ge
s
Tutorial 6-4: Photo Stitch 2
Tutorial 6-4: Photo Stitch 2
We will create an embroidery pattern with [Photo Stitch 2] in a method different than that used with [Photo
Stitch 1]. Although this embroidery pattern will also be created from a photo, this type of embroidery pattern
contains repeating zigzag stitches. This produces a more general rendering than with [Photo Stitch 1];
however, the data is created with well-regulated stitching.
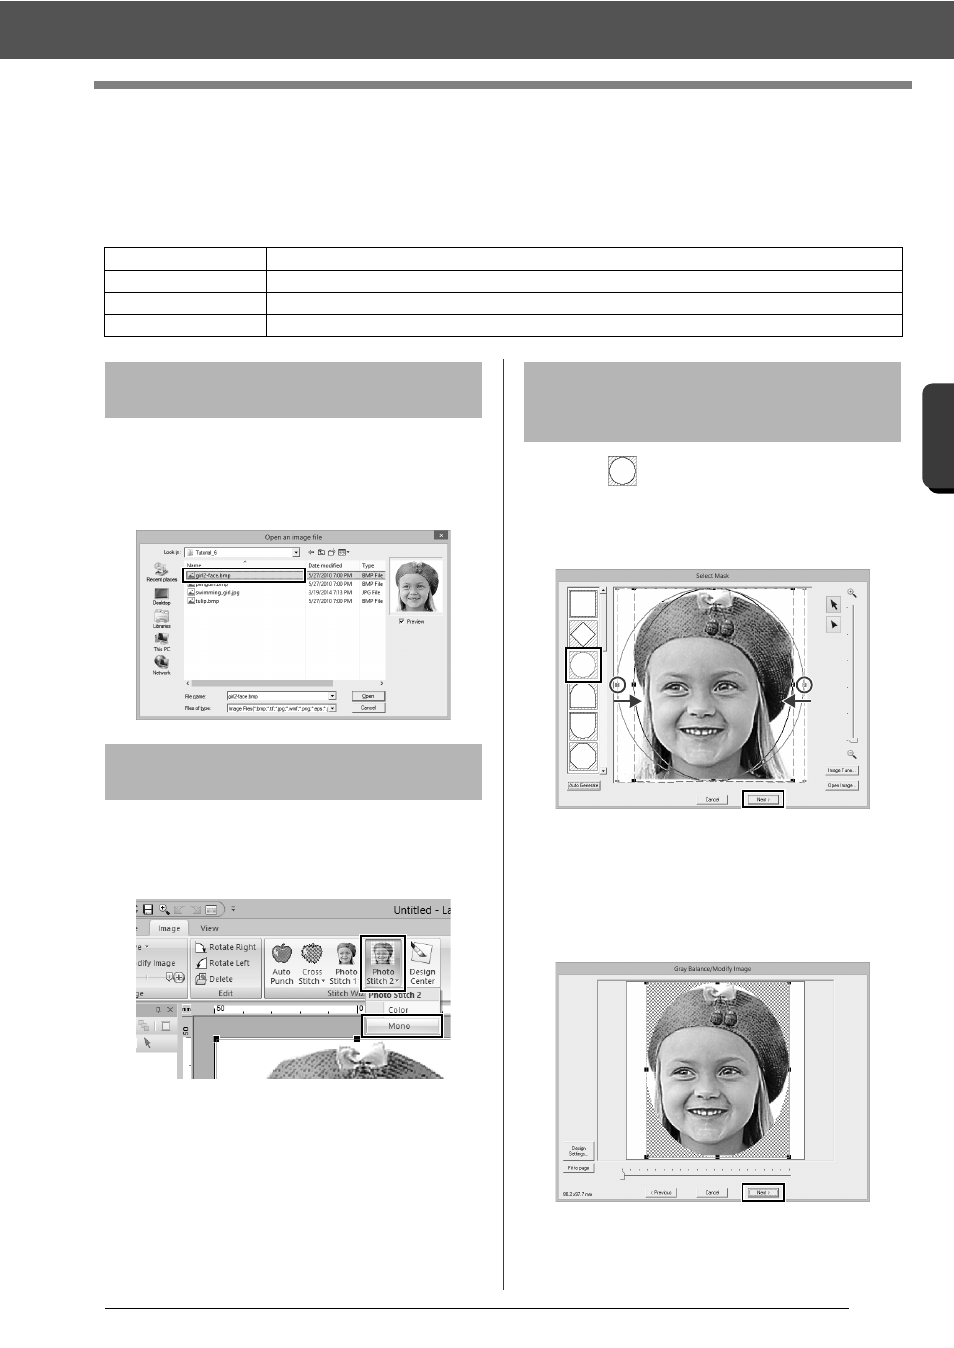
Select the [Tutorial_6] folder, and then select
[girl2- face.bmp] as the image.
cc
"Importing image data into Layout &
Editing" on page 132
1
Click the [Image] tab.
2
Click [Photo Stitch 2] in the [Stitch Wizard]
group, and then click [Mono].
1
Click
to select the circle mask.
Drag handle to adjust the size of the mask,
and drag the mask to adjust its position.
Click [Next].
cc
"Select Mask dialog box" on page 147
2
From this dialog box, the size and position of
the image can be adjusted. For this example,
we will simply continue to the next step.
Click [Next].
cc
"Check Mask Shape/Modify Image dialog
box" on page 148 and "Gray Balance /
Modify Image dialog box" on page 149
Step 1
Importing photo data into Layout & Editing
Step 2
Starting the Photo Stitch 2 wizard
Step 3
Applying an image mask and adjusting its size and position
Step 4
Changing the sewing angle
Step 1
Importing photo data into
Layout & Editing
Step 2
Starting the Photo Stitch 2
wizard
Step 3
Applying an image mask
and adjusting its size and
position