Step 3 specifying hole sewing – Baby Lock Palette 10 (ECS10) Instruction Manual User Manual
Page 27
26
Tutorial 1: Drawing shapes to create an embroidery design
B
asic
L
ayo
u
t & E
d
it
in
g
Op
e
rat
io
n
s
2
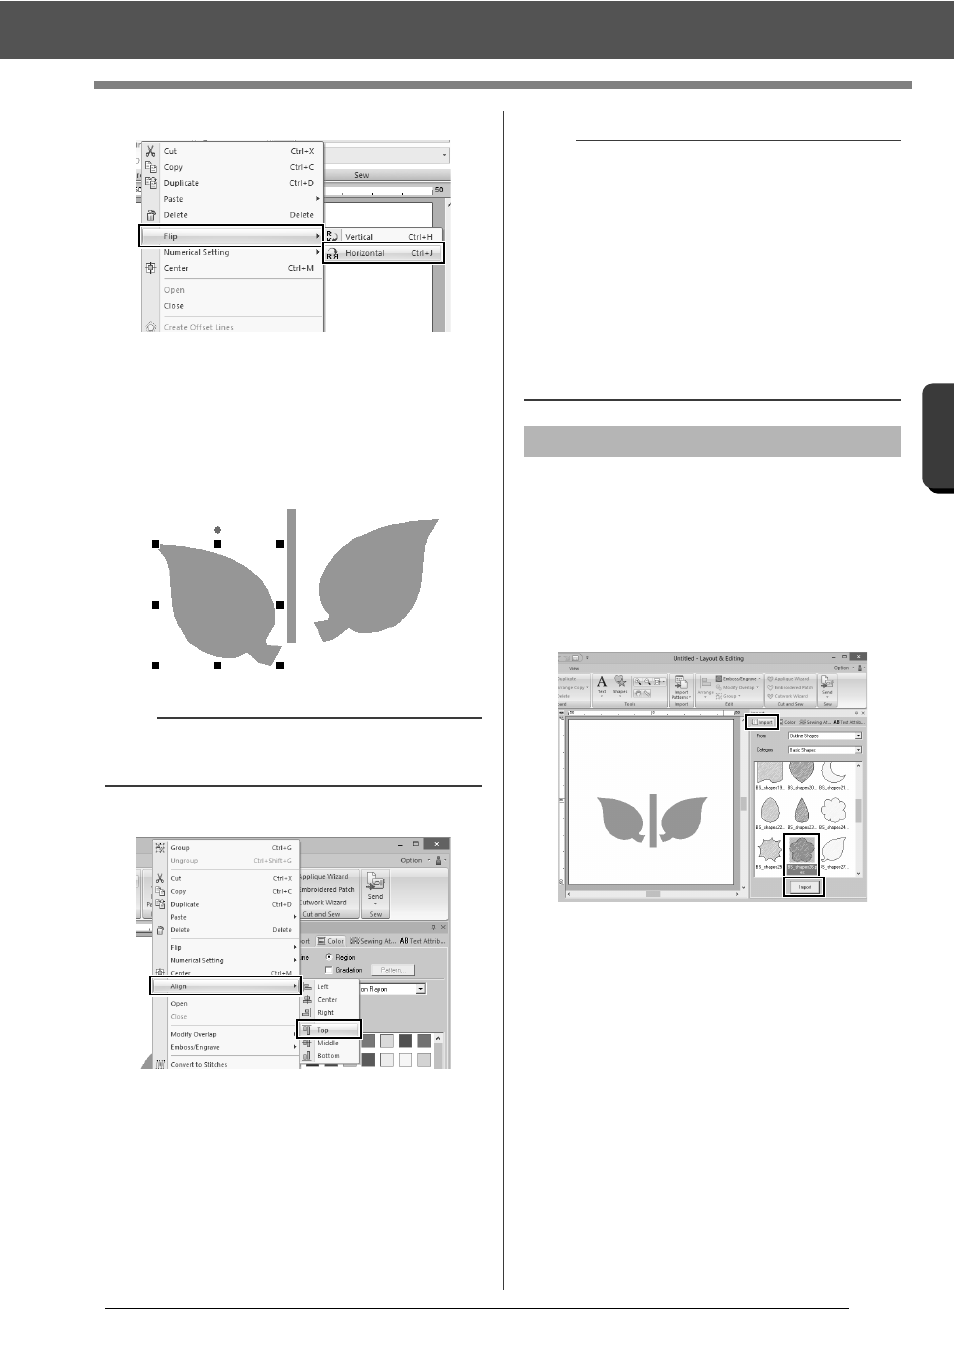
To flip the duplicated leaf horizontally.
(A) Right-click on the duplicated leaf.
A drop down menu will appear.
(B) Click [Flip], then [Horizontal].
3
Drag the duplicated leaf to the left side of the
stem.
4
Align the leaves on the left and right sides.
(A) While holding down the
the leaf on the right side, then the leaf on
the left side to select the two leaves.
Then, right-click the selected leaves.
(B) Right-click the leaves, and then click
[Align], then [Top].
Now, we will create the flower and a circle at the
center. Then, we will apply a setting so that the
overlapping areas are not sewn twice.
1
Create the flower petals.
(A) Click the [Import] tab.
(B) Select [BS_shapes26.pes], and then
click [Import].
(C) Click the [Shapes] tab.
b
To move an object horizontally, hold down the
b
• Multiple embroidery patterns can be selected in
any of the following ways.
Click the first pattern, and then, while holding
down the
Drag the pointer to draw a selection frame
around the patterns to be selected.
• Flipped copies can also be created by clicking
[Arrange Copy] in the [Clipboard] group of the
[Home] tab, then clicking [Vertical Mirror
Copy].
cc
"Using the Mirror Copy tool" on page 35.
Step 3
Specifying hole sewing