Step 2 using the cutwork wizard – Baby Lock Palette 10 (ECS10) Instruction Manual User Manual
Page 171
170
O
p
er
at
io
n
s f
o
r S
p
eci
fic Ap
p
lic
at
io
n
s
Tutorial 8-3: Creating a Cutwork Pattern Filled with Net Stitching
3
Enlarge the pattern imported into the Design
Page.
4
Ungroup the pattern. Select the pattern,
right-click it, and then click [Ungroup].
1
Select the four leaves, and then click the
[Home] tab.
2
Click [Cutwork Wizard] in the [Cut and Sew]
group to start the [Cutwork Wizard].
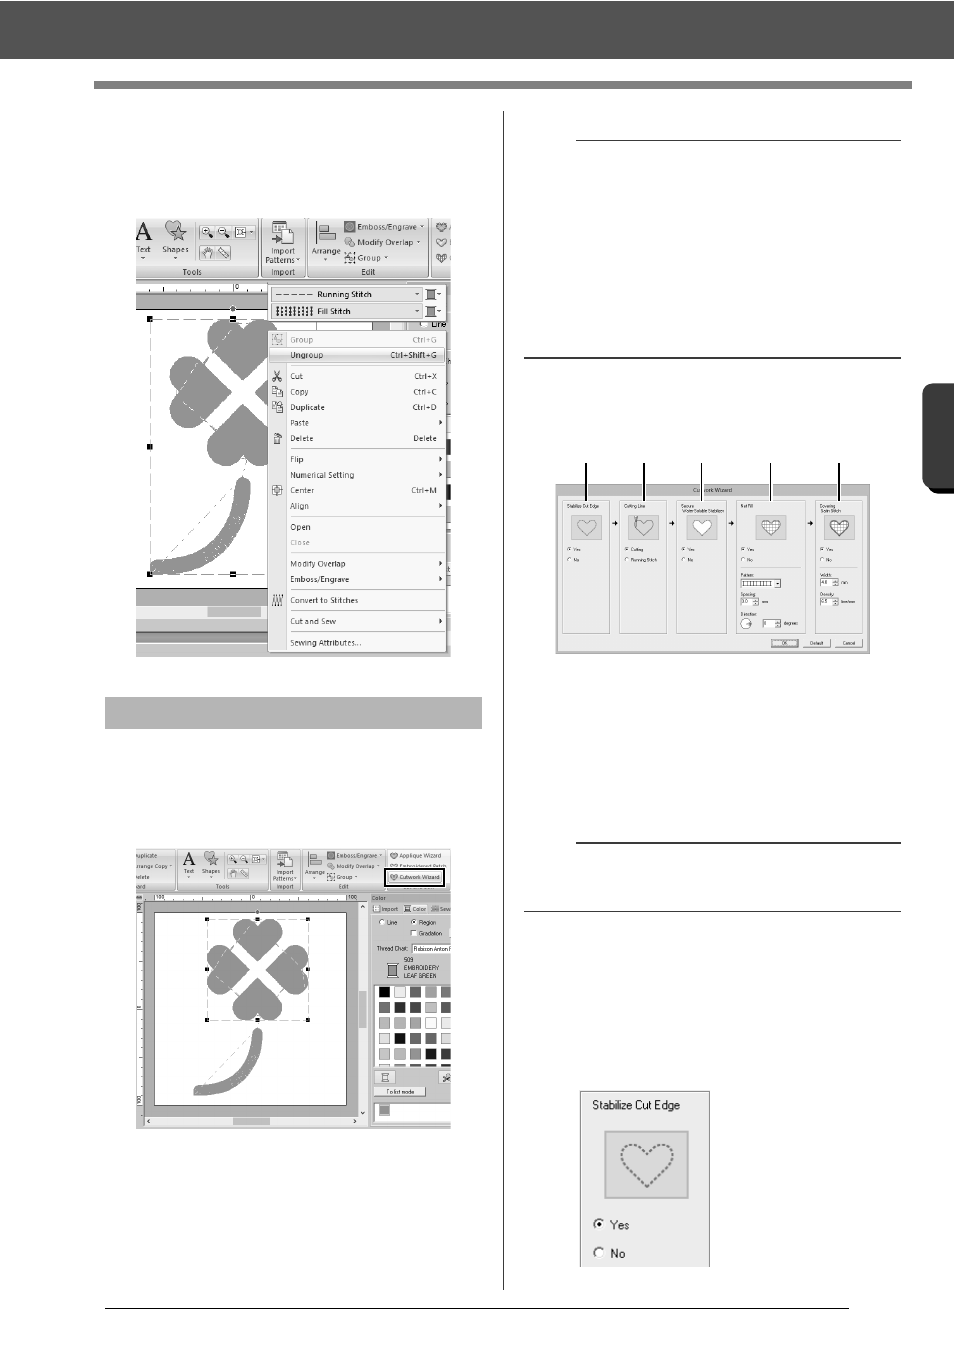
3
Specify settings in the [Cutwork Wizard] in
the following order
a
-
e
.
a
Stabilize Cut Edge
b
Cutting Line
c
Secure Water-Soluble Stabilizer
d
Net Fill
e
Covering Satin Stitch
4
Specify running stitching along the edge
before cutting in [Stabilize Cut Edge].
By specifying that running stitches be sewn
before the fabric is cut, the cut edges are
reinforced, preventing them from unraveling.
For this example, select [Yes].
Step 2
Using the Cutwork Wizard
b
• The [Cutwork Wizard] can also be used if
closed shape patterns or text patterns are
selected.
• If a line of the pattern crosses itself, the
[Cutwork Wizard] will not be available.
• Text with built-in font 025 or 029 or a user-
defined font cannot be used.
• Shape patterns and text patterns cannot be
combined.
b
To return all parameters to their default settings,
click [Default].
a
b
c
d
e