Working with keyframes in the timeline, P. 288) – Apple Color 1.0 User Manual
Page 288
288
Chapter 14
Keyframing
Working with Keyframes in the Timeline
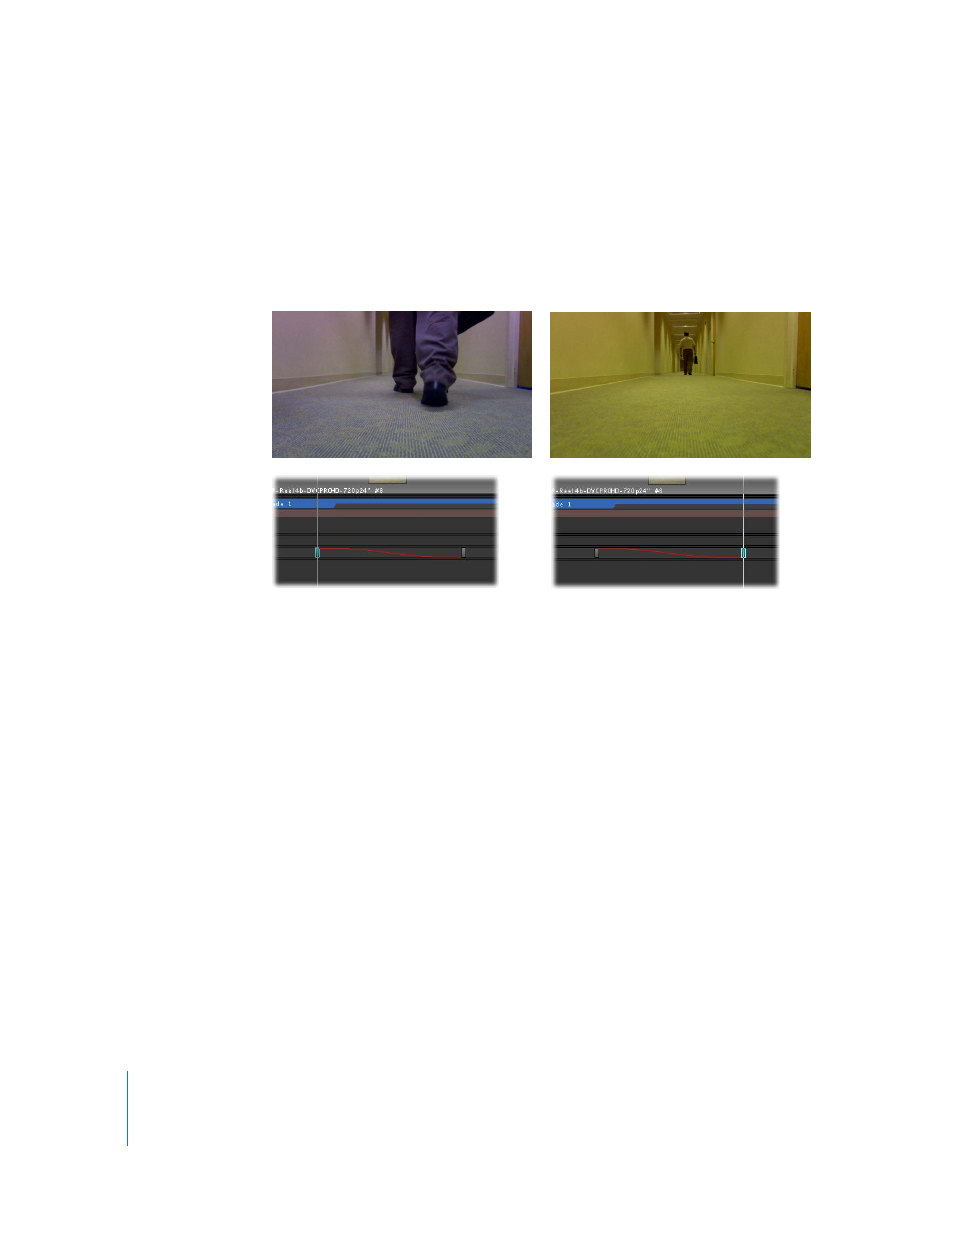
It takes a minimum of two keyframes to animate an effect of any kind. Each keyframe
you create stores the state of the room you’re in at that frame. When you’ve added two
keyframes with two different corrections to a room, Color automatically animates the
correction that’s applied to the image from the correction at the first keyframe to the
correction at the last.
Once you add a keyframe to a shot in a particular room, you can only edit the controls
and parameters in that room when the playhead is directly over a keyframe. If you
want to make further adjustments to a keyframed shot, you need to move the
playhead to the frame at which you want to make an adjustment and add another
keyframe. Then you can make the necessary adjustments while the playhead is over
the new keyframe.
To add a keyframe for the currently open room:
m
Choose Timeline > Add Keyframe (Control-9).
Once you’ve added one or more keyframes, you can use a pair of commands to quickly
move the playhead to the next keyframe to the right or left.
To move the playhead from one keyframe to the next in the currently open room,
do one of the following:
m
Press Option-Left Arrow to move to the next keyframe to the left.
m
Press Option-Right Arrow to move to the next keyframe to the right.
m
Control-click in the keyframe graph of the Timeline, then choose Next Keyframe or
Previous Keyframe from the shortcut menu.
Keyframes that are at the current position of the playhead appear highlighted.
You can delete keyframes you don’t need.