Configuring identification, Figure 31 configure identification dialog box, 31 configure identification dialog box – HP StorageWorks 2.64 Director Switch User Manual
Page 90
Configuring the director
90
Configuring identification
Use the procedure in this section to identify the director by its name, description, location, and
contact person. This information displays in the following Element Manager locations:
•
Element Manager window title panel (name).
•
Director Properties dialog box (name, location, contact, description).
•
Identification table at the top of the Hardware view (name, location, description).
The name also displays in the director icon labels in HAFM’s Physical Map/ topology if the
product name is enabled through the drop-down display list on HAFM’s tool bar.
Data entered through the following procedure is saved in nonvolatile random access memory
(NV-RAM) on the director.
To configure identification for the director, use the following steps:
1.
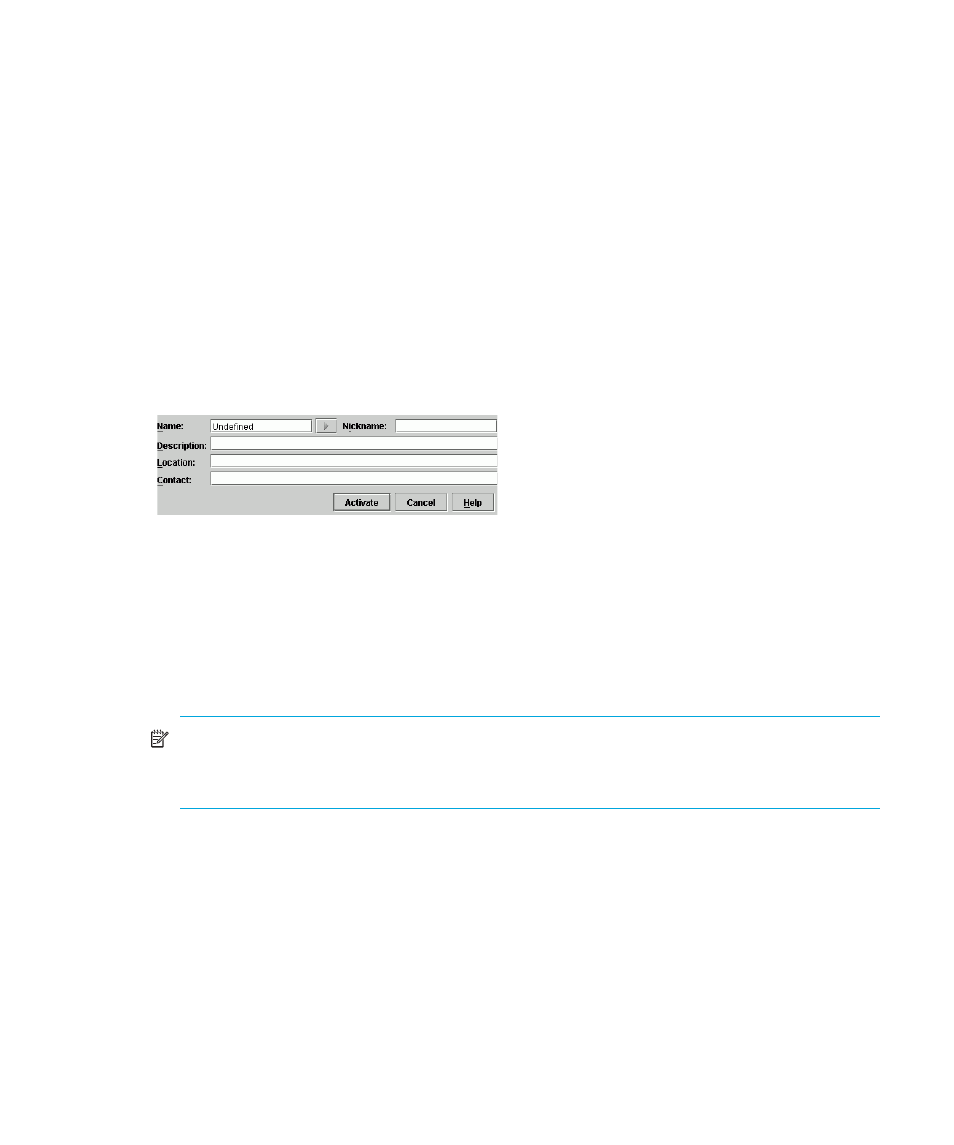
Click Configure > Identification. The Configure Identification dialog box displays.
Figure 31
Configure Identification dialog box
2.
Enter a name for the director in the Name field (24 alphanumeric characters maximum). The
name could reflect the director’s Ethernet network domain name service (DNS) host name, if
assigned.
3.
Enter a enter a nickname for the director of up to 32 alphanumeric characters in the Nickname
field. The nickname will display instead of the WWN in Element Manager views. (You can
configure a maximum of 2,048 nicknames.
NOTE:
You can click the right arrow in front of this field if you want to use the name in the
Name field as a nickname for the director’s WWN. The nickname then displays instead of
the WWN in Element Manager views.
4.
Enter a description of the director in the Description field (255 characters maximum).
5.
Enter the location of the director in the Location field (255 characters maximum).
6.
Enter appropriate information about a contact person, such as a phone number, title, or e-mail
address, in the Contact field (255 characters maximum).
7.
Click Activate to save the data and close the dialog box.
8.
If you are finished configuring the director, back up the configuration data. For more
information, see ”