Fujitsu Ricoh Fujitsu N7100E Network Image Scanner User Manual
Page 73
4.2 Administrator Login
73
1. Start the Admin Tool.
Windows Server 2012
Right-click the Start screen, and select [All apps] on the app bar
[Network
Scanner Admin Tool] under [Network Scanner].
Windows Server 2012 R2
Select [
↓
] on the lower left of the Start screen, and click [Network Scanner Admin
Tool] under [Network Scanner].
To display [
↓
], move the mouse cursor.
Windows 10/Windows Server 2016/Windows Server 2019/Windows Server 2022
Select [Start] menu
[Network Scanner]
[Network Scanner Admin Tool].
Windows 11
Select [Start] menu
[All apps]
[Network Scanner]
[Network Scanner Admin
Tool].
The Admin Tool is started.
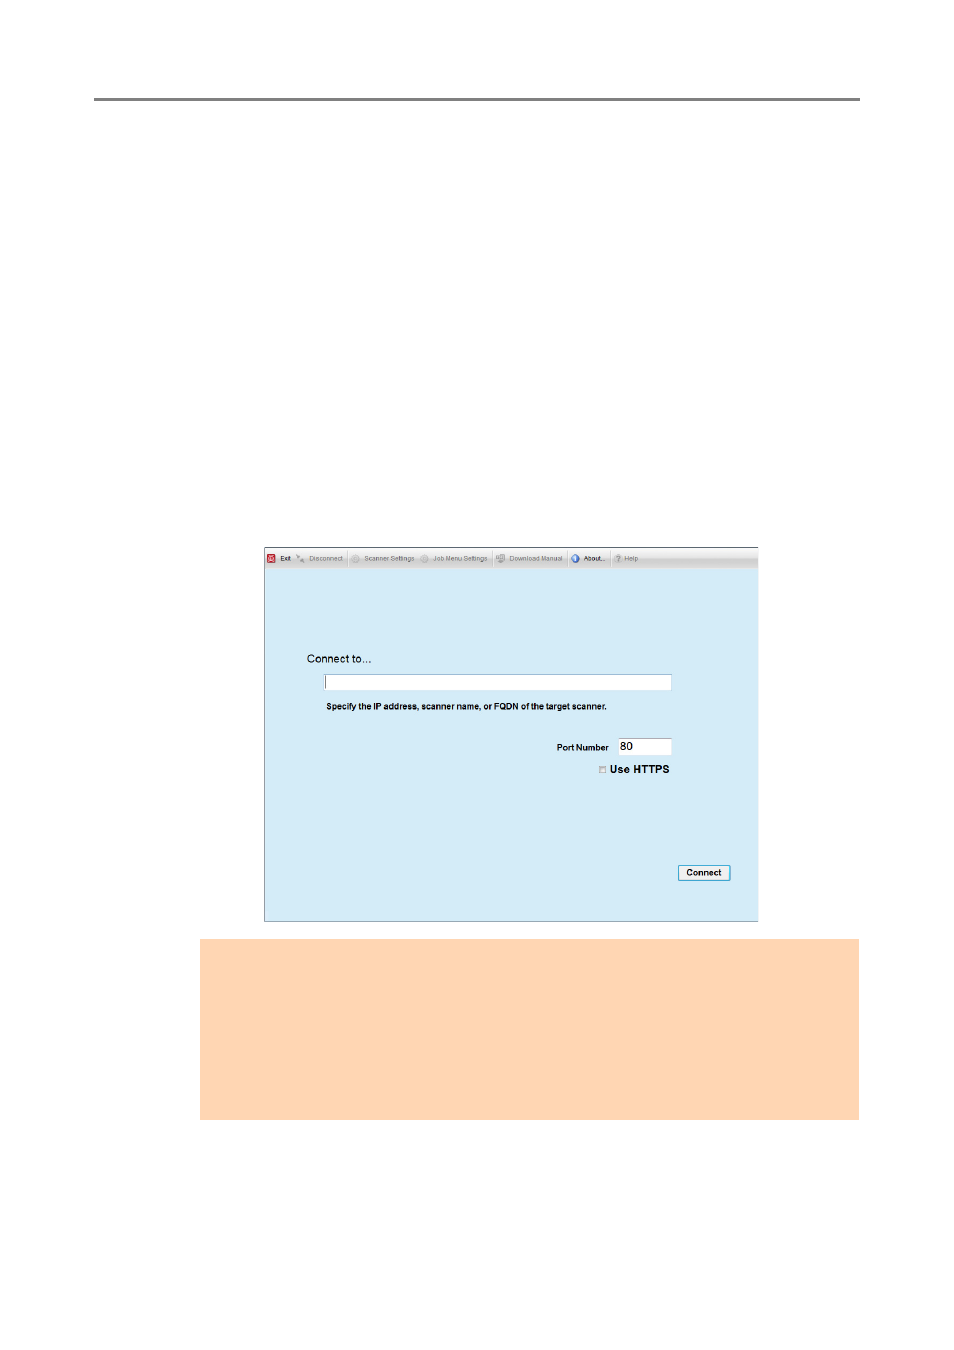
2. Specify the [Connect to] (of the scanner).
Enter the IP address, scanner name, or FQDN for the scanner to be setup or
managed.
3. Press the [Connect] button.
The login window appears.
4. Enter a [User Name] and [Password].
ATTENTION
If the port number was changed in
"4.9.1 Setting the Admin Connection" (page 110)
,
enter the changed port number in [Port Number].
When trying to connect with a port number other than the specified number, it takes up
to 20 seconds before a connection error occurs.
To use SSL, select the [Use HTTPS] check box.
If the Admin Tool is started while there is insufficient free memory, an error may occur.
Try again after ensuring that there is enough free memory.