G.3 configuring ipv6 communication environment, G.3.1 giving the scanner an ipv4 address, P.457) – Fujitsu Ricoh Fujitsu N7100E Network Image Scanner User Manual
Page 457: G.3.1 giving the, Scanner an ipv4 address" (p.457)
G.3 Configuring IPv6 Communication Environment
457
G.3 Configuring IPv6 Communication
Environment
If you set [IPv6 Function] to [On] on the window that is displayed when [Network
Advanced Settings] under [Network Settings] is selected, the menu that is displayed on
the window is switched to the menu that supports the enabled IPv6 function so that the
settings related to IPv6 can be specified.
This section describes the windows with the setting items that are changed when the IPv6
function is enabled.
"G.3.1 Giving the Scanner an IPv4 Address" (page 457)
"G.3.2 Giving the Scanner an IPv6 Address" (page 458)
"G.3.3 Setting the DNS Server (IPv4)" (page 460)
"G.3.4 Setting the DNS Server (IPv6)" (page 461)
"G.3.5 Checking the Network Operating Status" (page 462)
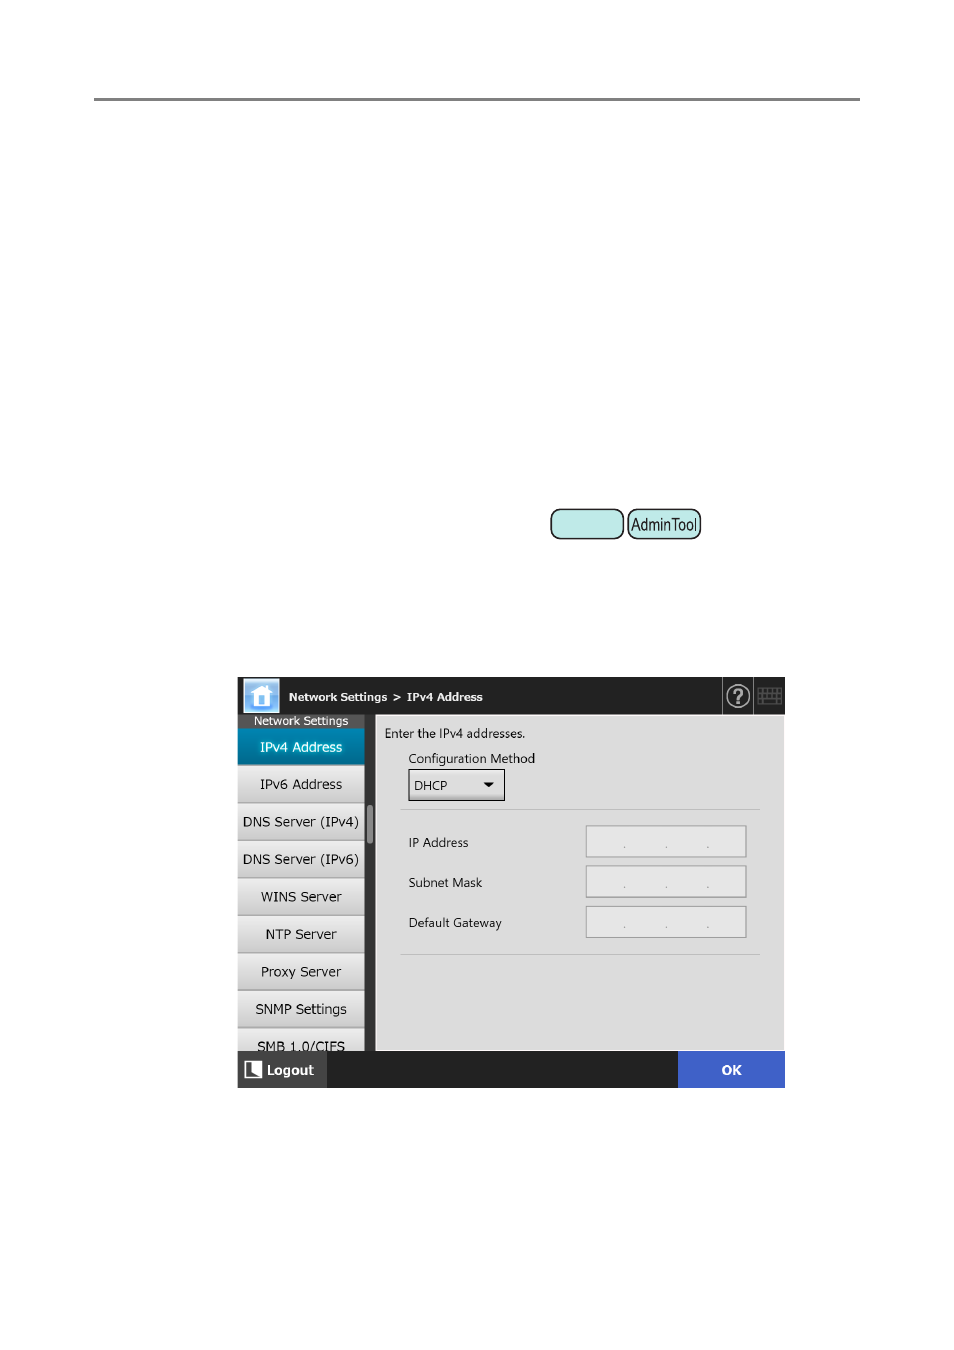
G.3.1 Giving the Scanner an IPv4 Address
An IPv4 address must be set in order to connect the scanner to a network.
1. Select [IPv4 Address] under [Network Settings].
The [IPv4 Address] window appears.
2. Specify each item.
3. Press the [OK] button.
The information entered is set.
Touch
Panel