Fujitsu Ricoh Fujitsu N7100E Network Image Scanner User Manual
Page 262
5.7 Saving the Scanned Data to a Network Folder
262
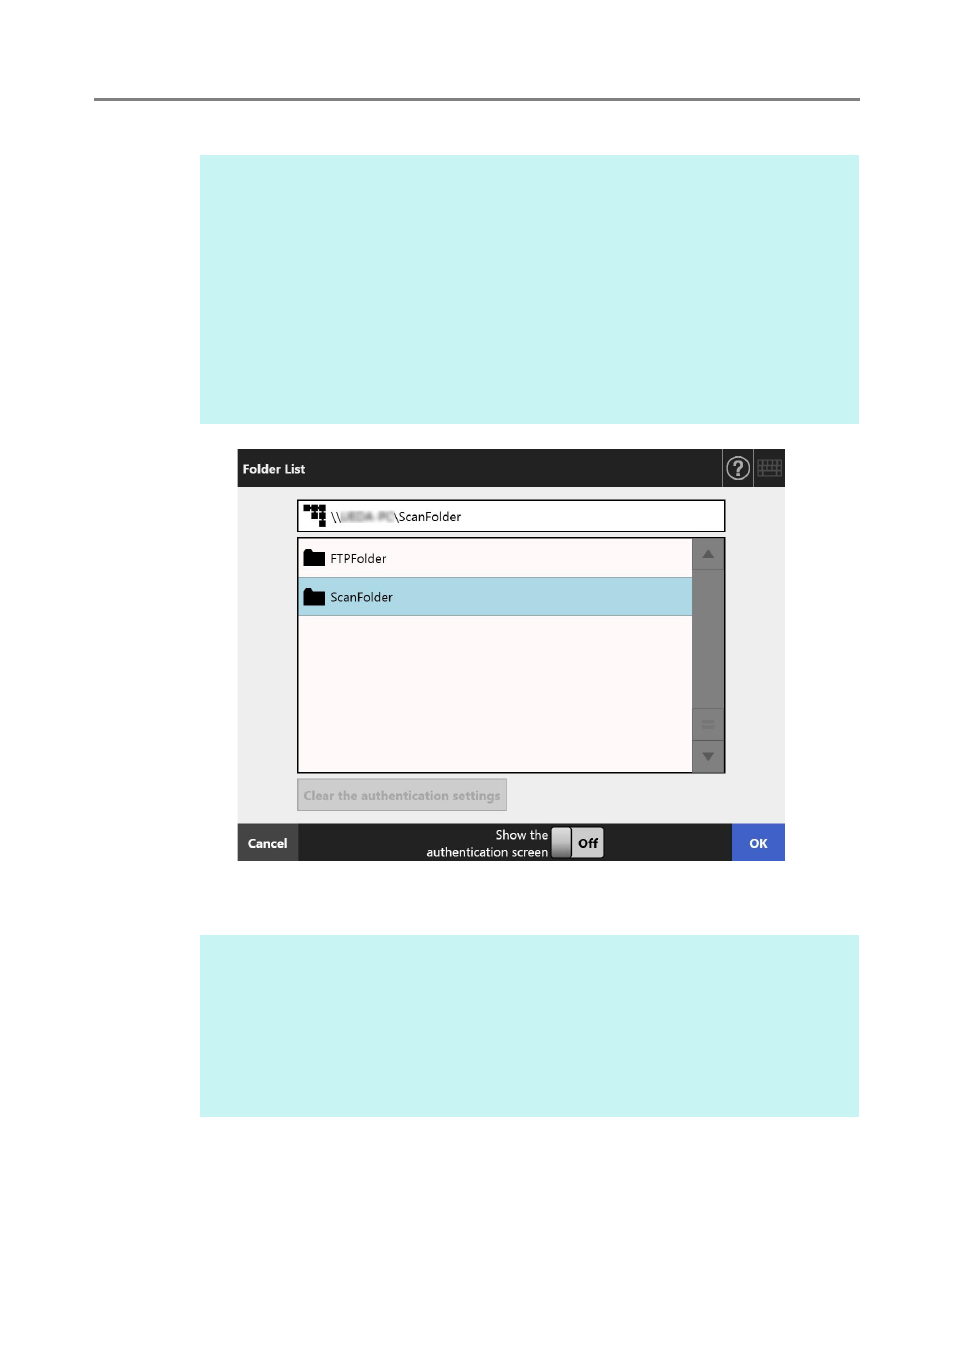
3. Select a folder for saving the scanned data.
4. Press the [OK] button.
This returns you to the [Save] window.
5. In the [Save as] field, enter a file name for the scanned data to be saved.
6. Select whether or not to overwrite an existing file with the same name.
Whether or not the file was successfully saved can be checked in the user log.
HINT
You can select a folder from the list of folders that are added by the administrator in
advance. To change the folders in the list, contact the administrator.
For more details about adding network folders, refer to
.
For more details about adding FTP server folders, refer to
For more details about adding SharePoint folders, refer to
SharePoint Folders" (page 140)
If the [Clear the authentication settings] button is enabled, you can clear the
authentication information that you have set for the selected network folder, the
selected FTP server folder or the selected SharePoint folder.
HINT
If the [File Server Authentication] window appears, enter authentication information
needed to access the file server, FTP server or SharePoint server, and press the [OK]
button.
If you select [On] for [Show the authentication screen] and then press the [OK] button,
the authentication window for the selected network folder, the selected FTP server
folder or the selected SharePoint folder appears. You can change the authentication
information on this window.