TA Triumph-Adler DC 2020 User Manual
Page 12
1-4
Section 1 Basic Use of this Fax
^
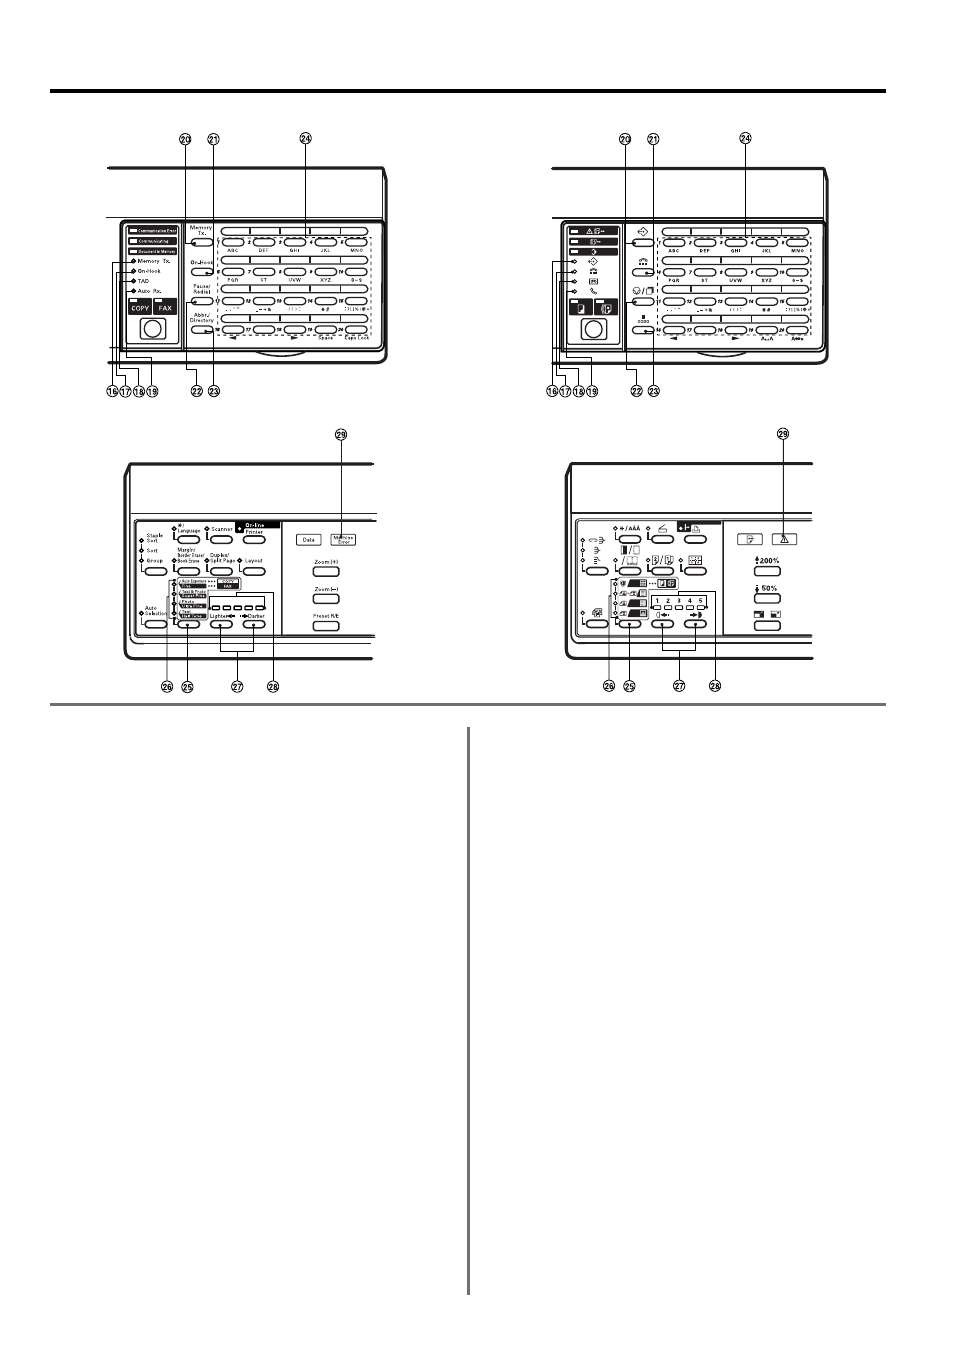
Memory Tx. [MEMORY TX.] indicator…When this indicator is lit,
the fax is in the Memory Transmission mode. When the indicator
is out, the fax is in the Direct Feed Transmission mode.
&
On-Hook [ON-HOOK] indicator…When a separately purchased
telephone is connected to this fax machine and this indicator is lit,
the On-Hook [ON-HOOK] key has been pressed while the
telephone receiver is still “on the hook”, thereby enabling dialing
without the need to pick up the receiver.
*
TAD [MESSAGE TEL.] indicator…When this indicator is lit, the
fax is in the TAD Reception mode.
(
Auto Rx. [MANUAL RX.] indicator
• Inch version: When this indicator is lit, the fax is in the Auto Fax
Reception mode.
• Metric version: When this indicator is lit, the fax is in the Manual
Fax Reception mode].
)
Memory Tx. [MEMORY TX.] key…Press this key when you want
to switch between the Memory Transmission and Direct Feed
Transmission modes.
⁄
On-Hook [ON-HOOK] key…When a separately purchased
telephone is connected to this fax machine, press this key when
you want to dial without picking up the telephone receiver.
¤
Pause/Redial [PAUSE/REDIAL] key…Press this key when the
fax is in the Direct Feed Transmission mode and you want to
have the fax automatically redial the most recently dialed number.
Press this key also while entering a fax number when you want to
insert a pause of a few seconds at that point in dialing. A pause is
indicated by a dash ( - ) in the message display.
‹
Abbr./Directory [ABBR./DIRECTORY] key…Press this key
when you want to dial with abbreviated numbers or you want to
access the directory.
›
One-touch keys (No. 1 - No. 32)…32 one-touch keys are
available for use with this fax. Lower the cover plate when you
want to access one-touch keys No. 1 - No. 20 and raise the cover
plate in order to access one-touch keys No. 21 - No. 32. You can
designate each of the keys to function as either a one-touch key,
a program key, a group dial or a chain dial key. Use these keys
as well during the registration of destination names, etc.
fi
Resolution select key…Press this key when you want to select
the degree of resolution at which the documents will be
transmitted.
fl
Resolution indicators…Select among the 5 available resolution
settings: Normal, Fine [FINE], Super Fine [SUPER FINE], Ultra
Fine [ULTRA FINE] and Half Tone [PHOTO MODE]. Ordinarily,
all of the resolution indicators will be out; and the Normal
resolution is thus selected. If you want to use any resolution other
than Normal, press the resolution select key until the resolution
indicator that corresponds to the desired resolution is lit.
‡
Contrast select keys…Press these key when you want to select
the degree of contrast, darker or lighter, at which the documents
will be scanned.
°
Contrast indicators…These indicators display the 3 available
levels of scanning contrast. Ordinarily, the middle indicator will be
lit. If you want to increase (darken) the contrast at which
documents are scanned, press the right contrast select key to
move the lit indicator towards the number “5”. If you want to
reduce (lighten) the contrast at which documents are scanned,
press the left contrast select key to move the lit indicator towards
the number “1”.
·
Machine Error indicator…When this indicator is lit, a paper jam
or a mechanical error has occurred.
(Metric version)
(Inch version)
(Right portion, with cover plate lowered)
(Left portion)