Cub Cadet 6 x 4 Big Country User Manual
Page 99
Section 6: Front Suspension
6 - 4
2.14. With a helper holding the steering wheel,
attempt to pivot each tire around its steering
axis. If more than 1/8” of play is present, identify
the source of the play.
NOTE: Sources of play in this direction are:
worn or loose steering rack, worn wheel bear-
ings, worn or loose tie rod ends, worn joint
between the steering knuckle and the axle
assembly.
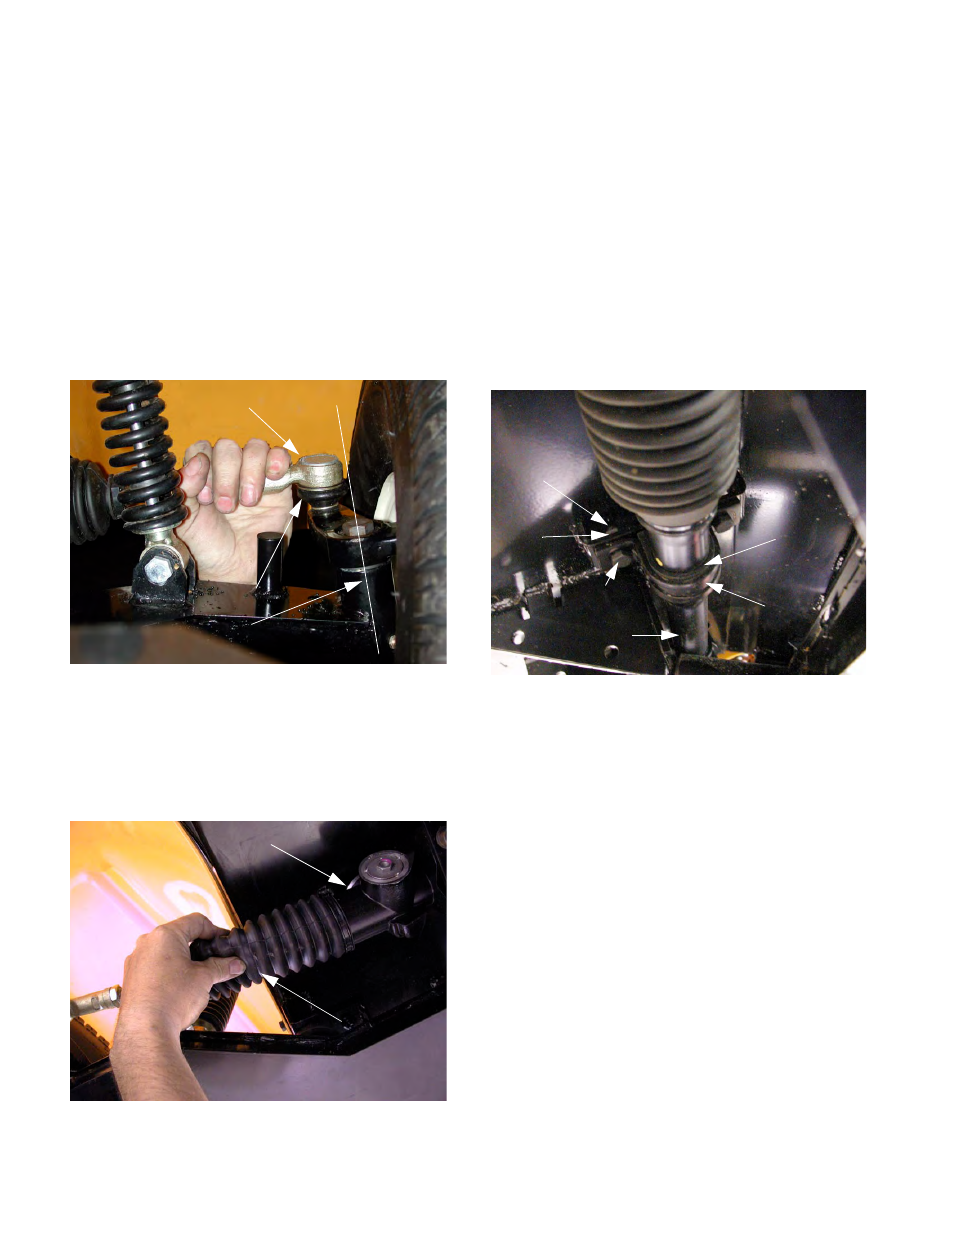
2.15. Grip the tie rod end, and apply up and down
pressure to it. There should not be excessive
play within the tie rod end. See Figure 2.15.
NOTE: Check the rubber boot around the
tapered stud of each tie rod end for tears.
2.16. Inspect the rubber boots on the steering rack.
2.17. Inspect the tie rods.
•
If either one is visibly damaged, the steering
rack should be replaced.
•
If the jam nut that locks either tie rod end in posi-
tion is found to be loose, check the toe angle
and tighten the jam nut. Refer to the “checking
and Adjusting Front Wheel Alignment” section of
this manual.
2.18. Check both steering rack mounts for loose hard-
ware, and inspect the rubber bushing that sur-
rounds the steering rack on the passenger side
steering mounting bracket. See Figure 2.18.
2.19. Turn the steering wheel to full lock in each direc-
tion, and return it to center. It should not bind or
make any unusual noises.
NOTE: If binding or noise are noticed, separate
the tie rod ends from the steering knuckles to
isolate the source. Refer to the “Tie Rod End
Removal and Replacement” section of this man-
ual.
2.20. Make a visual inspection of the steering rack.
Look for signs of leakage or obvious physical
damage.
2.21. Push the wheels forward and backward to check
the bushings between the axle assembly and the
frame.
Figure 2.15
Tie Rod End
Steering Axis
Rubber Boot
Figure 2.16
Steering Rack
Rubber Boot
Figure 2.18
View From Right Side
Steering
Mounting
Bracket
Steering Rack
Rubber
Bushing
Bolt
Lock
Washer
Nut