Cub Cadet 6 x 4 Big Country User Manual
Page 59
Section 3: Drive Axle Service
3 - 16
10.
Front Drive Sprocket
Removal and Replacement
10.1. Remove the front drive axle as described in
“Front Drive Axle Removal and Replacement” .
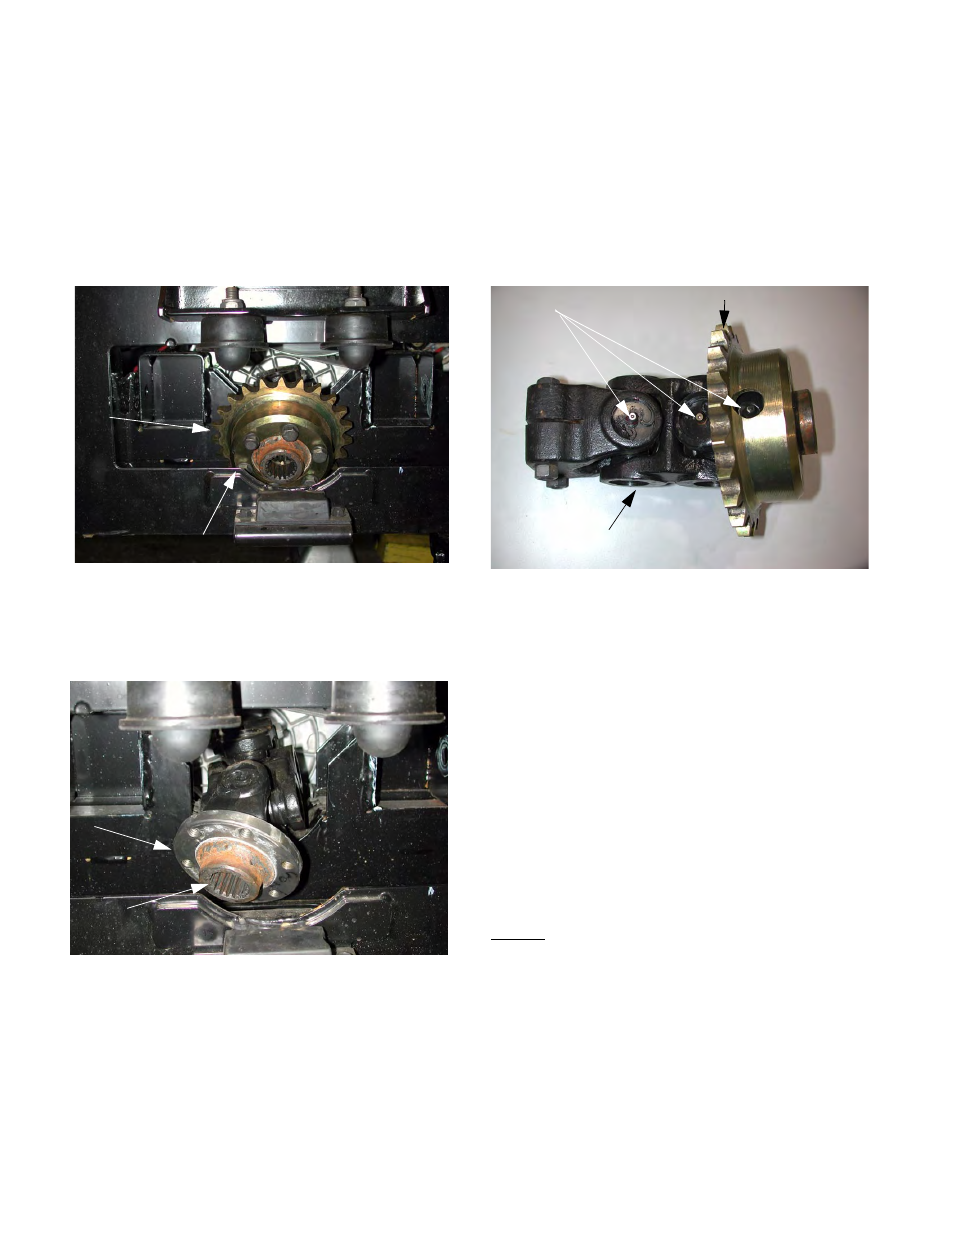
10.2. Remove the six bolts and lock washers that hold
the sprocket to the drive flange on the universal
joint. See Figure 10.2.
10.3. Pull the sprocket off of the universal joint flange.
10.4. While the sprocket is removed, inspect the uni-
versal joint for play between the yoke and the
cross (loose needle bearings), stiffness, stripped
threads, damaged flange surface, damaged
splines, loose or missing grease zerks. If any of
these conditions exist the universal joint should
be repaired before the Big Country is returned to
service. See Figure 10.4.
NOTE: There is a hole in the sprocket to provide
grease gun access to the zerk that feeds the
splines. It must be aligned with the zerk when
the sprocket is installed on the universal joint.
NOTE: If the spline of any part is damaged, the
mating spline should also be inspected.
NOTE: Each spline has the same pitch. The
shaft does not need to be indexed to the univer-
sal joint.
10.5. Reverse the removal procedure to install a front
sprocket.
10.6. If the bed lift motor or prop rod has been discon-
nected, re-connect it by reversing the procedure
used to disconnect it.
NOTES
Sprocket
Six bolts Holding Sprocket to Flange
Figure 10.2
Figure 10.3
Flange
Internal Splines
Figure 10.4
Grease Zerks
Universal Joint
Sprocket