Cub Cadet 6 x 4 Big Country User Manual
Page 73
Section 4: Engine and Transmission Support Asssembly
4 - 4
1.27. Disconnect the black 8 AWG ground cable from
the frame (at the isolator) using a ½” wrench
NOTE: Insure that the ground cable from the
engine to the frame has a clean connection at
both ends, otherwise the starter motor and
charging system will not work properly.
1.28. Remove the two bolts that hold the muffler
bracket to the engine block using a 13mm
wrench.
1.29. Remove the two nuts from each exhaust flange
using a 12mm wrench. See Figure 1.29.
1.30. Lift the muffler off of the exhaust port studs, and
remove it.
NOTE: Replace the exhaust port gaskets each
time the muffler is removed.
1.31. Remove the nuts, from the two bolts that attach
the plenum to the upper cross-member at the
front of the engine compartment using a 9/16”
wrench and a 9/16” socket.
1.32. Remove the bolts and steel flat washers from
the front of the plenum.
NOTE: There are two rubber washers between
the plenum and the cross-member.
1.33. Move the plenum far enough forward to gain
access to the bolts that hold the belt guard to the
upper cross-member at the front of the engine
compartment.
1.34. Disconnect the barbed cable tie that holds the
engine control cables to the belt guard using a
pair of diagonal cutting pliers.
1.35. Remove the two horizontal bolts that hold the
belt guard to the cross-member using a 1/2”
wrench. See Figure 1.35.
1.36. Remove the nuts from the vertical bolts that hold
the belt guard to the cross-member using two
1/2” wrenches.
1.37. Lift the belt guard straight up to remove it and
the bolts from the cross-member.
1.38. Disconnect both high tension leads from the
spark plugs.
1.39. Release the parking brake if it has been set.
1.40. Roll the belt off of the driven clutch pulley,
toward the transmission.
1.41. Set the parking brake.
1.42. Place the transmission shift lever in gear.
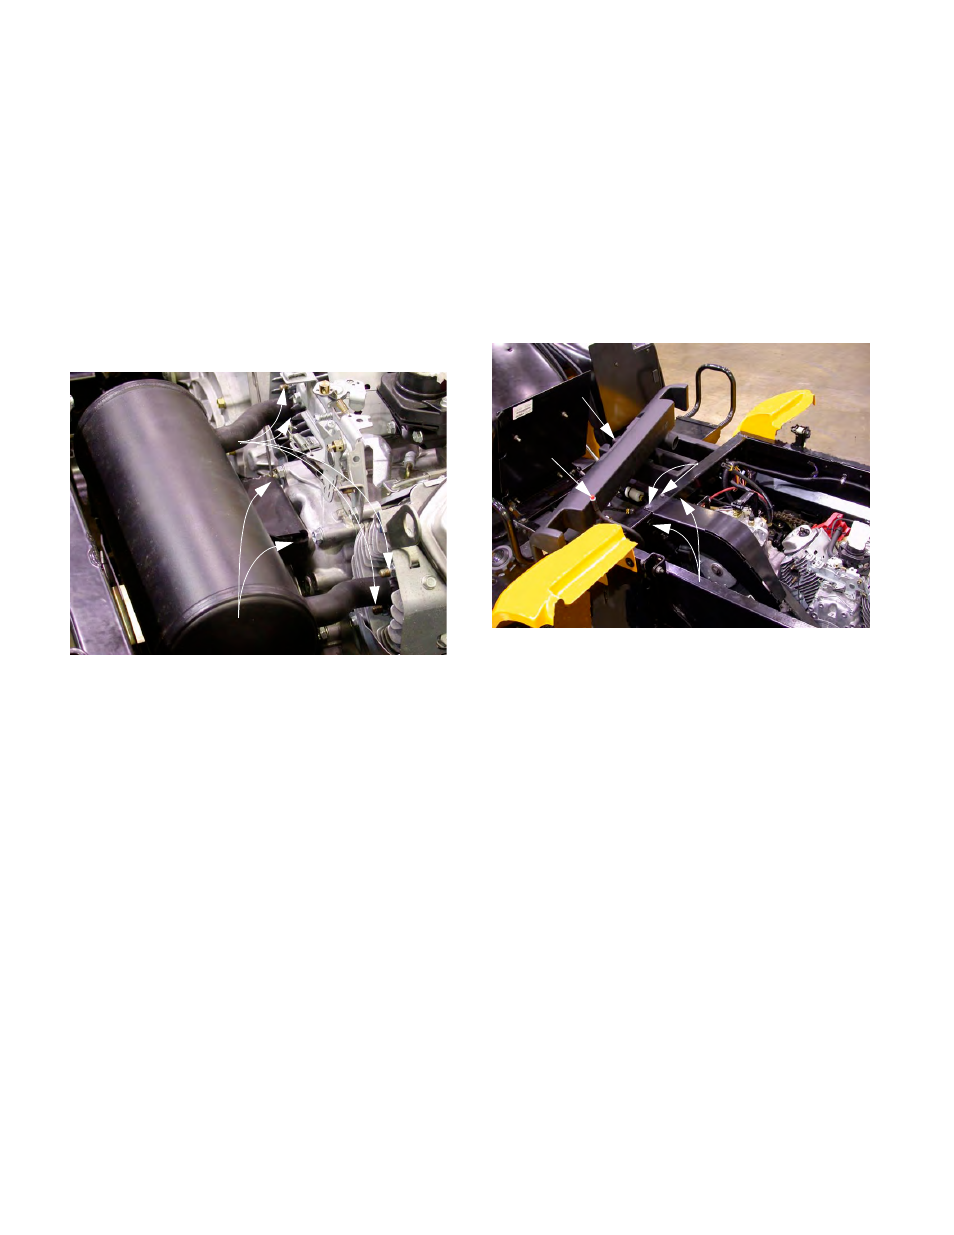
Figure 1.29
Muffler Bracket Bolts
Exhaust Flange Nuts
Figure 1.35
Plenum
Fuel Tank Vent
Horizontal Bolts
Vertical Bolts