Throttle cable removal and replacement – Cub Cadet 6 x 4 Big Country User Manual
Page 93
Section 5: The Fuel System
5 - 10
8.6.
Pull the choke knob out, and verify that the
choke arm is pulled tight against the choke arm
stop screw. Check that this corresponds with the
choke plate closing. See Figure 8.6.
NOTE: If the choke arm stop screw needs
adjustment, refer to the Honda Engine Service
Manual that applies to the GX620.
8.7.
Install the hose between the air filter and the car-
buretor, and tighten the hose clamps using a
5/16” driver or a screwdriver.
8.8.
Close the hood, and secure it with two bolts, flat
washers, and rubber washers, using a 9/16”
wrench.
NOTES
9.
Throttle Cable Removal and Replacement
9.1.
Park the Big Country on firm level ground.
9.2.
Raise and secure the bed.
9.3.
Remove the keys from the key switch.
9.4.
Remove the two bolts, flat washers and rubber
washers that hold the hood down using a 9/16”
wrench, and open the hood.
9.5.
Tilt both seats forward.
9.6.
Remove the bolt and flat washer that hold the
cup holder console to the console support plate
using a 3/8” wrench.
9.7.
Remove the cup holder console.
9.8.
Remove the two bolts and flat washers that hold
the parcel bin under the passenger’s seat using
a ½” wrench.
9.9.
Lift out the parcel bin.
9.10. Match mark the choke cable, loosen the clamp
that holds it to the choke cable bracket using an
8mm wrench, and move it far enough out of the
way to reach the screw that holds the clamp on
the throttle cable.
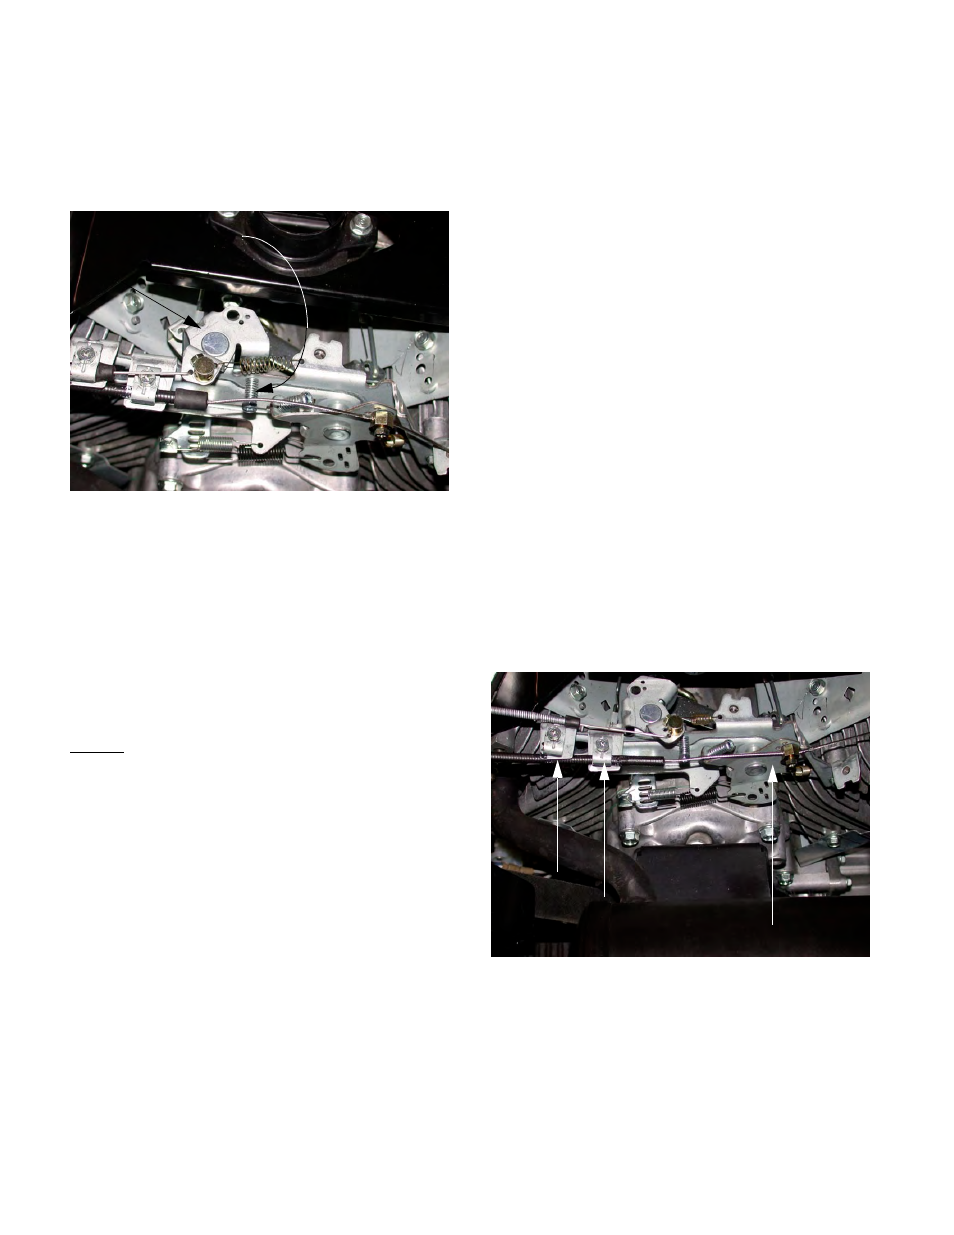
9.11. Loosen the clamp on the throttle cable using an
8mm driver. See Figure 9.11.
9.12. Loosen the clamp screw that holds the throttle
cable to the throttle in-put arm using an 8mm
wrench and a 10mm wrench, and pull the cable
our of the cable clamp.
9.13. Release the barbed cable tie that holds the
choke and throttle cables to the belt guard.
Figure 8.6
Choke Arm
Choke Arm Stop Screw
Figure 9.11
Throttle Cable
Throttle Cable Clamp
Throttle In-put Arm