Brake cable adjustment – Cub Cadet 6 x 4 Big Country User Manual
Page 19
Section 2: Clutch, Transmission, Brakes, Linkages
2 - 10
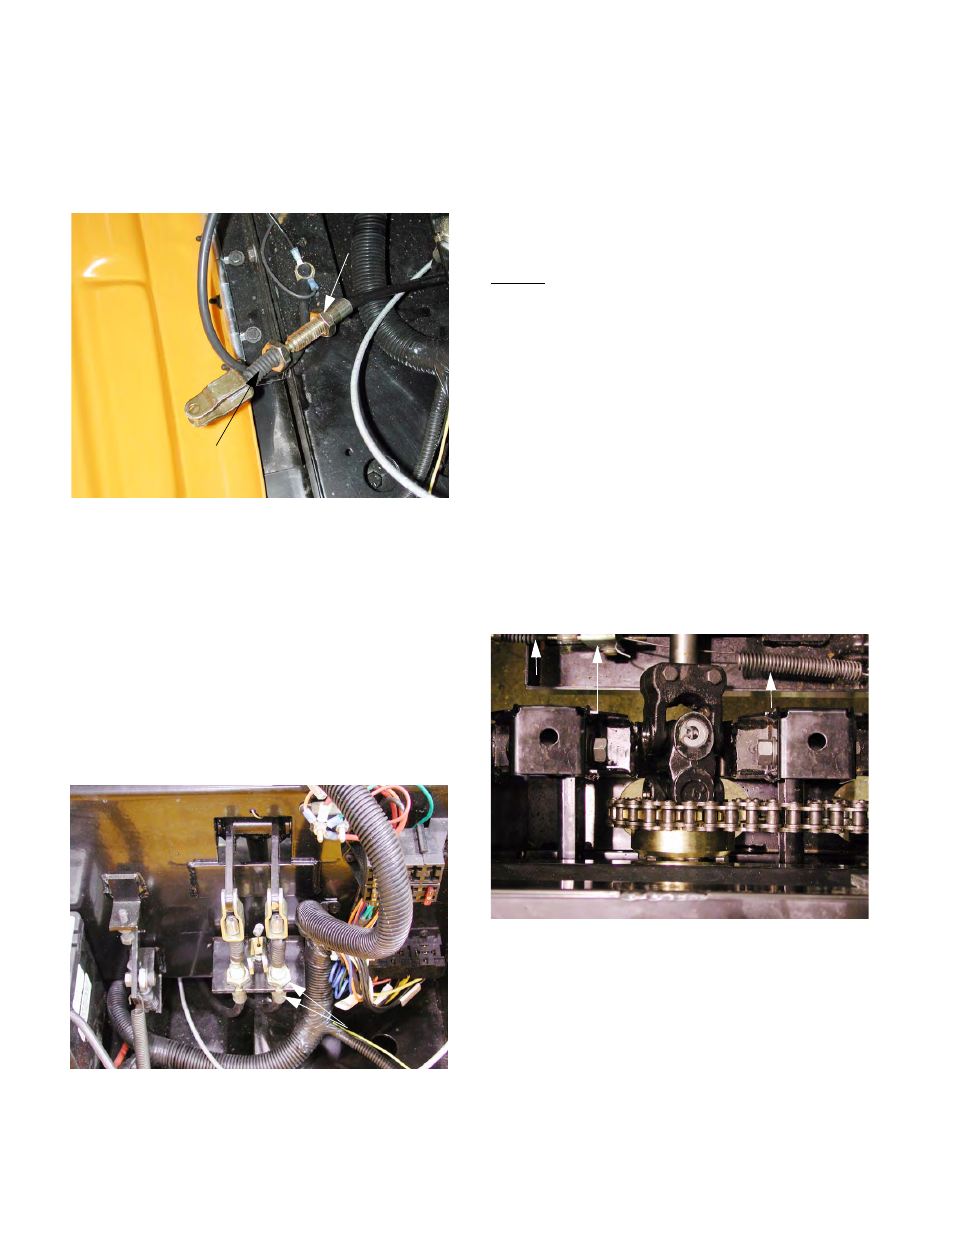
8.25. Working at the front of the Big Country, thread
the first jam nut all the way up the cable housing
end until it stops against the shoulder.
See Figure 8.25.
8.26. Slip the cable core through the slot in the
bracket, and draw the end of the cable housing
into the bracket.
8.27. Slip the rubber boot back onto the end of the
cable housing.
8.28. Start the second large jam nut onto the threads
on the cable housing, and tighten against the
bracket.
8.29. Tighten both large jam nuts against the bracket
using a pair of 7/8” wrenches. See Figure 8.29.
8.30. Apply a small amount of white E.P. chassis lube
grease to the clevis pin, and install it through the
brake pedal, the clevises of all three cables.
8.31. Secure the clevis pin with a hairpin clip.
8.32. Follow steps number five through number eight
of the “Brake Cable Adjustment” procedure, to
set the two jam nuts on the cable end.
NOTES
9.
Brake Cable Adjustment
9.1.
Safely lift and support the Big Country. Refer the
the “Lifting the Big Country and Removing the
Drive Wheels” section of this manual.
NOTE: It is not necessary to loosen the lug bolts
or remove the wheels.
9.2.
Lift and secure the bed.
9.3.
Release the brake return spring by unhooking
the rear of the spring from the frame.
See Figure 9.3.
9.4.
Loosen the jam nut at the cam arm end of the
brake cable core using a deep ½” socket on an
extension.
NOTE: Use a pair of slip joint pliers to hold the
cable, if necessary.
9.5.
Thread the jam nut that is immediately forward
of the cam arm all the way forward, to the shoul-
der of the threaded cable core end.
Figure 8.25
First Jam Nut
(Thread to Shoulder)
Rubber Boot
Figure 8.29
Jam Nuts
Tightened
Figure 9.3
Brake Return Spring
Cam Arm
Brake Cable