Fuel pump removal and replacement – Cub Cadet 6 x 4 Big Country User Manual
Page 89
Section 5: The Fuel System
5 - 6
4.5.
If the pump makes no noise at all, confirm that
an electrical problem is not to blame. If the fuel
pump has good power supply and good ground,
yet fails to operate, it is bad.
4.6.
If the pump runs normally, but fails to supply fuel
to the carburetor, check the fuel line between
the pump and the engine for kinks or obstruc-
tions. This includes the second fuel filter that is
located under the air intake shoulder.
4.7.
If the pump runs normally, but fails to supply fuel
to the carburetor, and the fuel line between the
pump and the carburetor is free of kinks or
obstructions, the fuel shut-off solenoid may be
at fault. It makes a single audible click when the
key switch is turned to the “ON” position. If this
click cannot be heard, check the power supply to
the fuel shut-off solenoid as well as the ground
path back to the negative battery post. If the
power supply and ground path to the fuel shut-
off solenoid are both good, yet the solenoid fails
to click, the solenoid is bad. See Figure 4.7.
4.8.
If fuel is reaching the carburetor in sufficient
pressure and quantity to maintain the level in the
float chamber, and the fuel shut-off solenoid
clicks, but the engine dies after burning a prime,
the problem lies within the carburetor, or with the
fuel itself.
5.
Fuel Pump Removal and Replacement
5.1.
Park the Big Country on a firm, level surface.
raise and support the bed, set the parking brake,
and remove the key from the key switch.
5.2.
Drain the fuel tank into an approved container.
NOTE: The fuel pump may be used to empty the
fuel tank by disconnecting the fuel line at the car-
buretor and routing it into a gas can.
5.3.
Tilt both seats forward.
5.4.
Remove the bolt and flat washer that hold the
cup holder console to the console support plate
using a 3/8” wrench, and remove the cup holder
console.
5.5.
Remove the two bolts and flat washers that hold
the parcel bin in place under the passenger’s
seat using a ½” wrench. Remove the parcel bin.
5.6.
Loosen the two nuts on the bottom side of the
bolts near the center of the console support
plate using a 7/16” wrench and a deep 7/16”
socket.
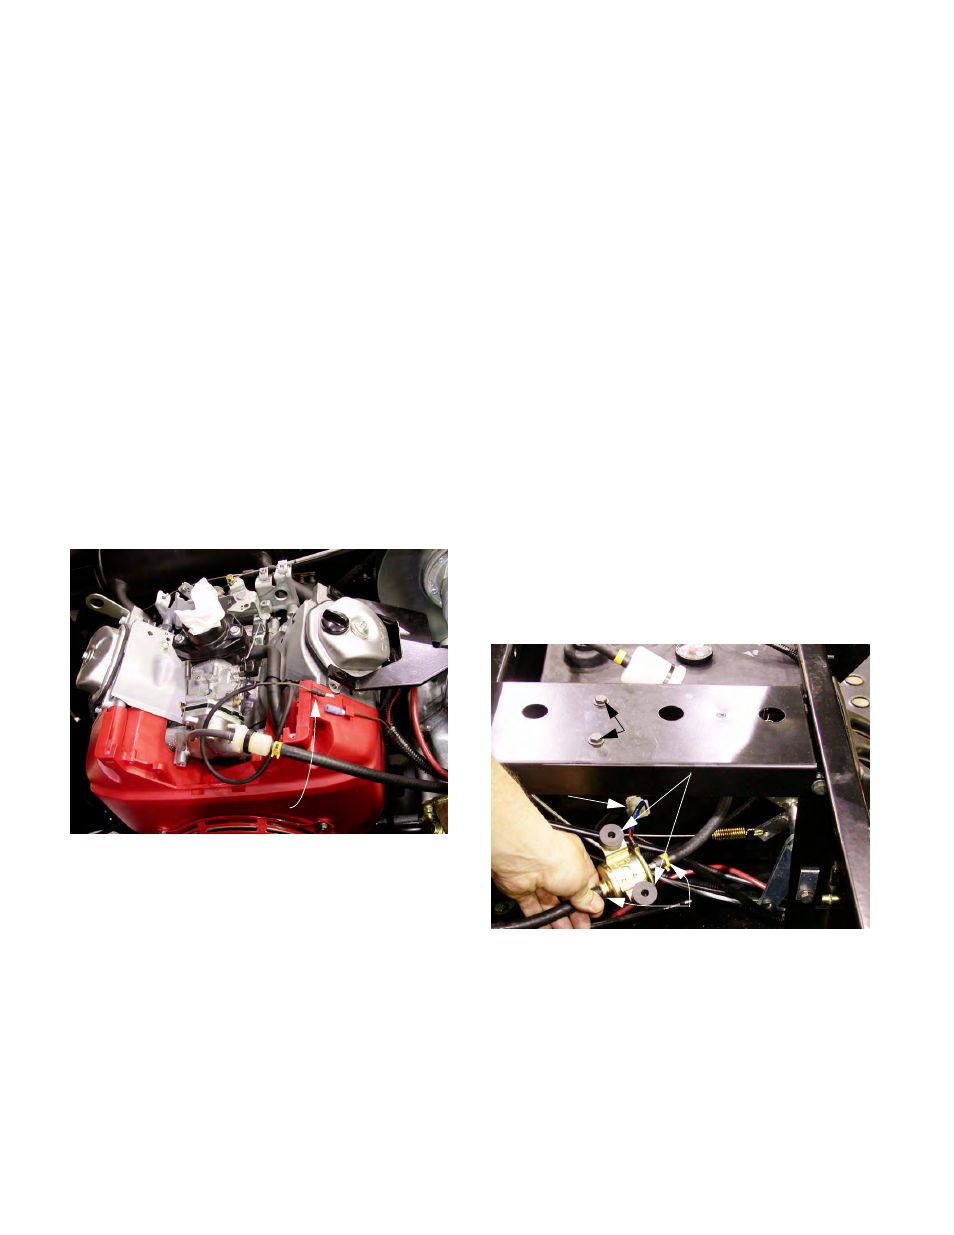
5.7.
Remove the nuts, fuel pump, and the rubber fuel
pump isolator mounts from beneath the console
support plate. See Figure 5.7.
5.8.
Squeeze the lock tab on the molded connector,
and unplug the fuel pump from the wiring har-
ness.
5.9.
Squeeze the hose clamps and slip them far
enough down the two hoses connected to the
fuel pump that the hoses can be removed.
Figure 4.7
Black Wire with Yellow Tracer
Fuel Shut-off Solenoid
Leads to
Figure 5.7
Fuel Pump
Mounting Bolts
Rubber Isolator Mounts
Molded
Connector
Hose Clamps