Spring and shock unit removal and replacement – Cub Cadet 6 x 4 Big Country User Manual
Page 52
Section 3: Drive Axle Service
3 - 9
3
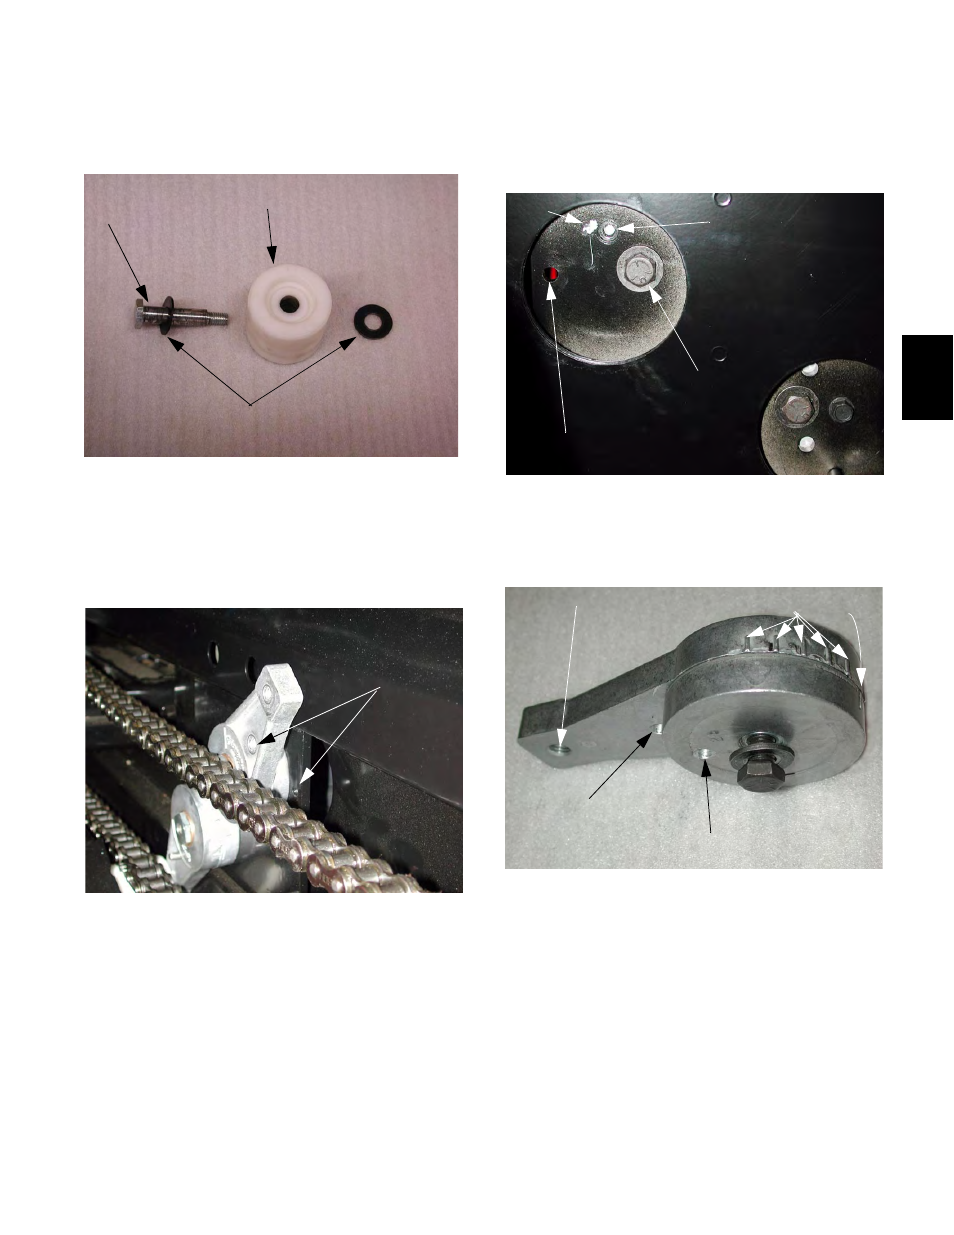
7.9.
Remove the roller and flat washers along with
the bolt. See Figure 7.9.
7.10. Push down on the tensioner arm to relieve the
load from the 1/4” pin, withdraw the pin, and
carefully release the tensioner arm.
See Figure 7.10.
7.11. Working through the access hole loosen the
large bolt at the center of the chain tensioner
using a 9/16” wrench.
NOTE: It may be necessary to hold the nut on
the inside of the Tensioner using a 7/8” wrench.
Figure 7.9
Shoulder Bolt
Flat Washer
Roller
Holes for Locking Pin
Figure 7.10
7.12. Mark the hole that the smaller indexing bolt goes
through, and remove the indexing bolt using a
3/8” wrench. See Figure 7.12.
7.13. Remove the mounting bolt and lift the tensioner
out of the vehicle. See Figure 7.13.
NOTE: It is necessary to disconnect the chain
before the lower tensioner can be removed.
7.14. Push the lower chain tensioner arm down to
relieve tension from the chain and lock the lower
arm using a 1/4” steel dowel pin.
Figure 7.12
Locking Pin Hole
Paint Mark
Indexing Bolt Hole (Threaded)
Mounting Bolt
Roller Mounting Hole
Indexing Bolt Hole
Locking Pin Hole
Index Marks
Figure 7.13