Cub Cadet 6 x 4 Big Country User Manual
Page 112
Section 6: Front Suspension
6 - 17
6
NOTE: If a steering rack is sufficiently worn or
damaged to require replacement, it makes
sense to replace the tie rod ends as well.
10.14.To Install the steering rack in the Big Country,
perform the following steps:
10.15.Center the new rack: Turn it to full lock in one
direction, then turn it to full lock in the other
direction, counting the number of turns from lock
to lock.
10.16.Divide the number of turns from lock to lock by
two to find the center position.
NOTE: The blind spline (missing tooth) on the
input shaft should be 90 degrees from the rack
travel centerline, facing the front of the vehicle.
10.17.Lift the steering rack into position.
NOTE: It will hang temporarily on the two bolts in
the frame.
10.18.Install the flat washers and nuts on the bolts that
hold the steering sector bracket to the frame.
NOTE: Tighten nuts on the sector clamp steer-
ing bracket mounting bolts to a torque of 48-58
ft-lbs.
10.19.Position the rubber bushing around the body of
the steering rack, and align it with the mounting
points for the steering mounting bracket.
10.20.Place the steering mounting bracket over the
rubber bushing.
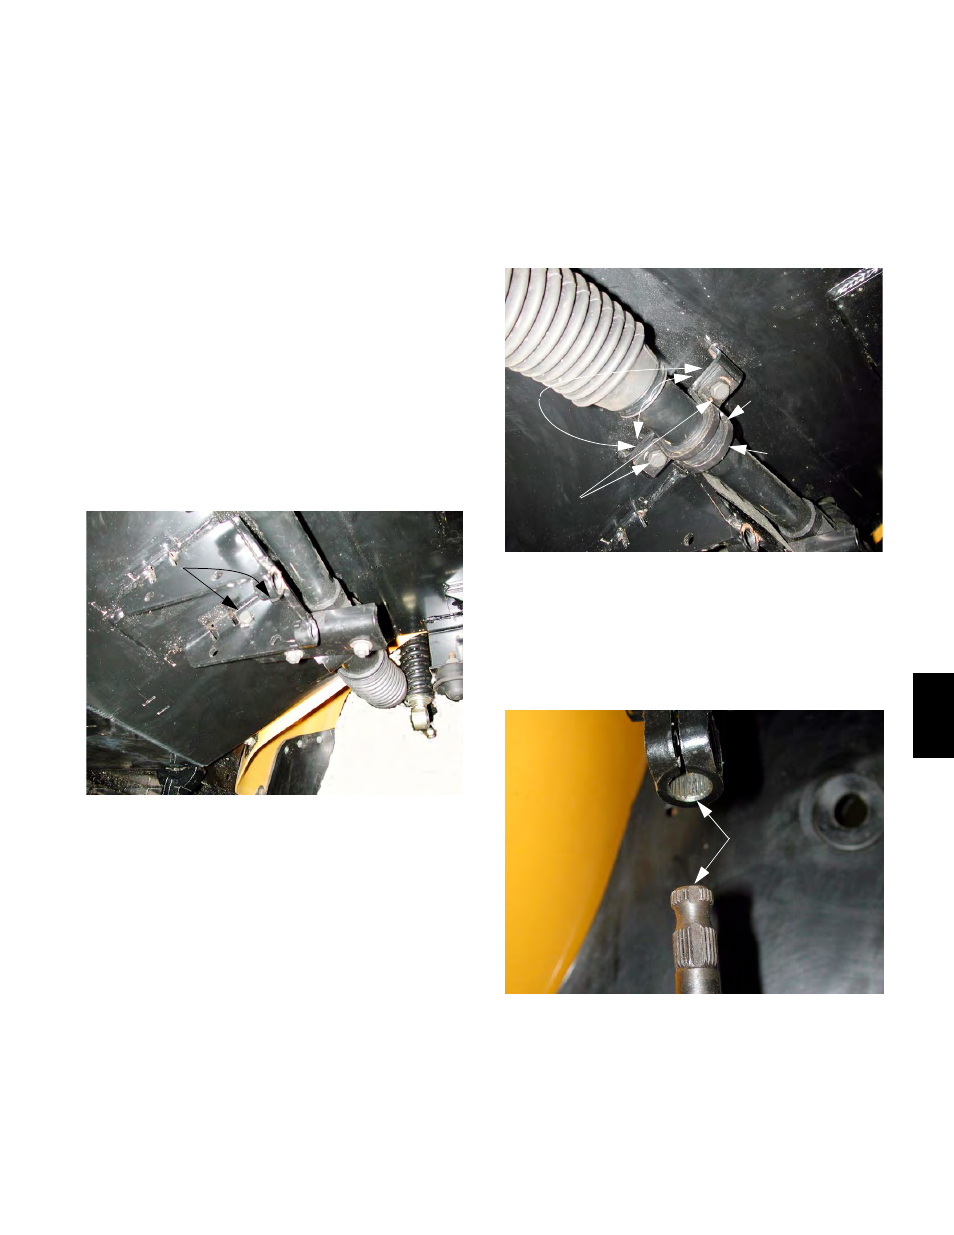
Figure 10.17
Mounting Bolts in Frame
10.21.One at a time, insert the bolts through the steer-
ing mounting bracket and the mounting holes in
the frame. Place a lock washer over each bolt,
and thread a nut on behind it. See Figure 10.21.
10.22.Tighten the steering mounting bracket bolts to a
torque of 48-58 ft-lbs using two 9/16” wrenches.
10.23.Align the blind splines in the universal joint and
the upper steering shaft. See Figure 10.23.
10.24.Insert the lower steering shaft into the universal
joint.
Figure 10.21
Nuts
Washers
Bolts
Rubber Bushing
Steering Mounting
Bracket
Figure 10.23
Blind Spline