Plenum and air filter – Cub Cadet 6 x 4 Big Country User Manual
Page 90
Section 5: The Fuel System
5 - 7
5
NOTE: There is an “IN’ fitting and an “OUT” fit-
ting on the pump. They are clearly marked.
5.10. To install a fuel pump, reverse the removal
procedure.
NOTE: A small quantity of grease or adhesive
can be used to help hold the isolator mounts in
position while the fuel pump is fastened to the
console support bracket.
5.11. Run and test the Big Country before returning it
to service.
6.
Plenum and Air Filter
NOTE: The plenum is located immediately
behind the seats.
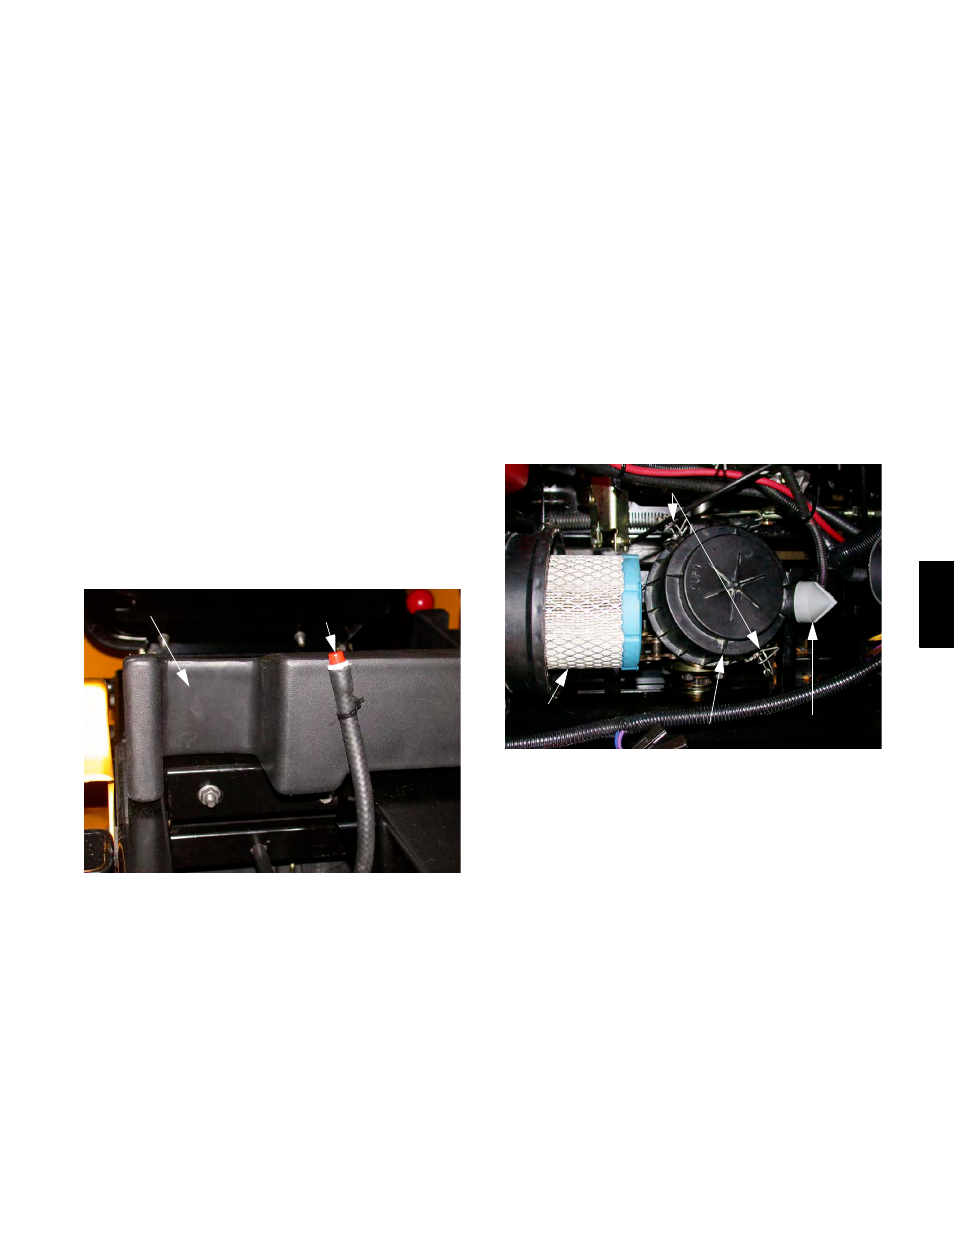
6.1.
The fuel tank vent valve is secured to the ple-
num with a barbed cable tie. It is of critical
importance that the vent valve be maintained in
this position: the highest practical mounting point
behind the seats. See Figure 6.1.
6.2.
Inspect the inside of the plenum at air filter ser-
vice intervals.
6.3.
The air filter should be inspected every 50 hours
in normal operating conditions. More frequent
service will be required in severe operating con-
ditions.
6.4.
To inspect the plenum, loosen the hose clamps
that hold the hose in place between the plenum
and the air filter using a 5/16” driver or screw-
driver, and remove the hose.
Plenum
Fuel Tank Vent Valve
Figure 6.1
6.5.
If there is a significant amount of dirt in the ple-
num, unbolt it from the frame using two 9/16”
wrenches.
NOTE: There are two rubber bushings that sep-
arate the plenum from the frame.
6.6.
Rinse and dry the plenum and the hose that
leads from the plenum to the air filter to remove
any loose contaminants. Regulated com-
pressed air is also effective.
NOTE: Wear eye protection when using com-
pressed air.
6.7.
Install the plenum by reversing the removal
process.
6.8.
To reach the air filter element, release the two
bale clips to remove the cover from the air filter.
NOTE: The duck valve must face down when
the cover is installed.
6.9.
The air filter element slips easily out of the air fil-
ter housing.
6.10. Clean the mating surface where the element
meets the housing when replacing the filter.
6.11. To remove the air filter from the air intake shoul-
der, remove the two bolts that fasten the two
together using a ½” wrench.
NOTE: The air intake shoulder can be
removed from the engine with the air filter
attached to it.
Figure 6.8
Duck Valve
Cover
Element
Bale Clips