Universal joint service – Cub Cadet 6 x 4 Big Country User Manual
Page 61
Section 3: Drive Axle Service
3 - 18
11.17. Slide the universal joint outward, until it pinches
the tool in position. See Figure 11.17.
11.18. Tighten the nuts on the universal joint pinch bolts
to a torque of 48-58 ft-lbs.
11.19. Remove the universal joint spacer tool.
11.20. Reverse the remainder of the removal process
to complete installation.
12.
Universal joint Service
NOTE: The decision of whether to repair or
replace a universal joint is left to the technician.
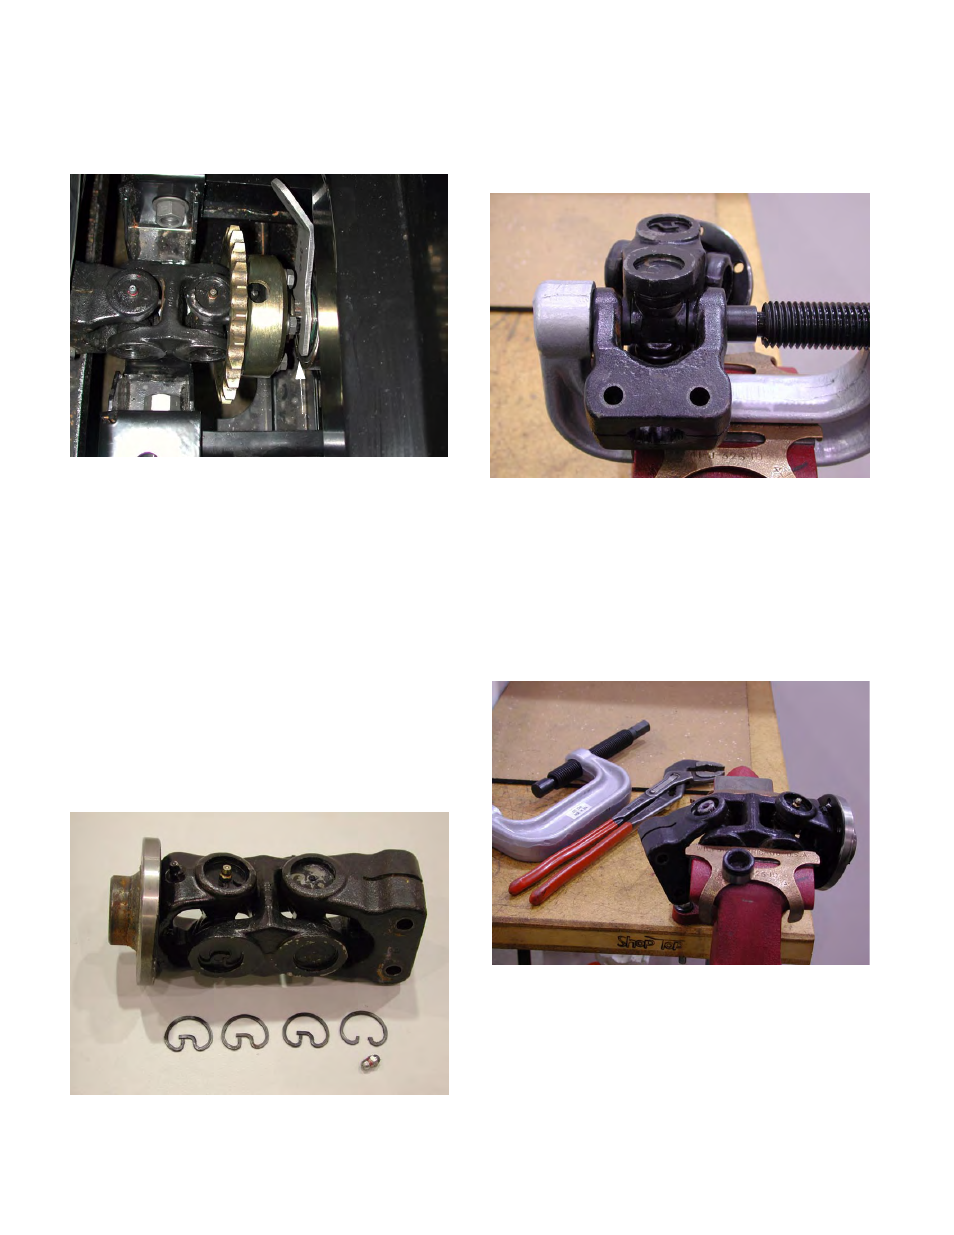
12.1. Using a 5/16” driver, remove the grease zerks
from the universal joint to be repaired.
12.2. Using a pair of needle-nose pliers, remove the
snap rings that retain the cups. See Figure 12.2.
12.3. In a universal joint press, push one cup in the
end yoke in as far as possible without coming
out of the bore in the yoke. See Figure 12.3.
12.4. Support the universal joint in a vise, and use a
soft hammer to drive the end yoke in the same
direction that the cup was pushed.
NOTE: This will cause the cross to force the
opposing cup partially out of the yoke.
12.5. Remove the cup. See Figure 12.5.
12.6. Remove the universal joint from the vise, turn
the universal joint over, and secure it in the vise.
Figure 11.17
Universal Joint Spacer Tool
Figure 12.2
Figure 12.3
Figure 12.5