Cub Cadet 6 x 4 Big Country User Manual
Page 42
Section 2: Clutch, Transmission, Brakes, Linkages
2- 33
2
18.61.Install the brake shaft making certain the shaft
has engaging the friction discs and the inner
bearing.
18.62.Install the outer bearing and shim on the brake
shaft.
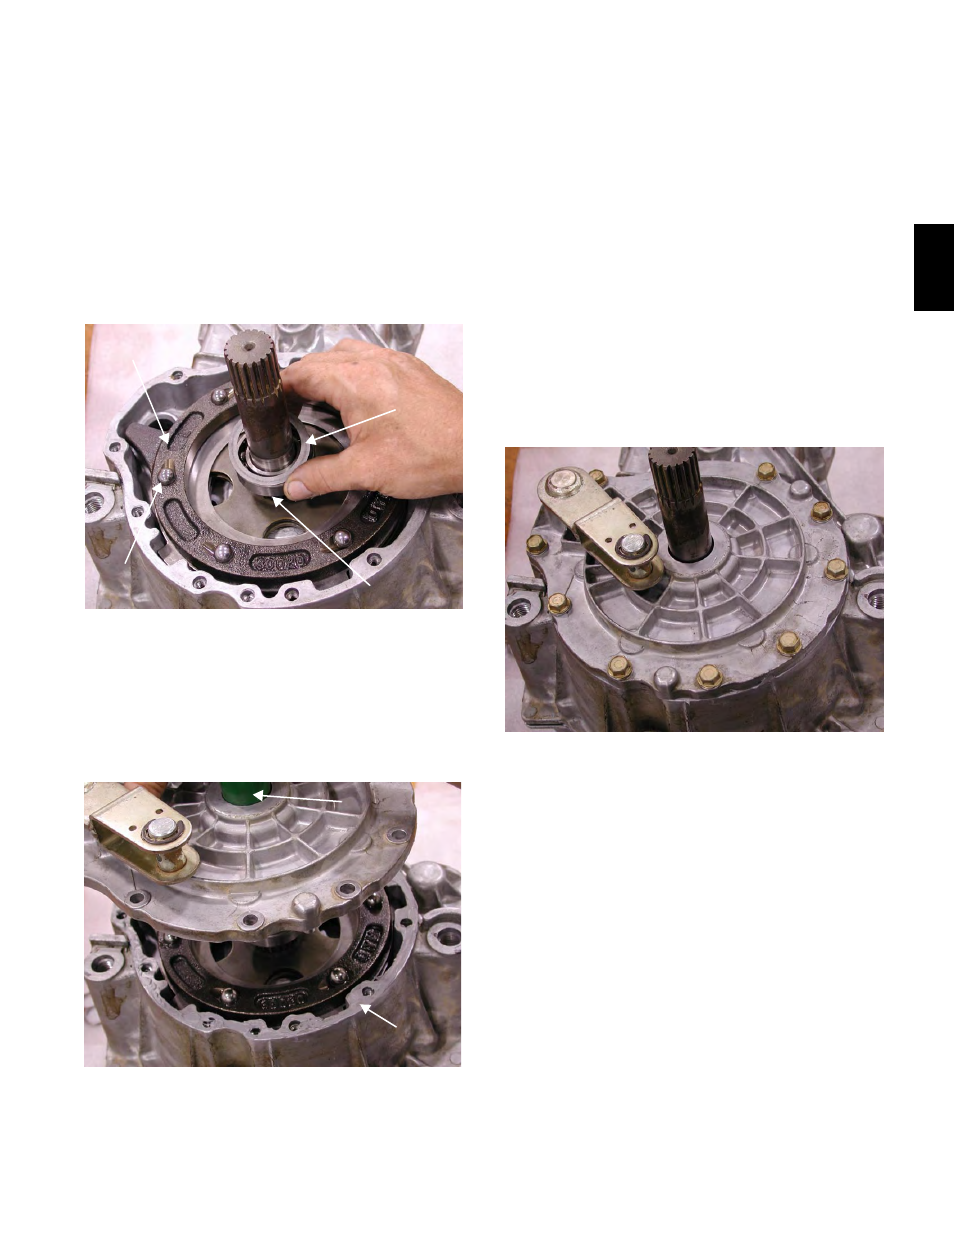
18.63.Install the right side actuator plate and place all
six steel balls in their respective ramp and pock-
ets. Thoroughly lubricate all six balls.
See Figure 18.63.
18.64.Apply sealant to the surface where the transmis-
sion case meets the brake cover.
18.65.Using a seal protector install the brake cover on
to transmission housing and bolt in place.
See Figure 18.65.
Figure 18.63
Ball
Shim
Bearing
Actuator
Figure 18.65
Sealant
Seal
Protector
18.66.When installing the brake cover lower the cover
and rotate until brake actuator arm touches the
actuator plate and enters its opposing support
bore. At that point the actuator balls will enter
their individual pockets. Tapping lightly with a
hammer handle will assist in seating the cover
plate to the brake housing.
18.67.Torque bolts to 225 - 260 inch pounds using a
cross pattern and two step technique using a
12mm socket wrench.
NOTE: To assist in assembly of right side brake
place transmission on two 4 X 4 blocks.
18.68.Install the right side brake assembly following
the same steps, 18.59 through 18.67.
See Figure 18.68.
18.69.The transmission may now be installed on the
engine transmission support assembly.
NOTE: Allow the transmission case sealant to
cure before filling unit with universal (hydraulic)
tractor transmission fluid.
NOTE: Apply Loctite 242 or a similar thread
locking compound to the transmission mounting
bolts, and tighten them to a torque of 125-147 ft-
lbs.
Figure 18.68
Right Side
Brake
Assembled