Cub Cadet 6 x 4 Big Country User Manual
Page 25
Section 2: Clutch, Transmission, Brakes, Linkages
2 - 16
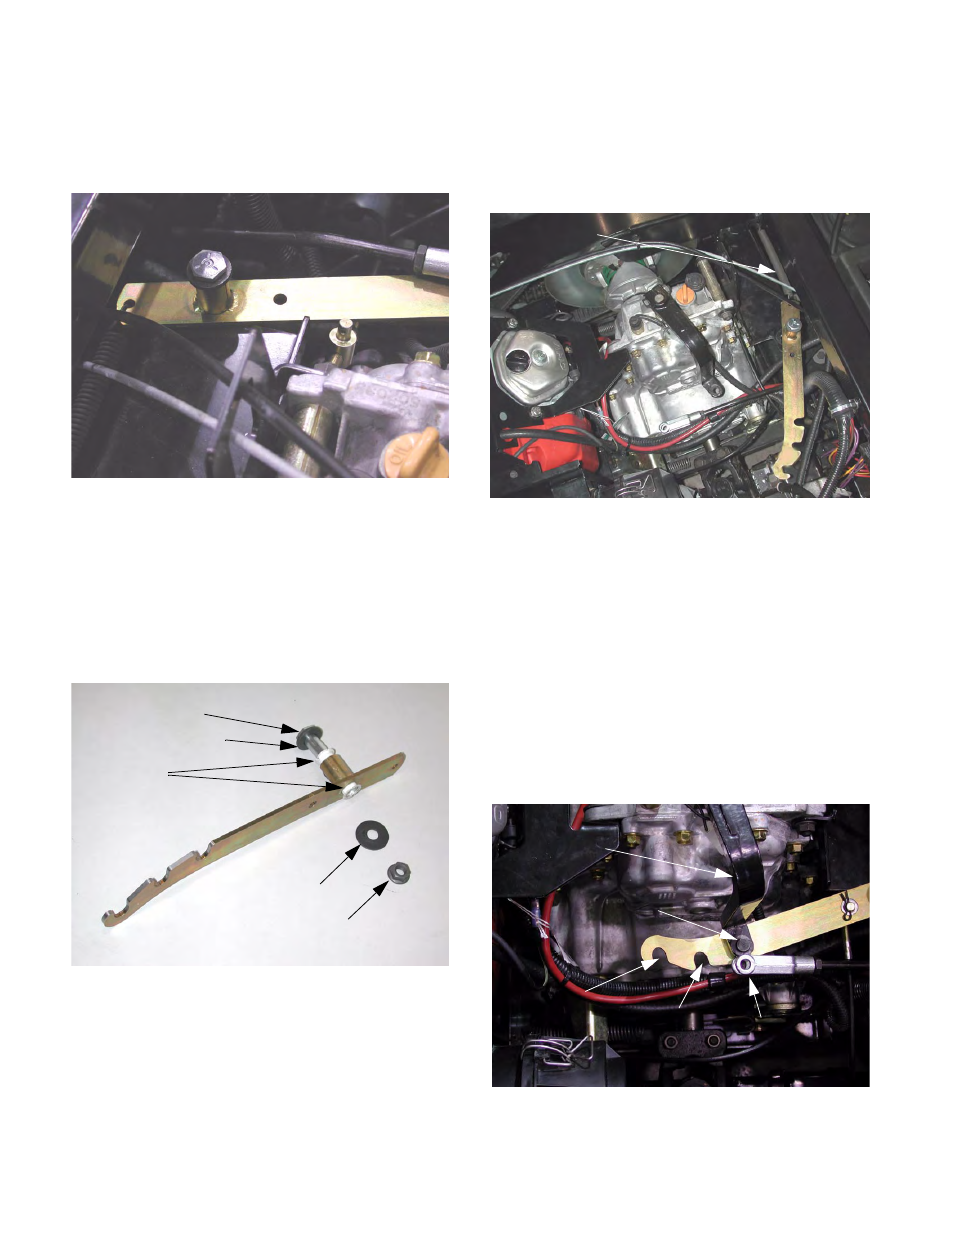
12.9. Remove the nut from the shoulder bolt that the
lock-out arm pivots on using a 9/16” wrench and
a ¾” wrench. See Figure 12.9.
12.10.Lift-up and pivot the arm to release the spring
that maintains tension between the lock-out arm
and the clutch pulley brake arm.
12.11. Remove the interlock arm from the vehicle.
12.12.Inspect the arm and replace the bushings. See
12.13.Lubricate the shoulder bolt with dry PTFE-based
lubricant and insert it through the heavy flat
washer, the arm and the bushings.
12.14.Position the bellville washer over the slot in the
bracket that the lock-out arm mounts to.
12.15.Hook the spring through the hole in the interlock
arm, and stretch the spring to allow the shoulder
bolt to reach the slot in the bracket.
See Figure 12.15.
NOTE: The end of the spring that hooks inward
connects to the lock-out arm.
12.16.Insert the shoulder bolt through the belleville
washer and the bracket, securing it with the cen-
ter lock flange nut.
12.17.Install the clevis pin through the transmission
shift arm.
12.18.Position the lockout arm so that the clevis pin
that connects the shift link to the shift arm is cen-
tered in the appropriate notch in each of the
three positions. See Figure 12.18.
Figure 12.9
Figure 12.12
Shoulder Bolt
Heavy Flat Washer
Bushings
Bellville Washer
Center-locking Nut
Figure 12.15
Hook-up spring
Clevis Pin
Pin Centered in notch
Test Fit:
Reverse
Neutral
Forward
Transmission Shift Arm
Figure 12.18