Cub Cadet 6 x 4 Big Country User Manual
Page 109
Section 6: Front Suspension
6 - 14
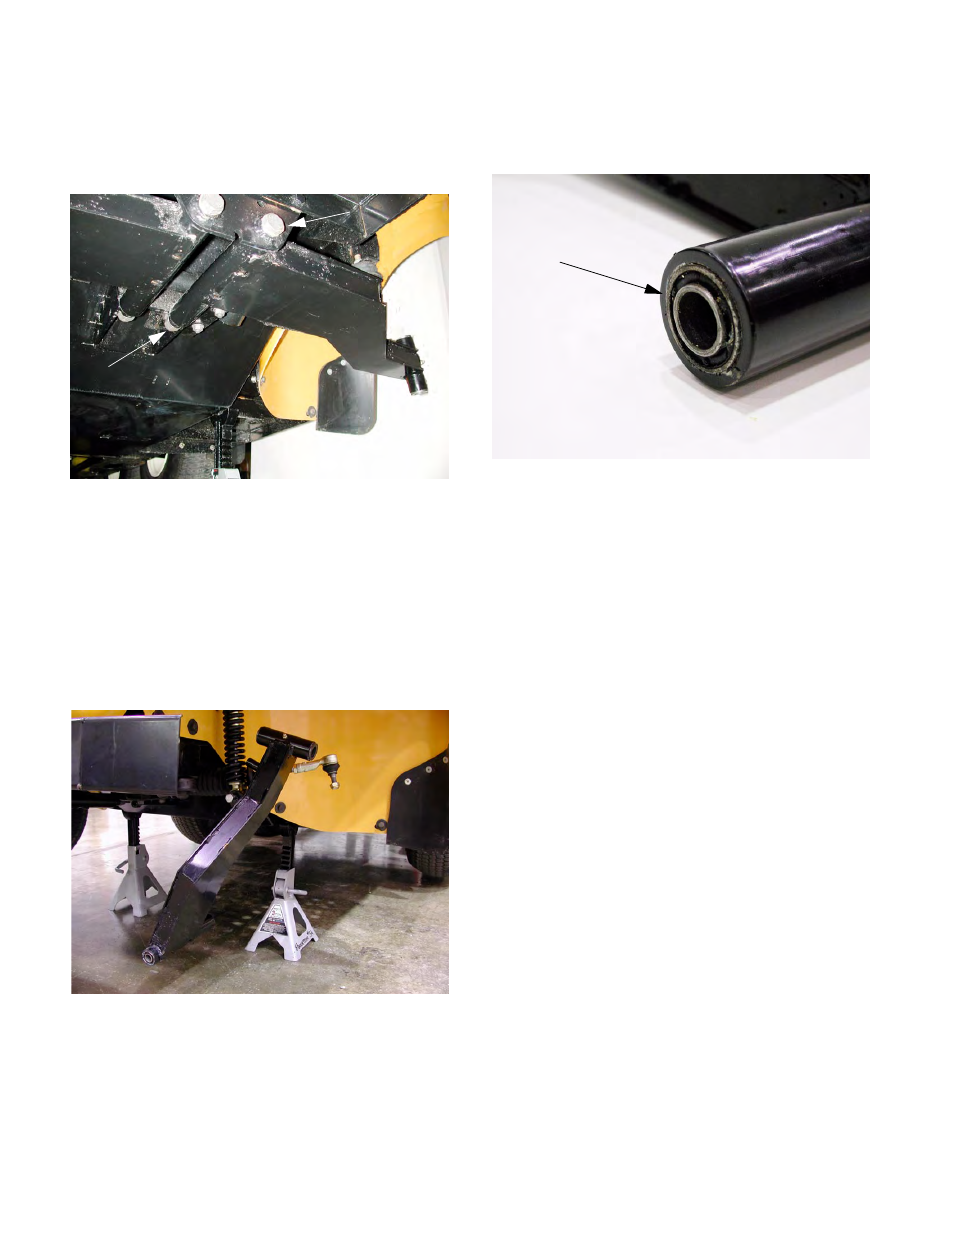
9.3.
Remove the nut and bolt that hold the inner end
of the axle assembly to the frame using two
15/16” wrenches. See Figure 9.3.
NOTE: In some cases, one facet of the nut may
rest up against a gusset on the rear bracket that
bolt passes through. It may not be necessary to
hold the nut.
9.4.
Separate the axle assembly from the frame,
remove the bolt that holds the bottom of the
spring and shock unit to it, and remove the axle
assembly.
9.5.
Inspect the bearings that the axle pivots on if the
axle is to be reused. See Figure 9.5.
NOTE: The bushings may be pressed-out and
replaced using a hydraulic press, or appropriate
size arbors and the bolt that holds the axle to the
frame. Heat may be necessary.
NOTE: Lubricate the outside diameter of the
replacement bushings with Alvania lead-free
EPROO grease before installation.
9.6.
To install the axle, reverse the removal pro-
cess.
NOTE: Lubricate the shoulder of the bolt that
holds the axle to the frame with Alvania lead-free
EPROO grease before installation.
NOTE: Tighten the nut on the bolt that holds the
axle to the frame to a torque of 175-195 ft-lbs.
Figure 9.3
Nut
Axle Bolt
Figure 9.4
Axle Pivot Bushing
Figure 9.5