Shift interlock arm removal and replacement – Cub Cadet 6 x 4 Big Country User Manual
Page 24
Section 2: Clutch, Transmission, Brakes, Linkages
2- 15
2
•
Equal and effective application of both sets of
brakes (left and right).
•
Complete engagement of shift lock-out mecha-
nism when the brakes are released.
•
Complete disengagement of shift lock-out mech-
anism when brakes are applied.
•
Complete engagement of clutch pulley brake
when brakes are applied, and complete release
when the brakes are released.
NOTE: If the transmission clashes on engage-
ment of forward or reverse, the clutch pulley
brake and shift interlock cable needs to be tight-
ened slightly.
NOTE: If the brake pad drags on the clutch pul-
ley with the brake pedal released, the clutch pul-
ley and shift interlock cable needs to be
loosened slightly.
11.20. Install the plenum by reversing the steps used to
remove it.
NOTES
12.
Shift Interlock Arm Removal and Replace-
ment
NOTE: If the shift lock-out arm is being removed
in conjunction with other service to the brakes
and related linkages, the plenum removal
instructions may be redundant.
12.1. Lift and secure the bed.
12.2. Fold both seats forward.
12.3. Loosen the hose clamp at the plenum end of the
hose that connects the plenum to the air filter.
12.4. Remove the two bolts that fasten the plenum to
the frame using a pair of 9/16” wrenches.
12.5. Lift the plenum straight up, and remove it.
NOTE: There are two rubber washers that fit
between the plenum and the frame.
12.6. Remove the hairpin clip and flat washer that hold
the ferrule into the lockout arm.
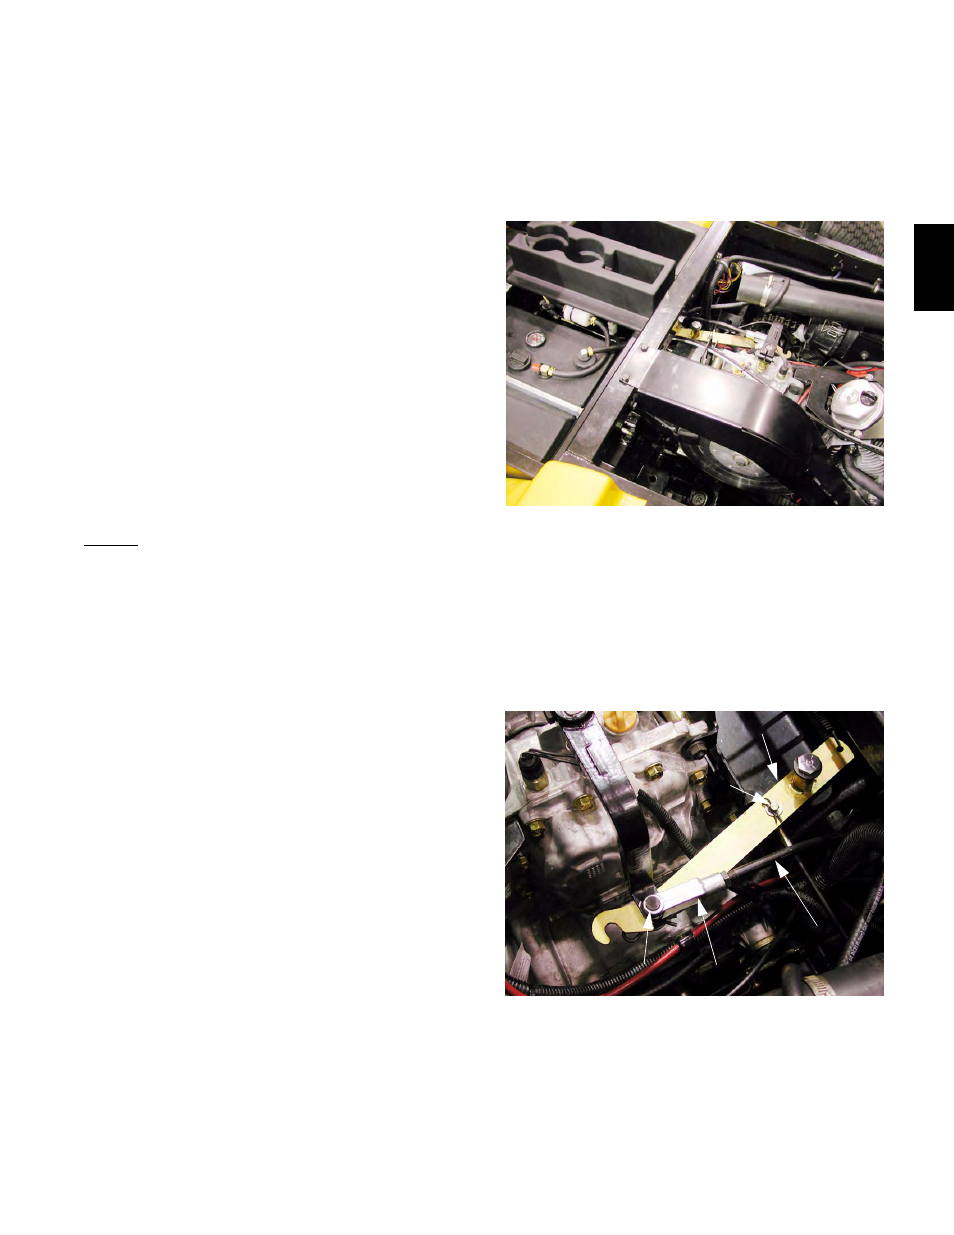
12.7. Push the ferrule down to release it from the lock-
out arm. See Figure 12.7.
12.8. Remove the hairpin clip, flat washer, and clevis
pin that connect the clevis on the shift rod to the
shift arm on the transmission.
Figure 12.5
Figure 12.7
Interlock Arm
Ferrule
Shift Rod
Clevis
Clevis Pin